- Developer tutorials
Build a blog with Next.js and React Bricks

Intro
Welcome to our comprehensive coding tutorial where we will dive into the exciting world of web development using Next.js and React Bricks! Whether you're a seasoned developer looking to expand your skill set or a beginner eager to create your first blog, this guide is tailored for you.
We will explore React Bricks, a fantastic CMS that brings the ease of visual editing to your React applications. You'll learn how to leverage its block-based system to construct a dynamic and visually appealing blog without compromising developer experience.
Throughout this tutorial, we will cover everything from setting up your development environment to deploying your blog for the world to see.
By the end of this journey, you'll have a fully functional blog, complete with a slick user interface and a seamless content editing workflow. So, gear up for an educational adventure that will enhance your web development prowess and potentially kickstart your blogging journey!
Prerequisites
- A React Bricks account
- Basic understanding of React and Next.js
- Visual Studio Code or any other code editor
- Beginner knowledge of the shell to run the CLI
- Node.js (You can download it here)
Create a React Bricks App
Set your project up with the CLI
The best way to create a new app is using React Bricks CLI.
Open the terminal, go to your development folder and paste the code below:
npx create-reactbricks-app@latestThis will prompt you to log in or create a new React Bricks account if you don’t have one.
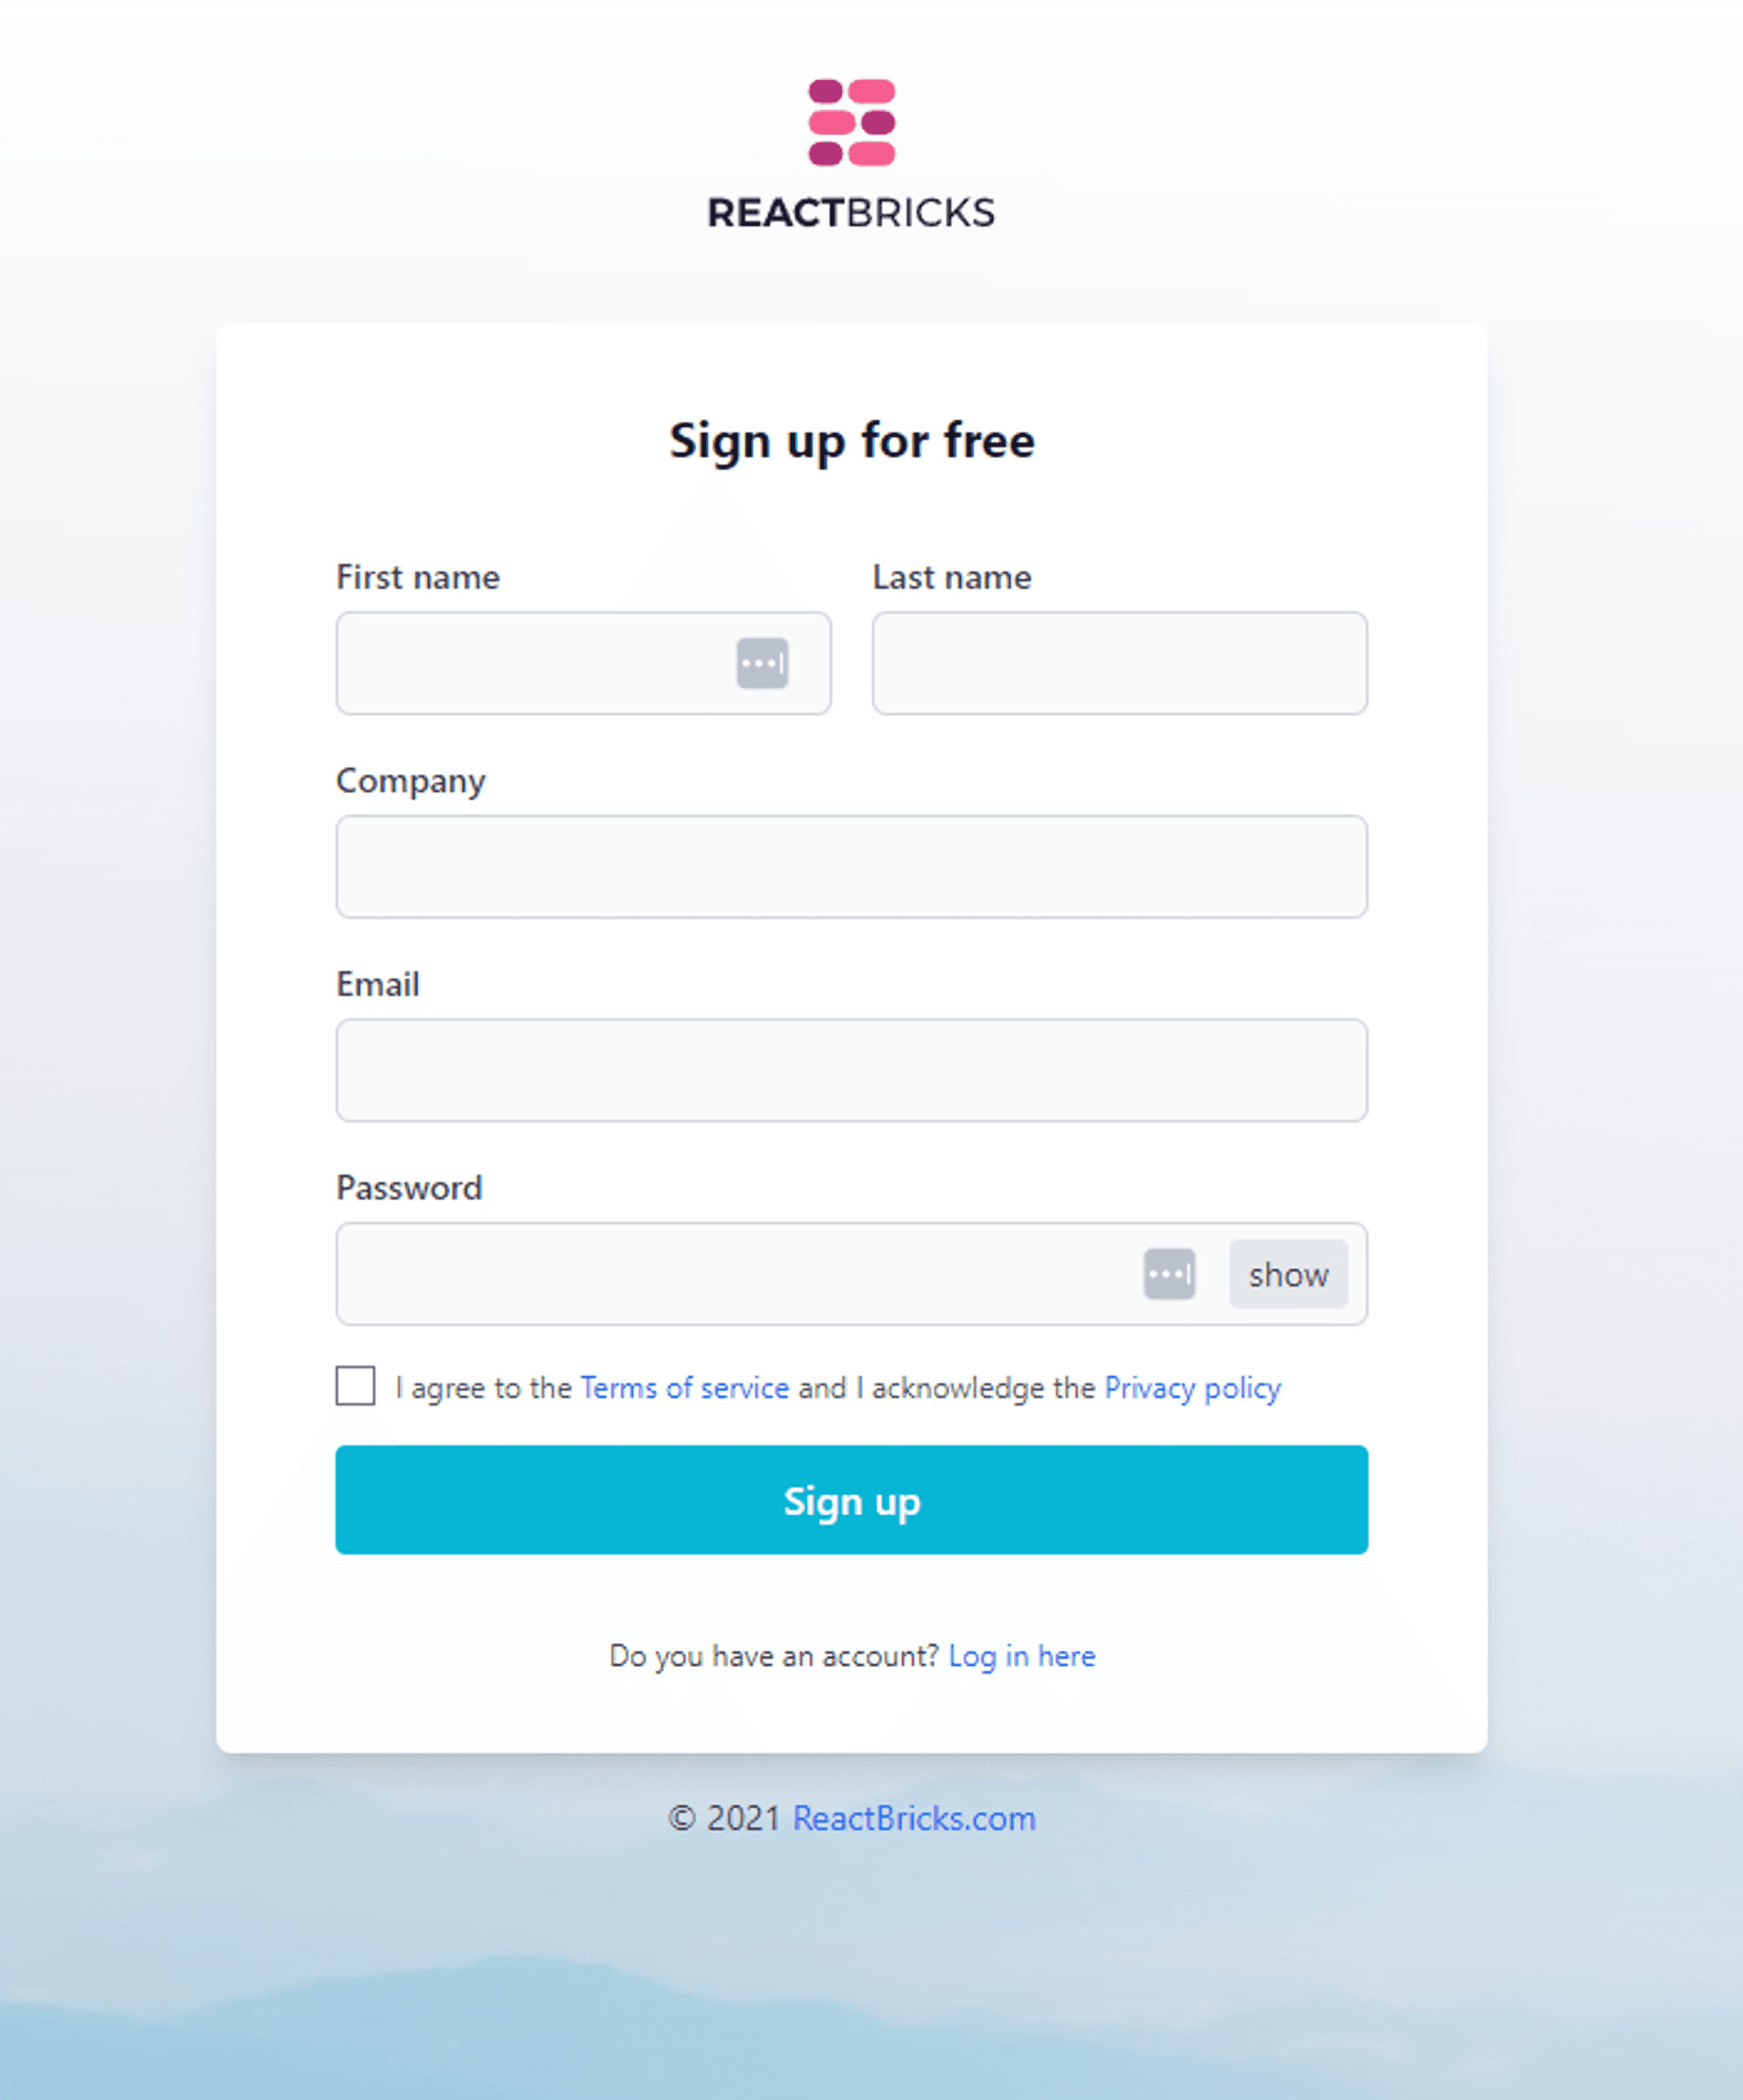
Now you can login through the CLI, select “Create new app” and choose a valid name. Then, choose an app name, a project name, and a folder name. I used “blog-with-next” for everything.
After that, the CLI will prompt you to choose a project type. Choose "Website and Blog with Tailwind". Then choose Next.js (i18n ready) and load some default content, as it will help us get started with a full-fledged website.

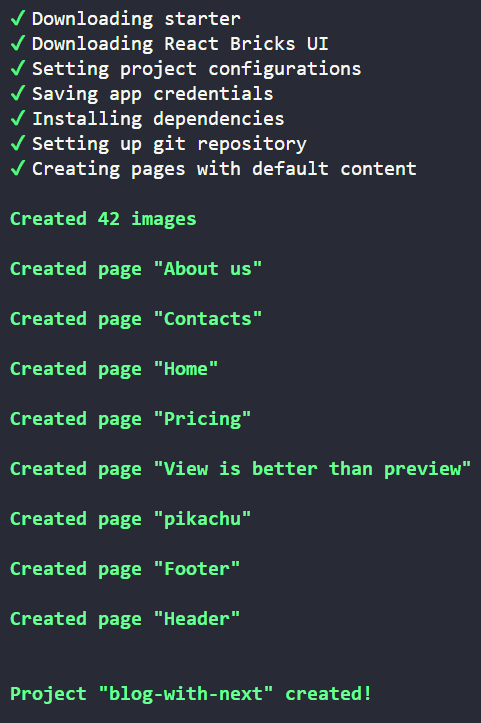
Start your project
Now that your project has been created, it’s time to start it up. To do that, let’s cd into your project. In my case, I have to type
cd blog-with-nextand then
yarn dev
This should start your project. To start editing content, let’s go to http://localhost:3000
The admin app
Before we begin editing, let’s take a quick tour of the admin dashboard
On the left, you see a sidebar with the example pages created for you by the CLI: click on the "Home" page. You should see something like this:
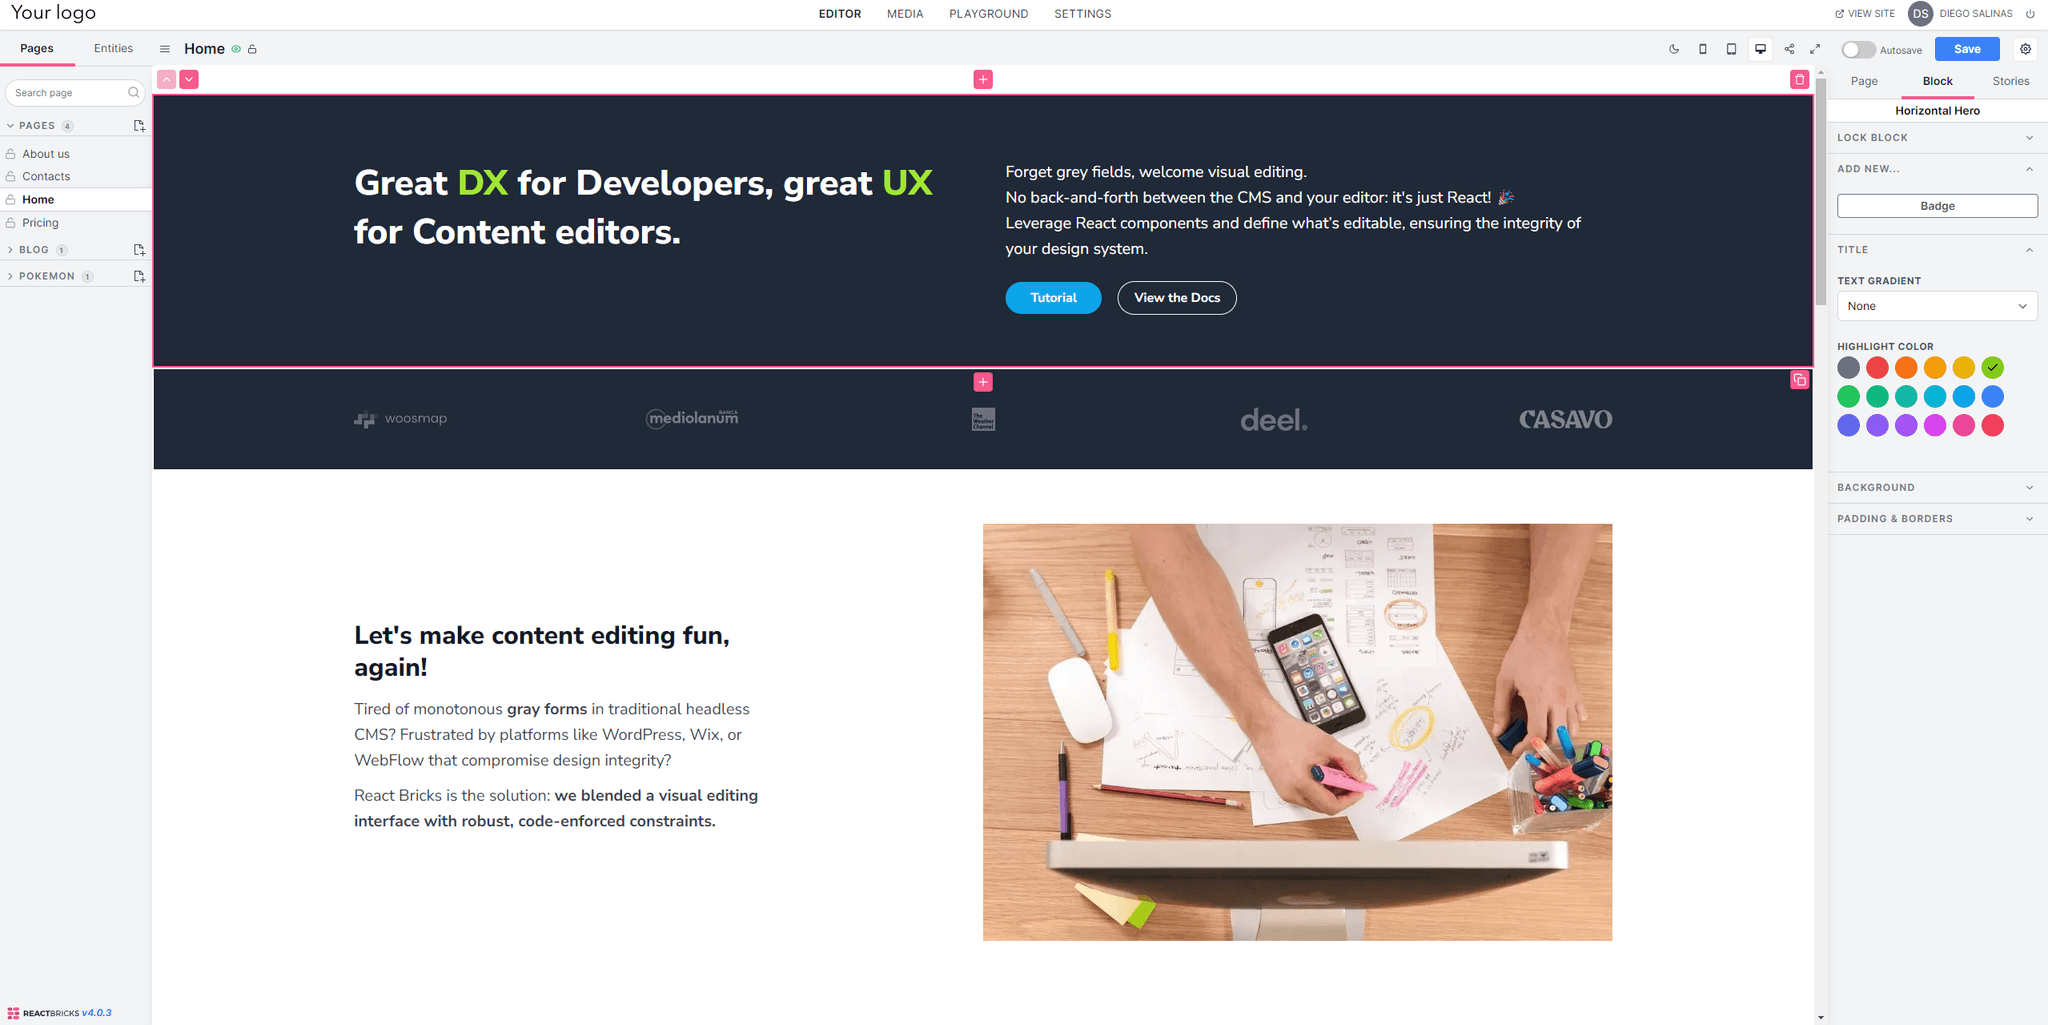
On the central panel, you can see the content you can edit visually. On the right sidebar, you can see the properties of the page or of the selected block.
Preview link
Click the "get preview link" button in action links at the top of the edit side.
This button copies to the clipboard the preview link of the page you are editing so that, when the website is published, you can share it to other people for review, even for pages in the “draft” status.

Editing content
Now comes the fun part. Let’s start editing content. To do it, click on the blue button on the top right side of the screen.
Edit a block
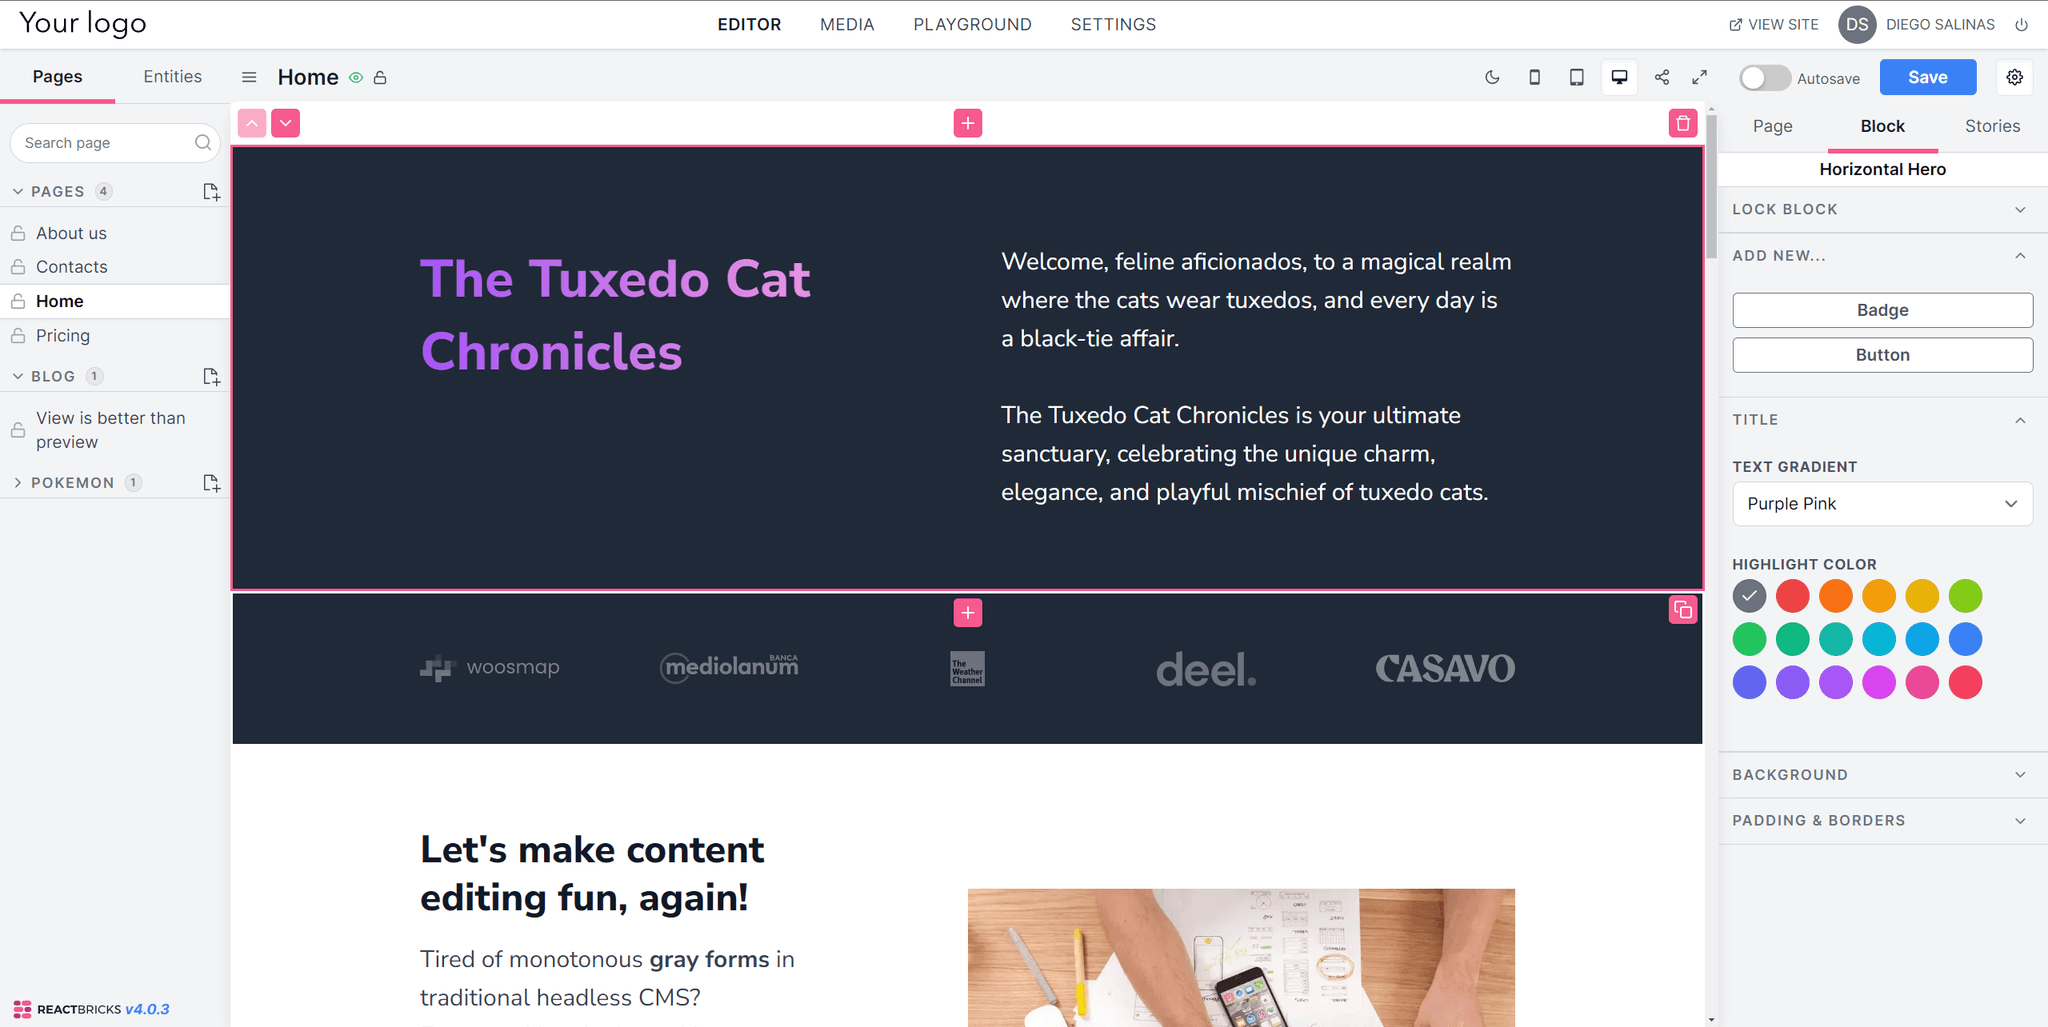
Click on the first content block (the Horizontal Hero unit with "Great DX for Developers, great UX for content editors.")
You see that it gets a pink border, and on the right side, you can see the properties for this block.
In React Bricks, you can edit content directly via the central panel and the right sidebar, making it easy for editors to change each block independently.
Try to change the text by clicking on it and editing. Since I’ll create a blog about Tuxedo Cats, I’ll edit my block to something about cats.
Sidebar edit
Now, let's use the sidebar controls to edit our content. You see that controls can be grouped in collapsible groups.
Here, for this pre-made "Horizontal Hero" block, we decided to have the "Title,” "Background,” “Text gradient,” and "Padding & Borders" controls.
Choose a different gradient and see the result.
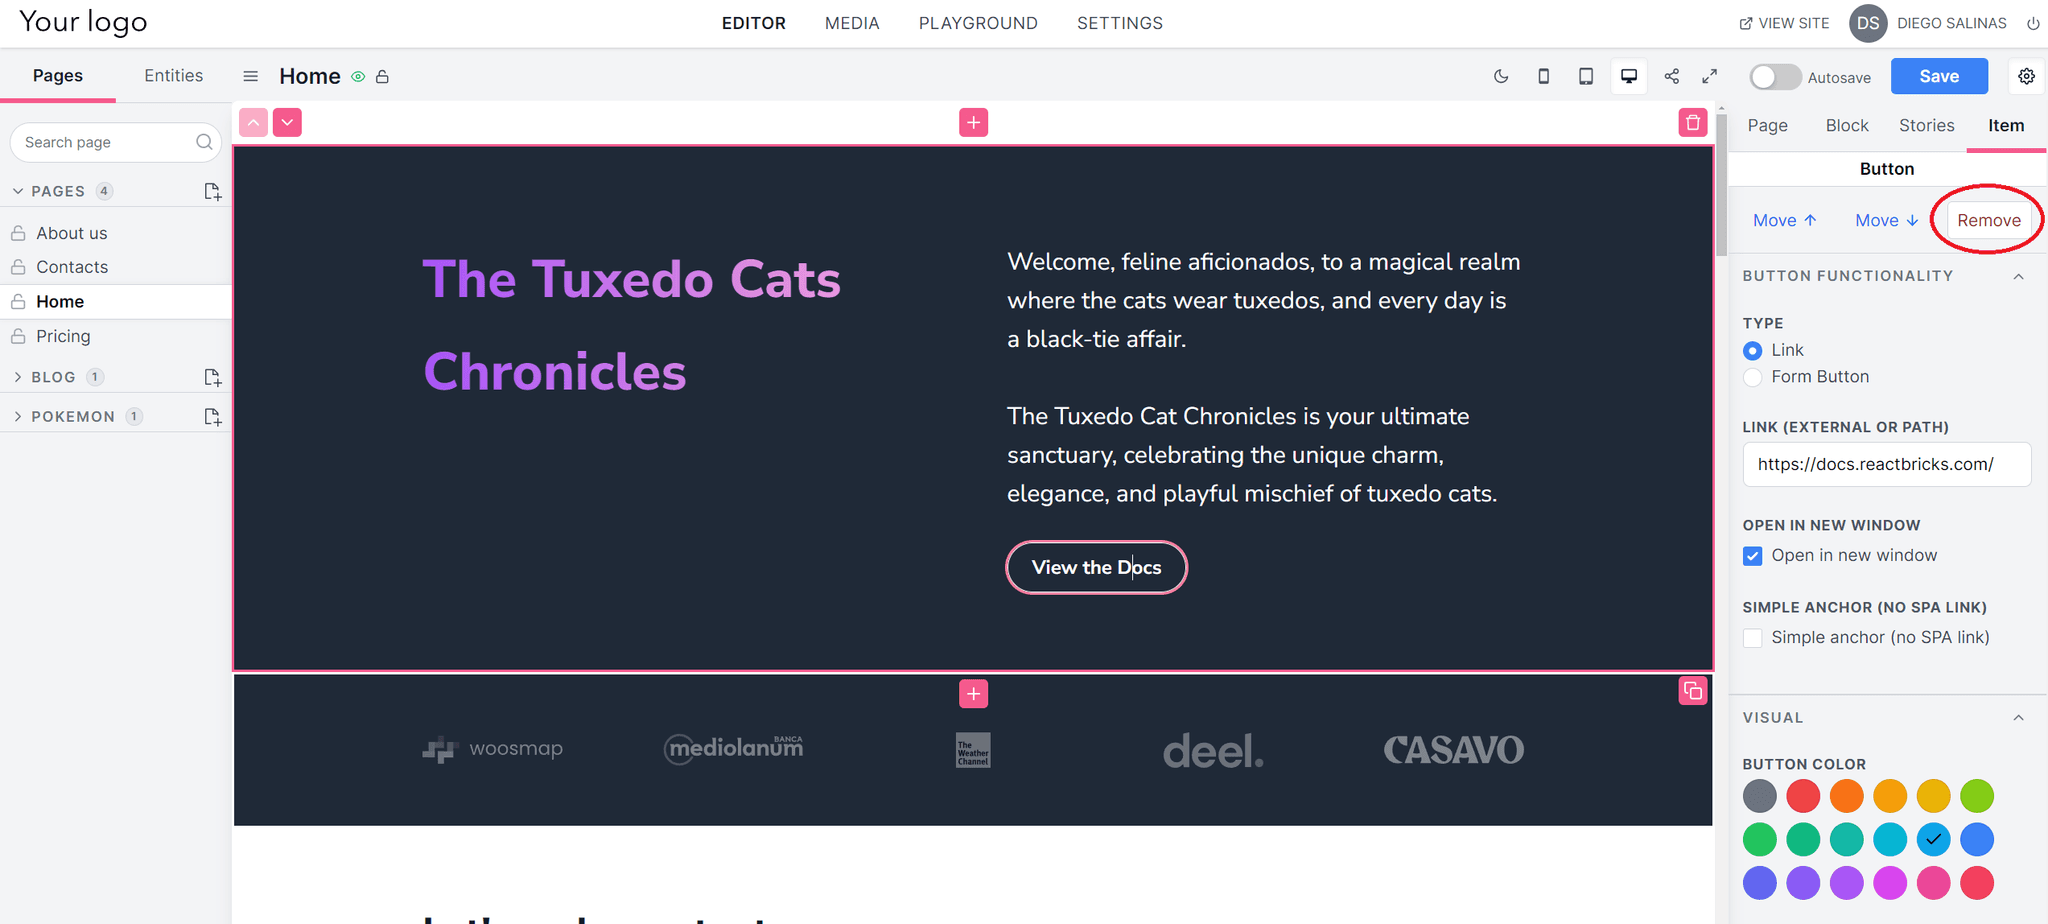
As you can see, I also removed the two buttons by clicking on them and hitting “Remove” on the right sidebar.
Easy, right?
So far so good!
Adding a new block
Click the "+" icon below (or above) a selected block to add a new block in that position. You will see that now, in the sidebar, you can choose the type of block to be added.
The content blocks ("bricks") you see are pre-made by us, as part of the React Bricks UI package.
When you create your own custom bricks, you'll be able to decide to remove completely these example blocks or take inspiration from them.
I’ll add a photo gallery showcasing a series of tuxedo cats. So, let’s pick an “Image carousel” block type.
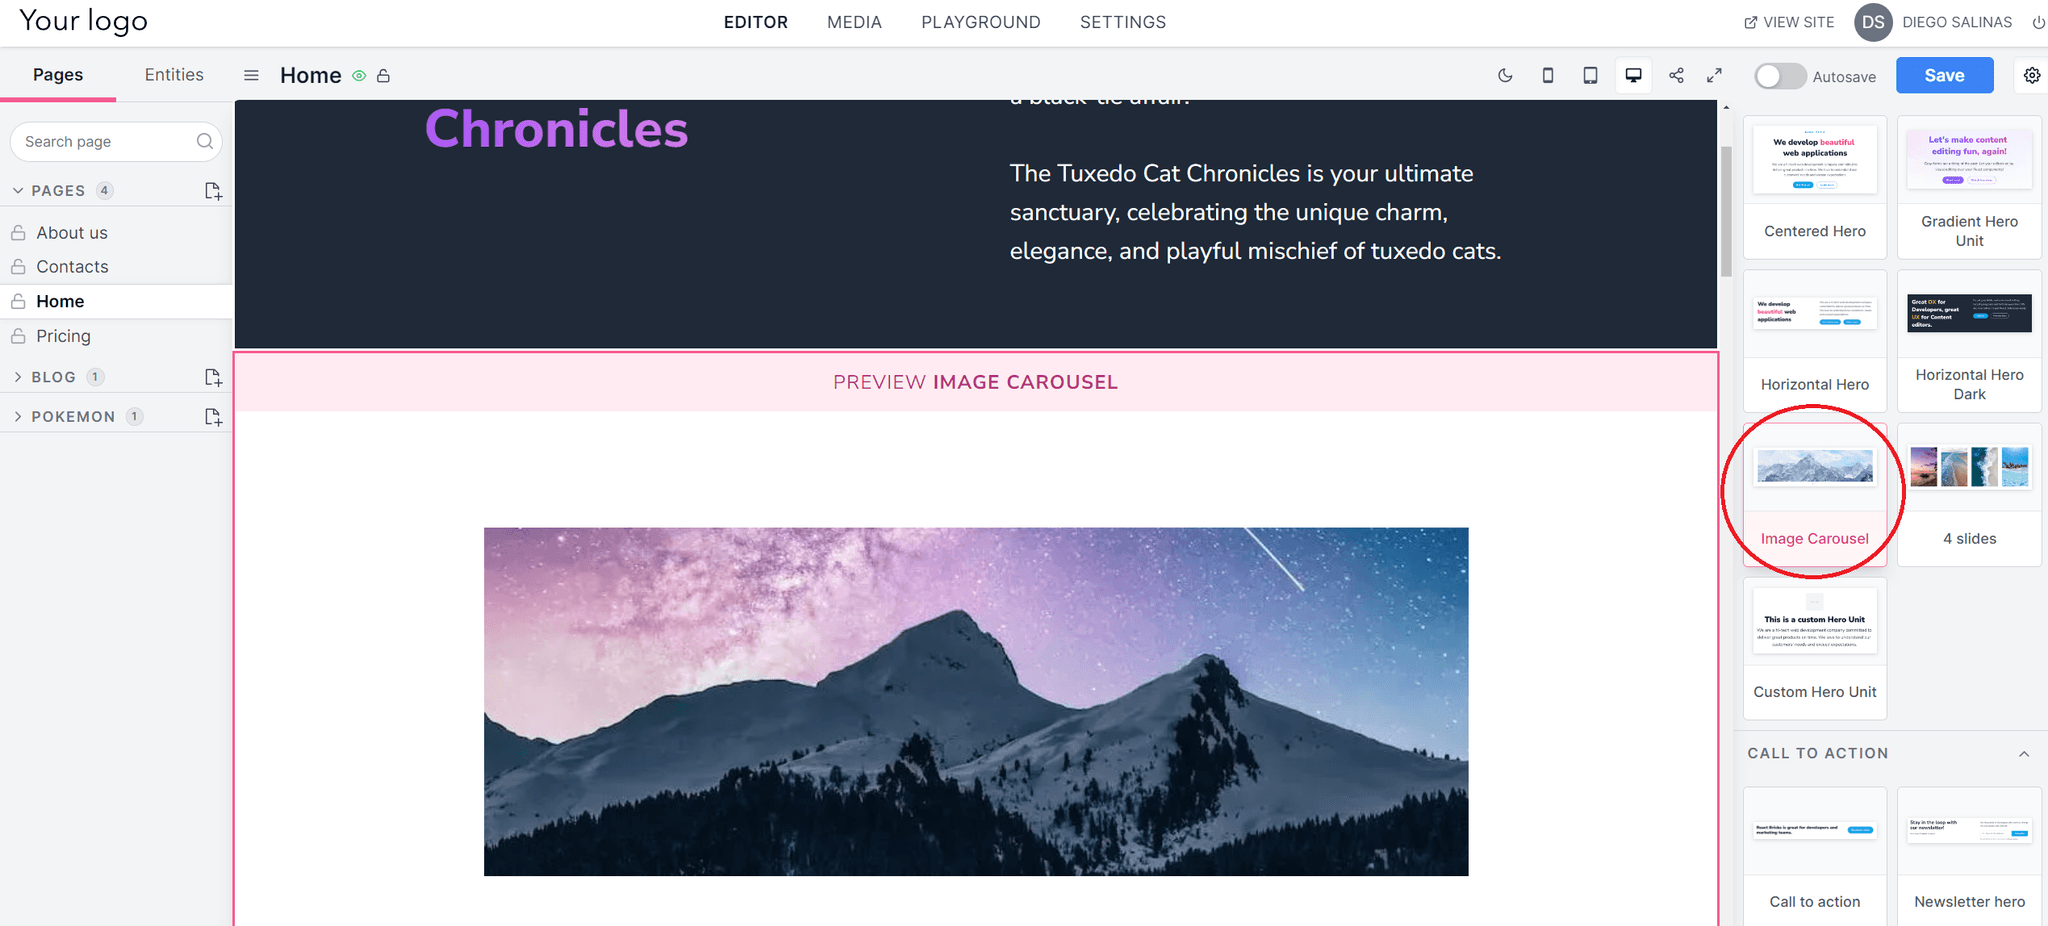
One of the cool things about React Bricks is that you can preview how the block will look on your website before using it, giving you the chance to change your mind on the fly before committing.
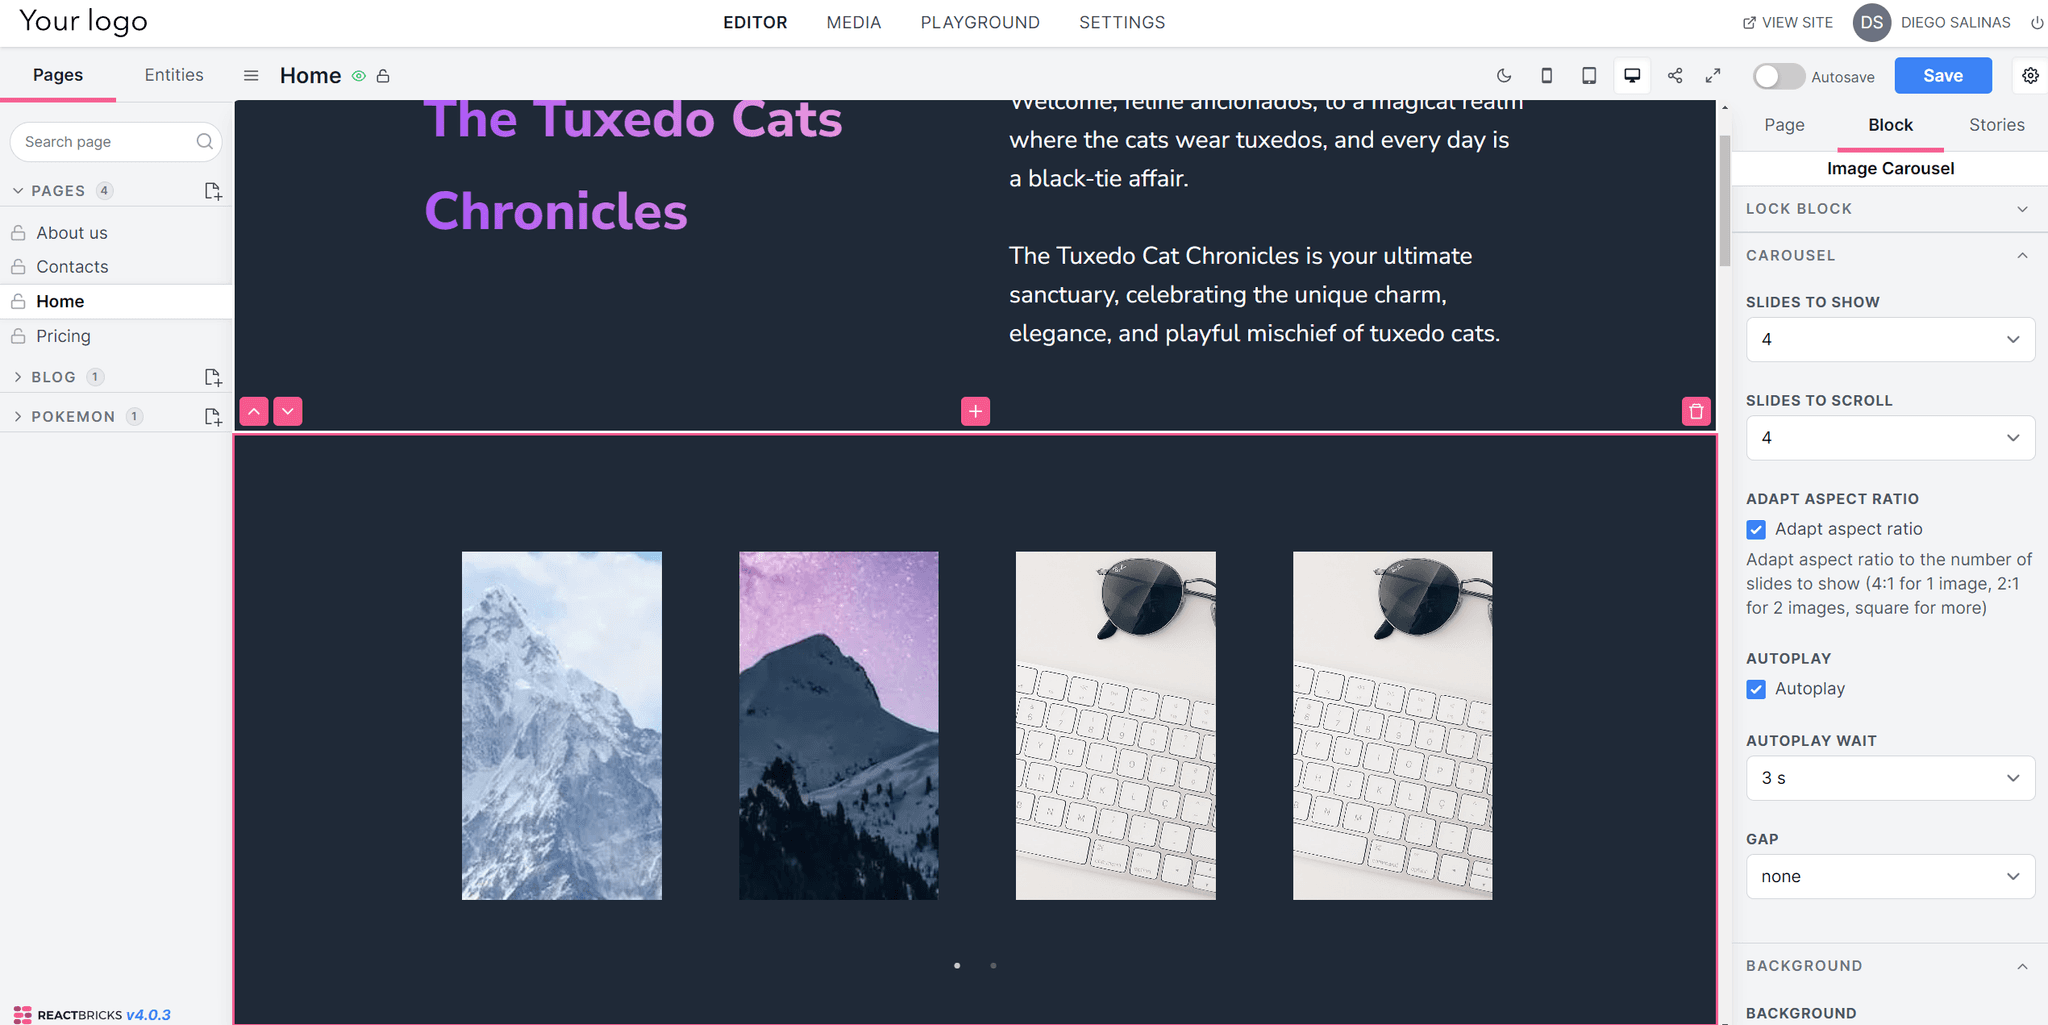
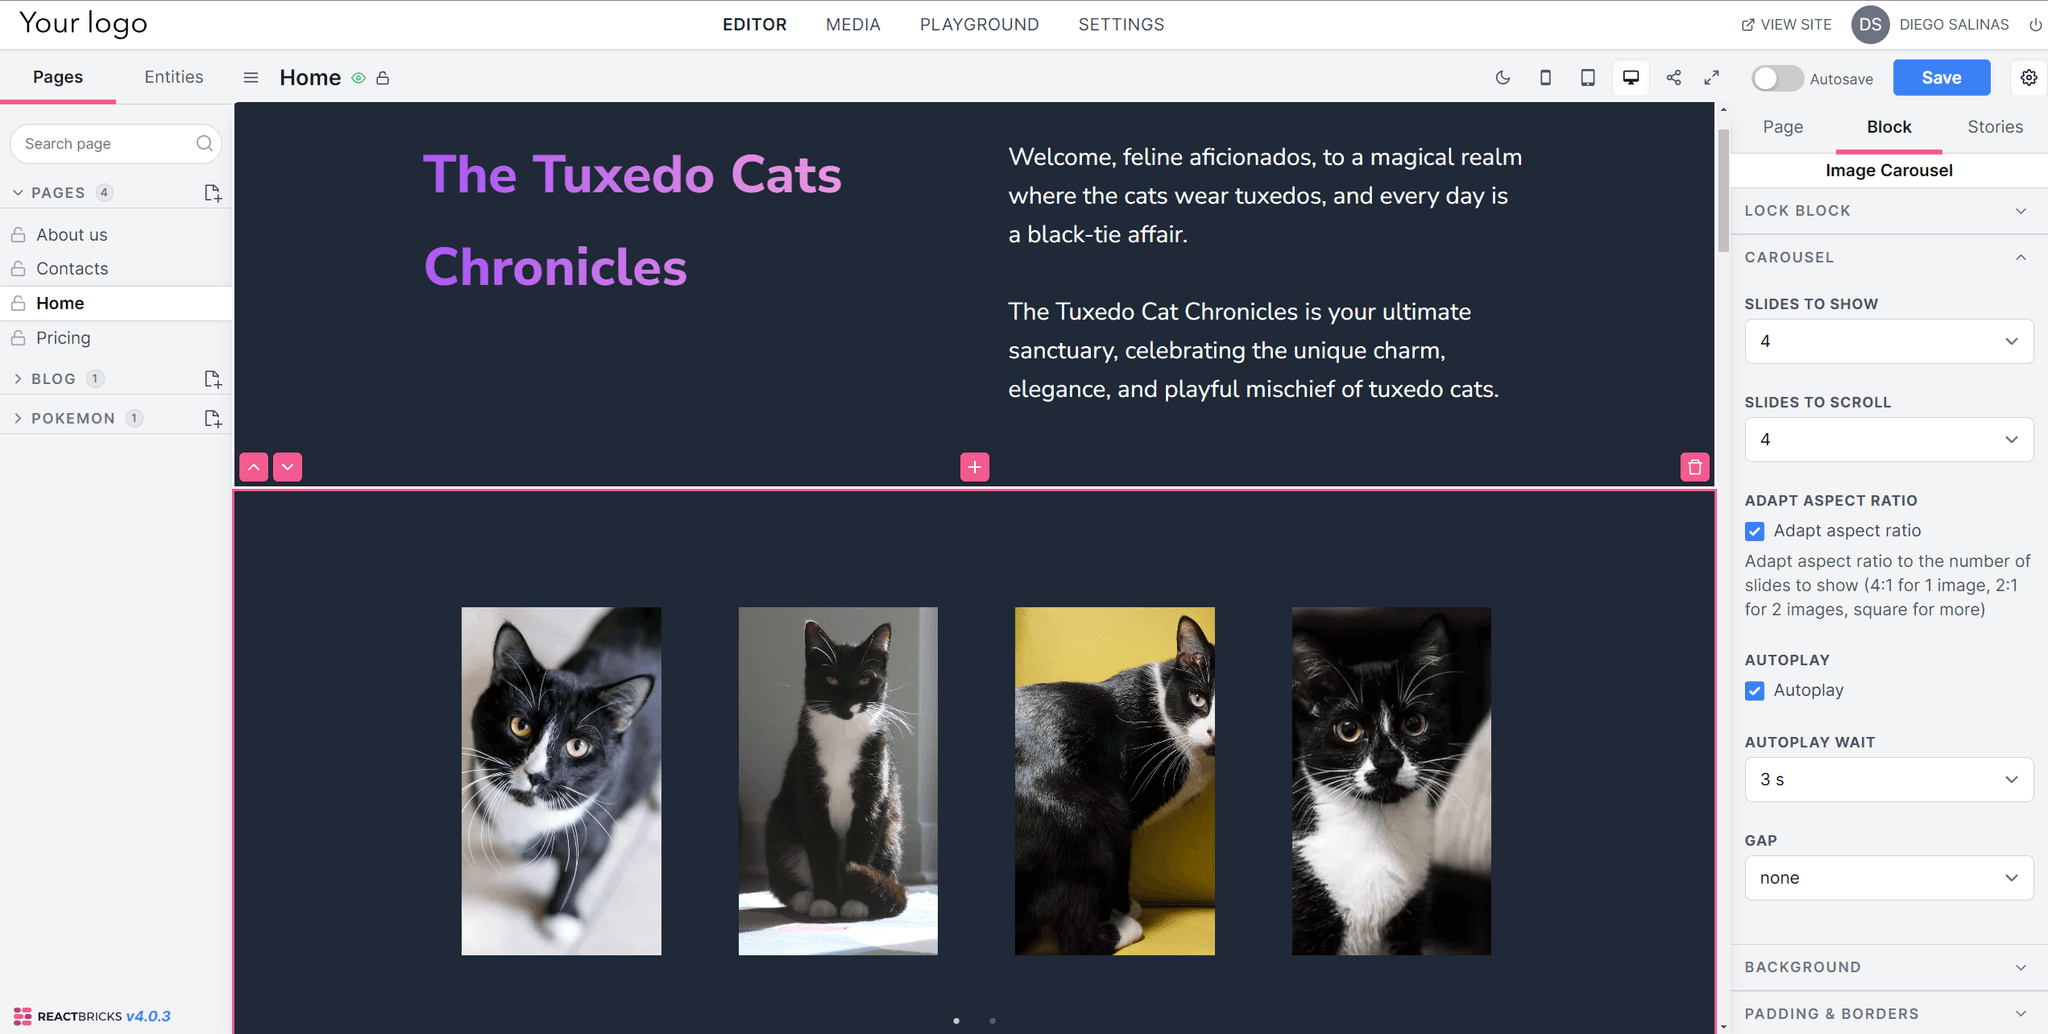
I edited my block a bit so it showed four slides, reduced the gap between the images, and changed the background color to match the block above.
Uploading an image
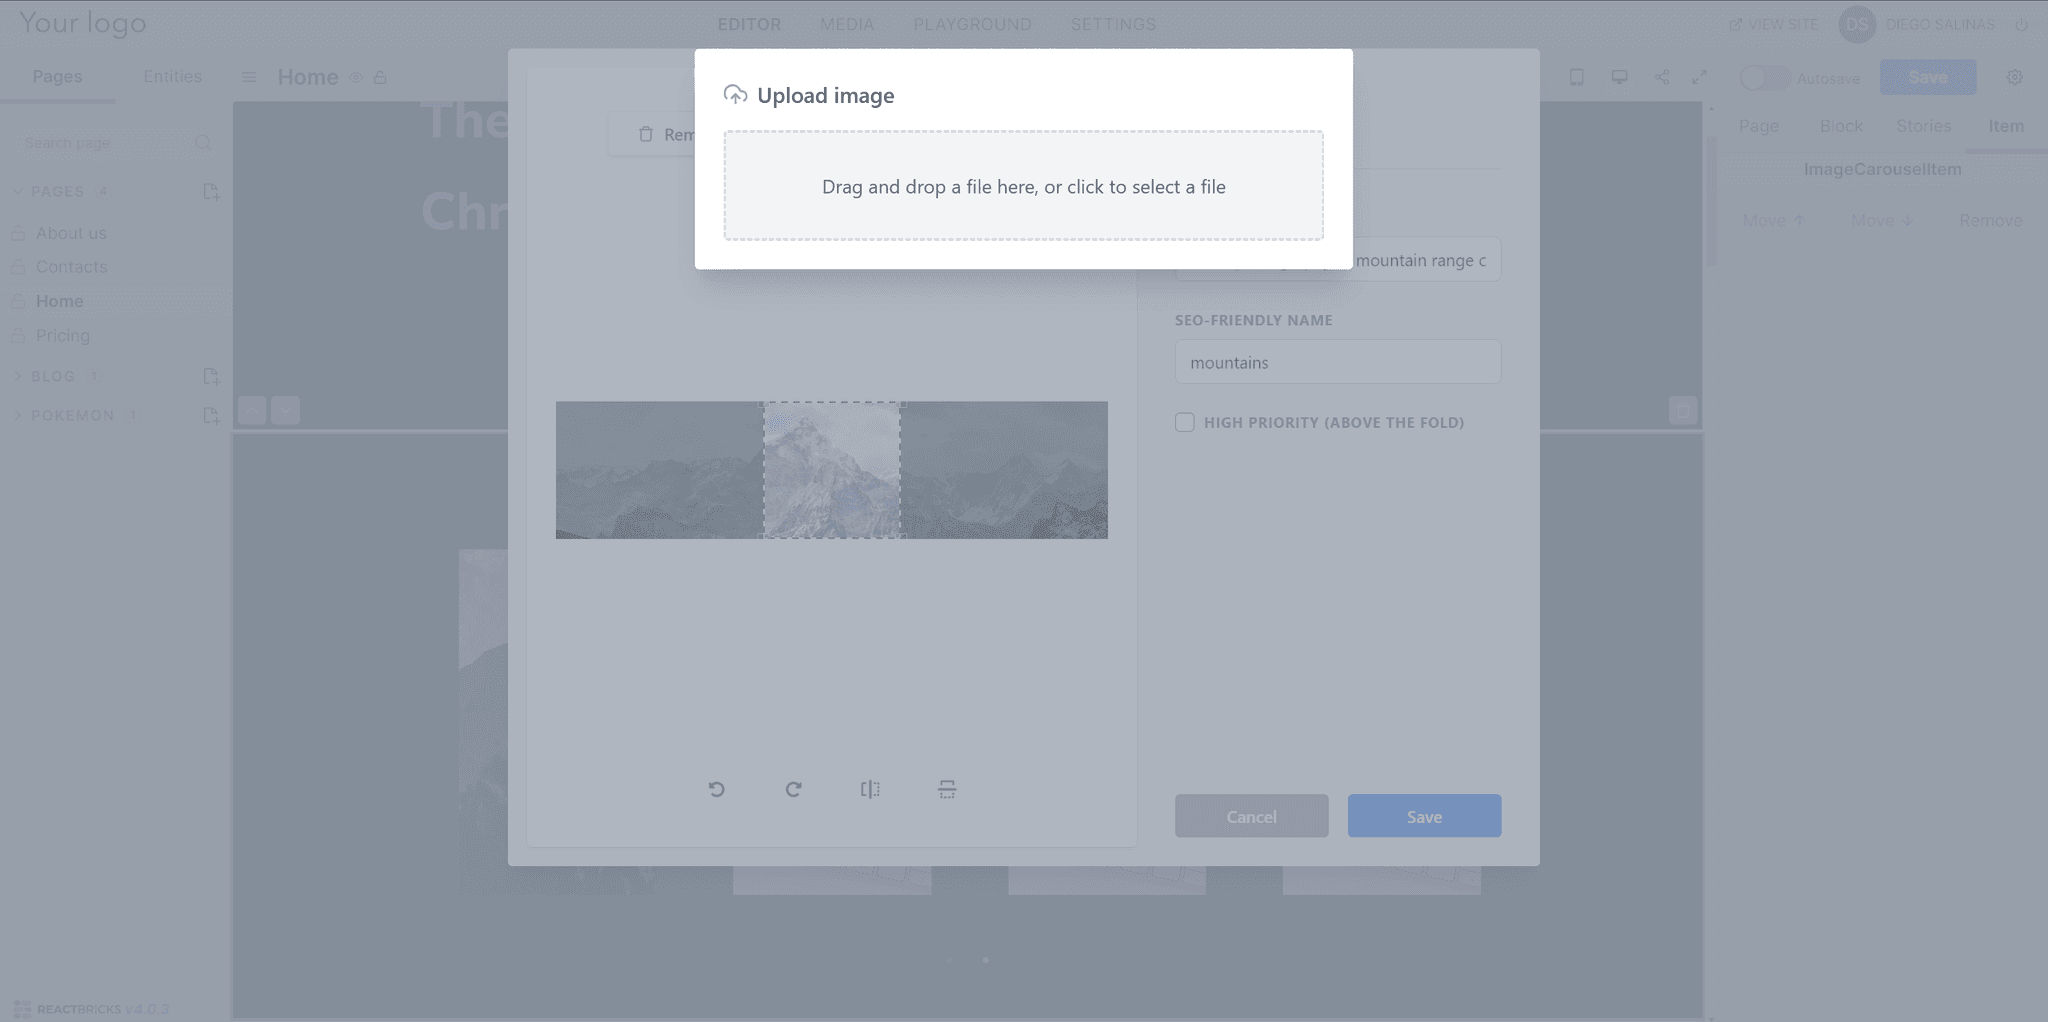
Now, let’s add some cat images. We have two ways of doing this: uploading your images to our DAM or using a stock photo from Unsplash. Let’s click on one of the pictures. You should see this:
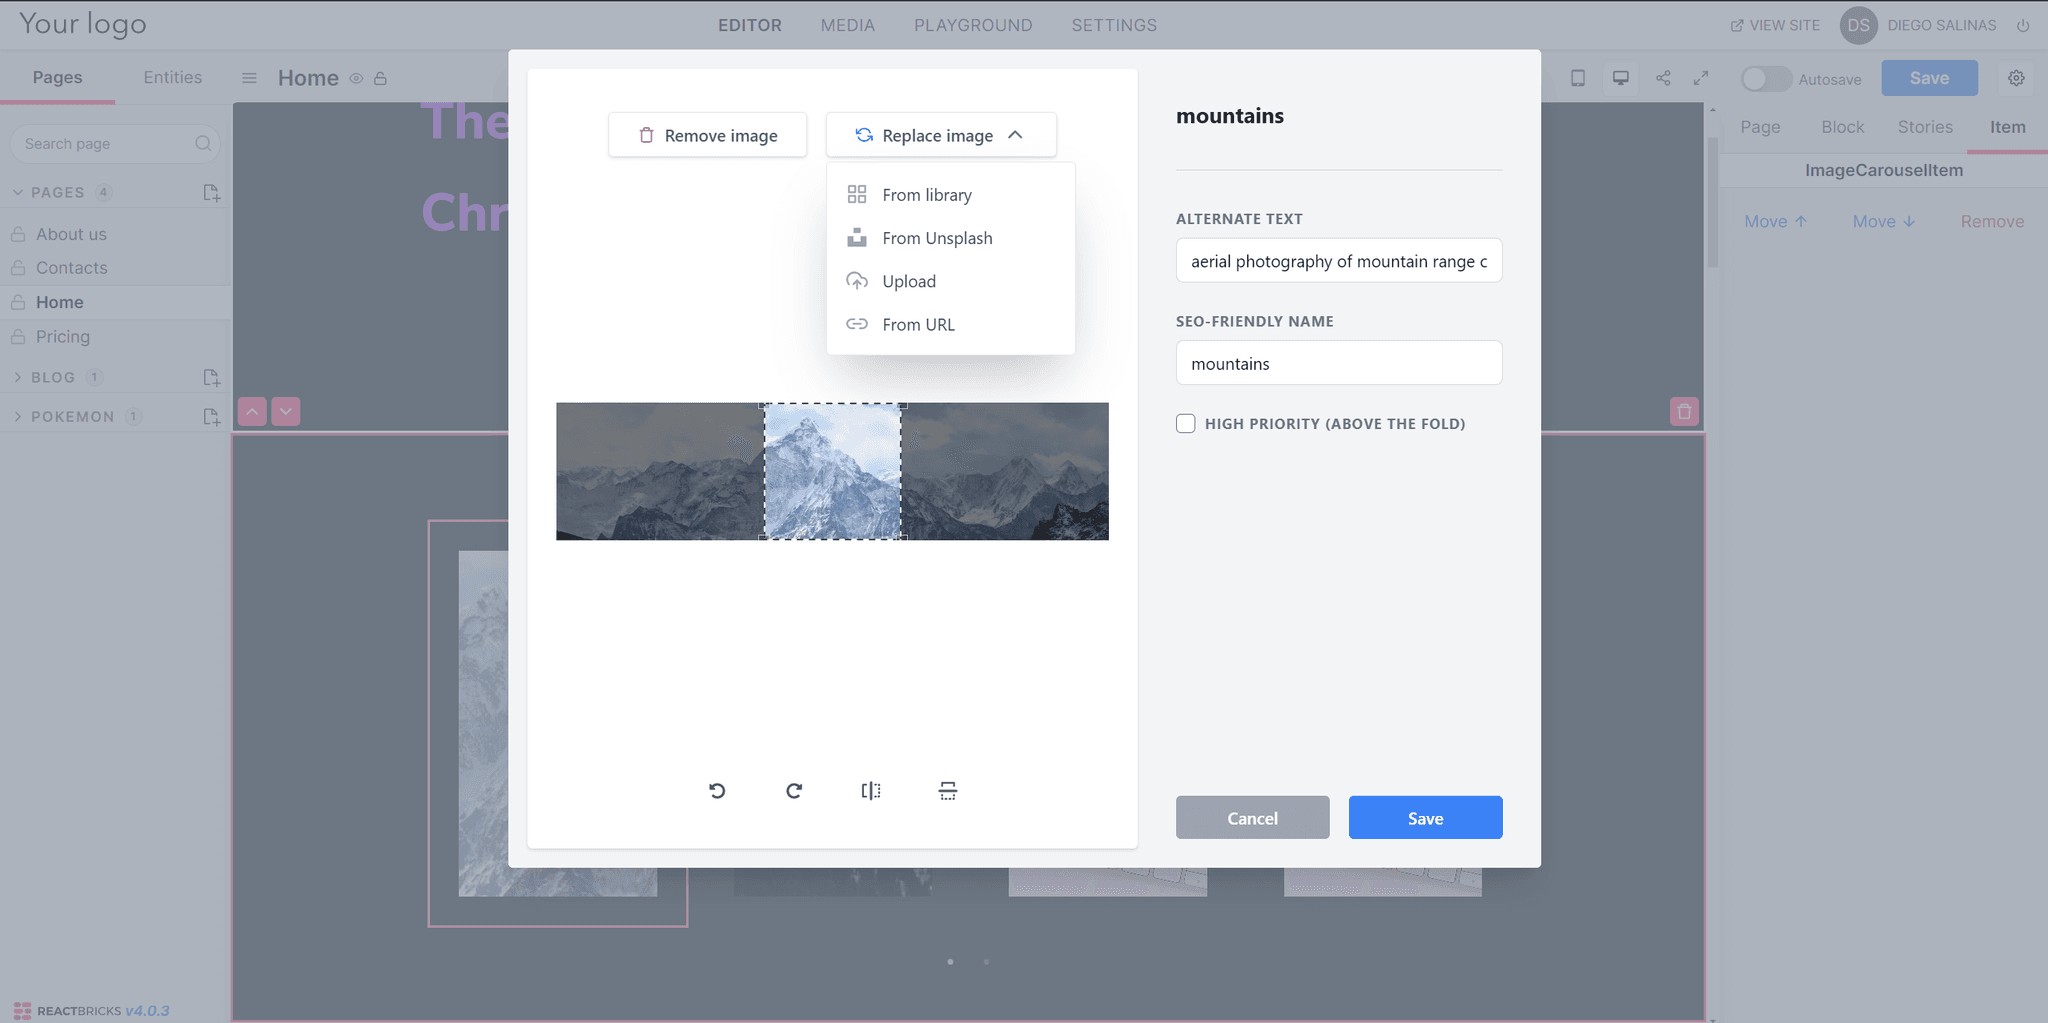
To upload an image, click the upload button, and select one from your computer.
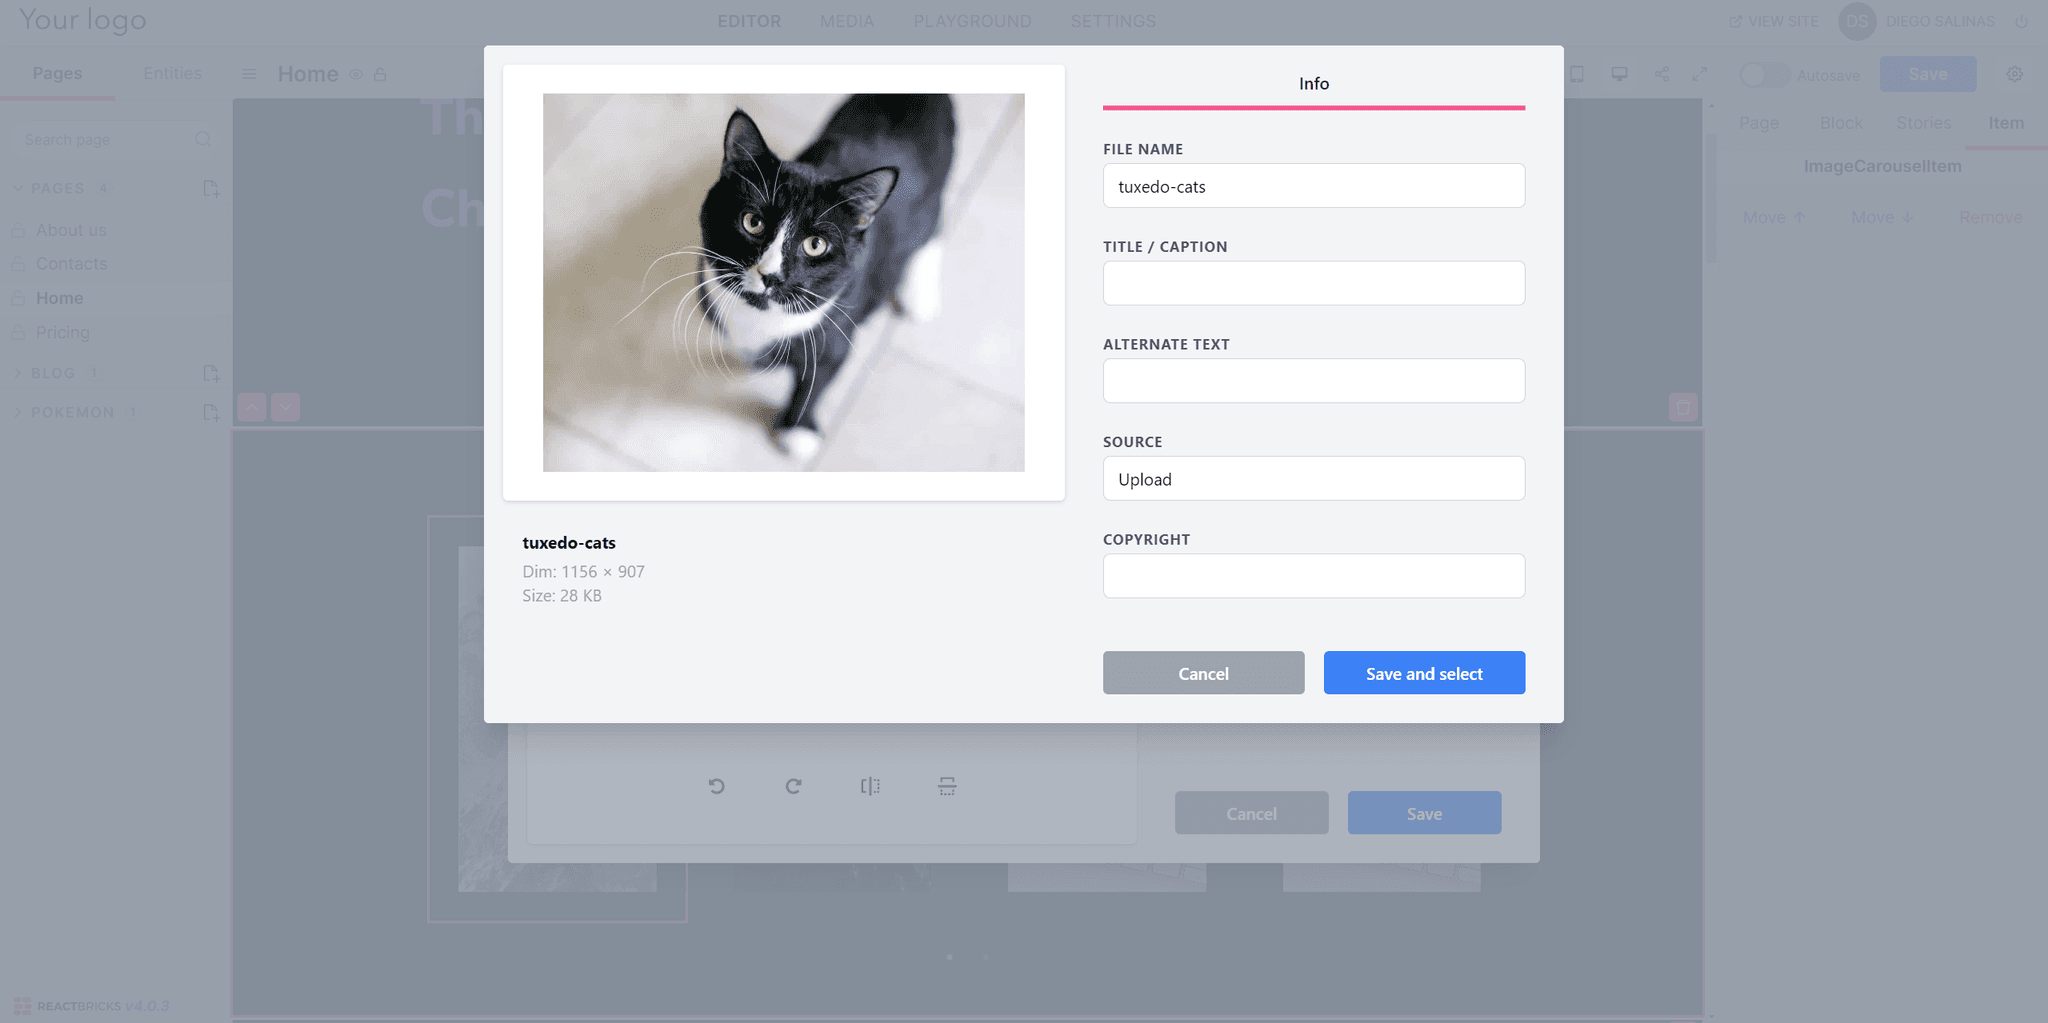
Add an alternate text and click on “Save and select.” React Bricks crops the image in 1:1 proportion in this case, but you can change that in your code editor.
Now, let’s pick one using Unsplash
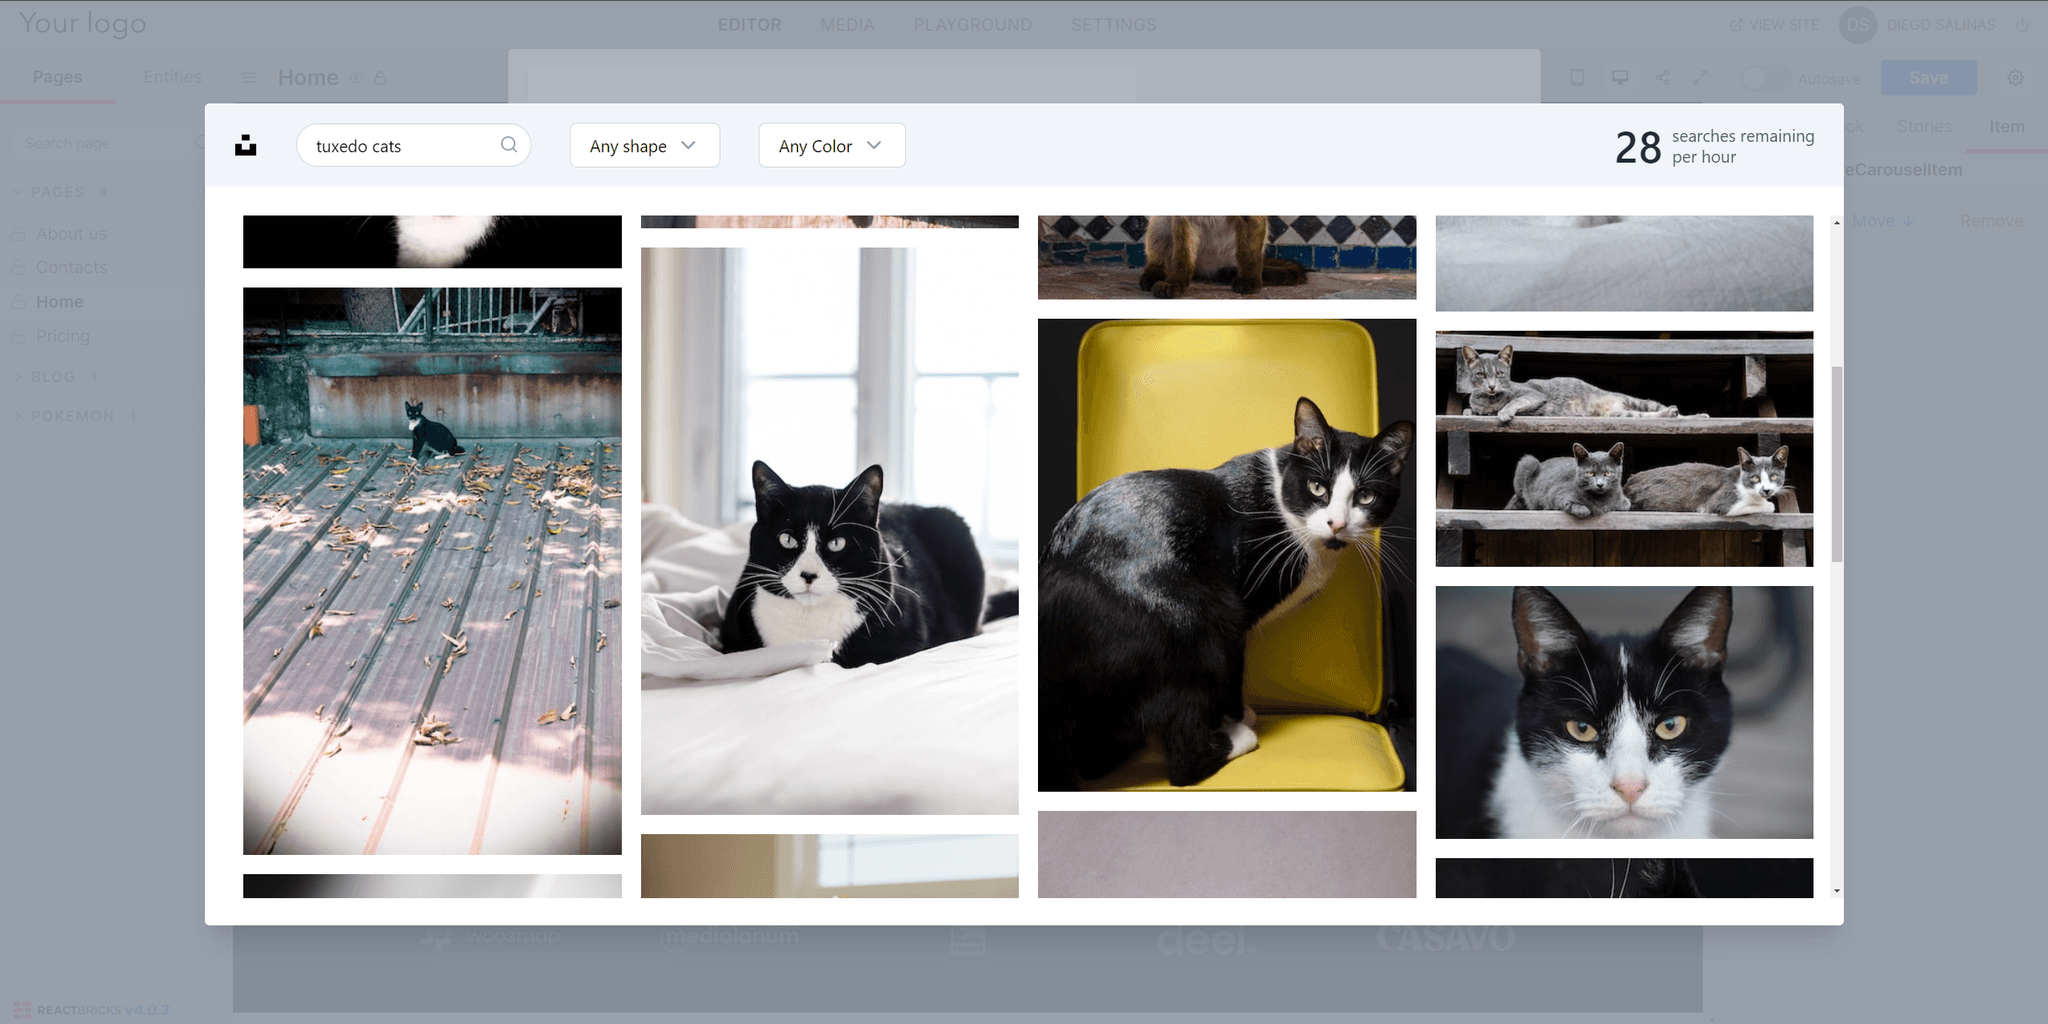
Now finish adding your pictures and see how it looks!
Using nested blocks
Now, add a "Features" block. You see that, in this case, the block is a repeater of nested "Feature" blocks. Via the sidebar you can Add / Remove the single features.
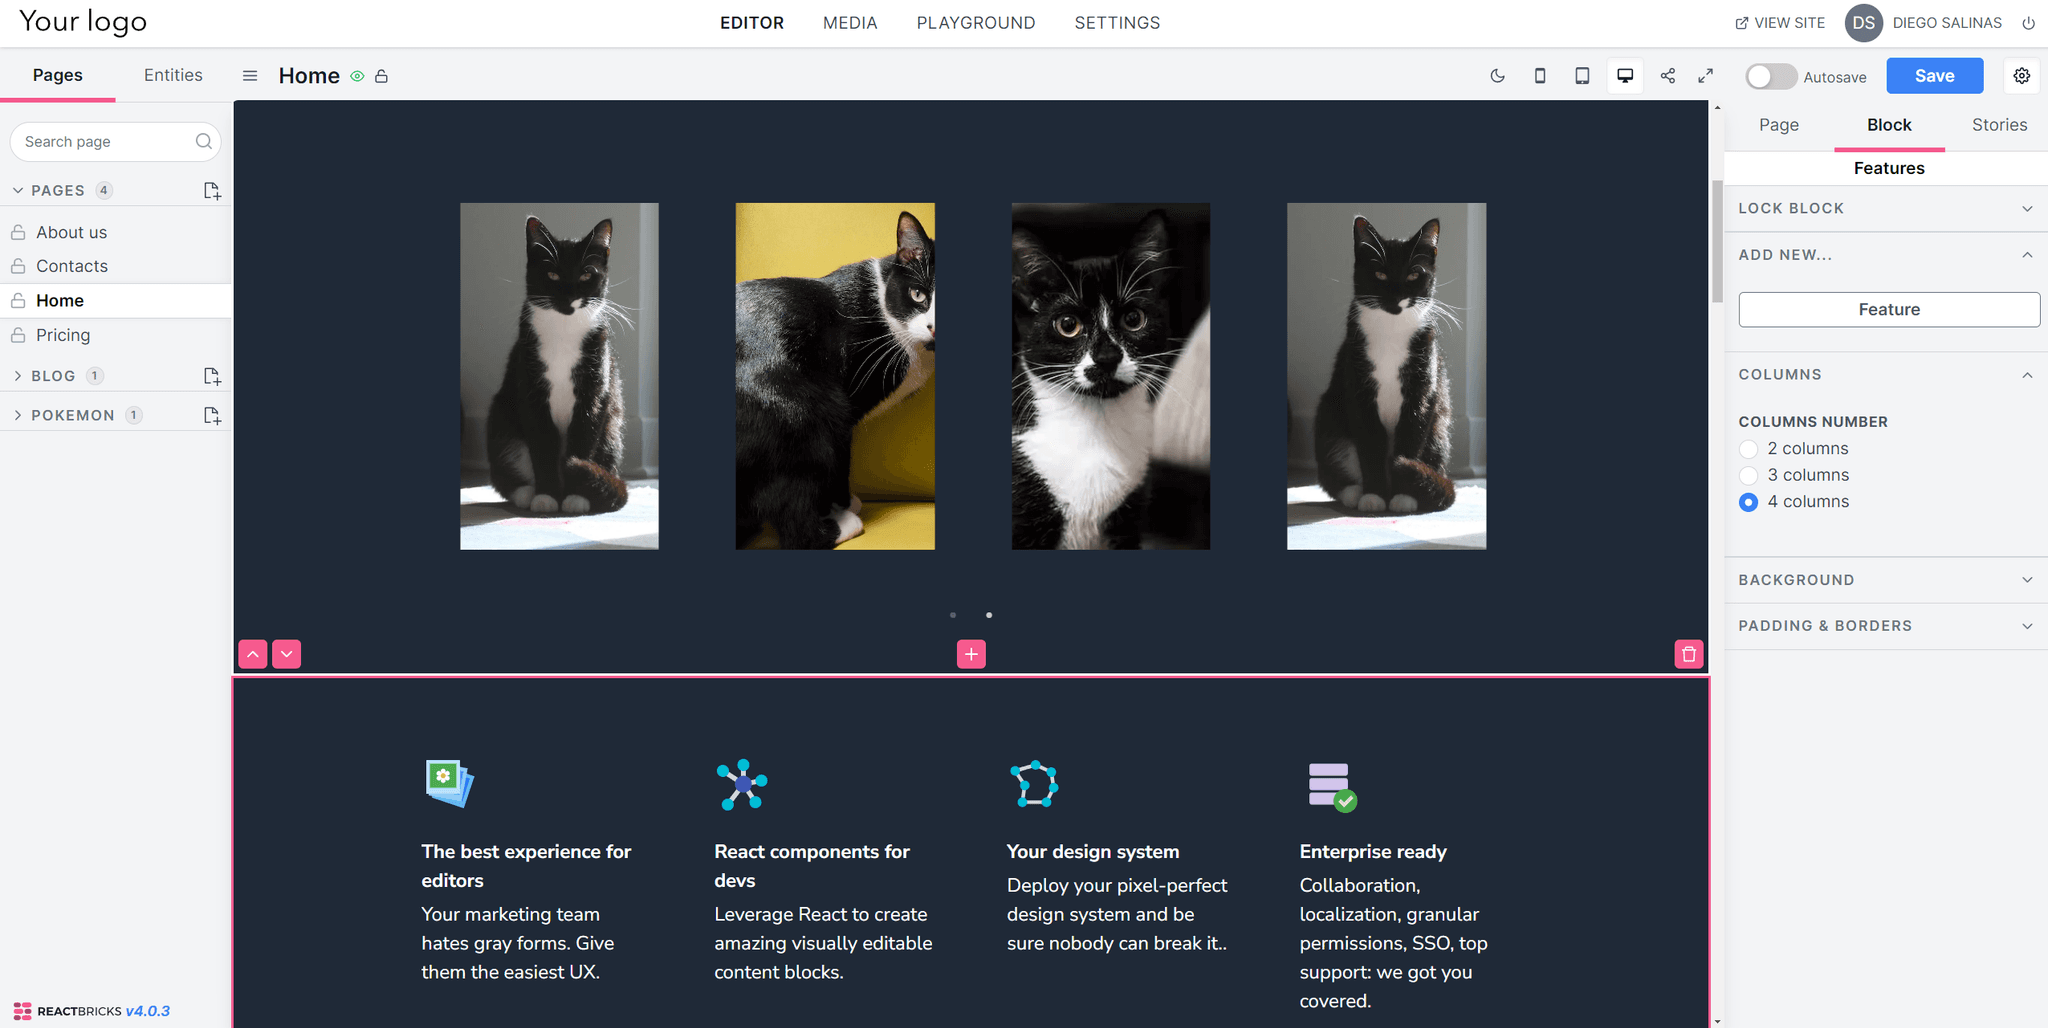
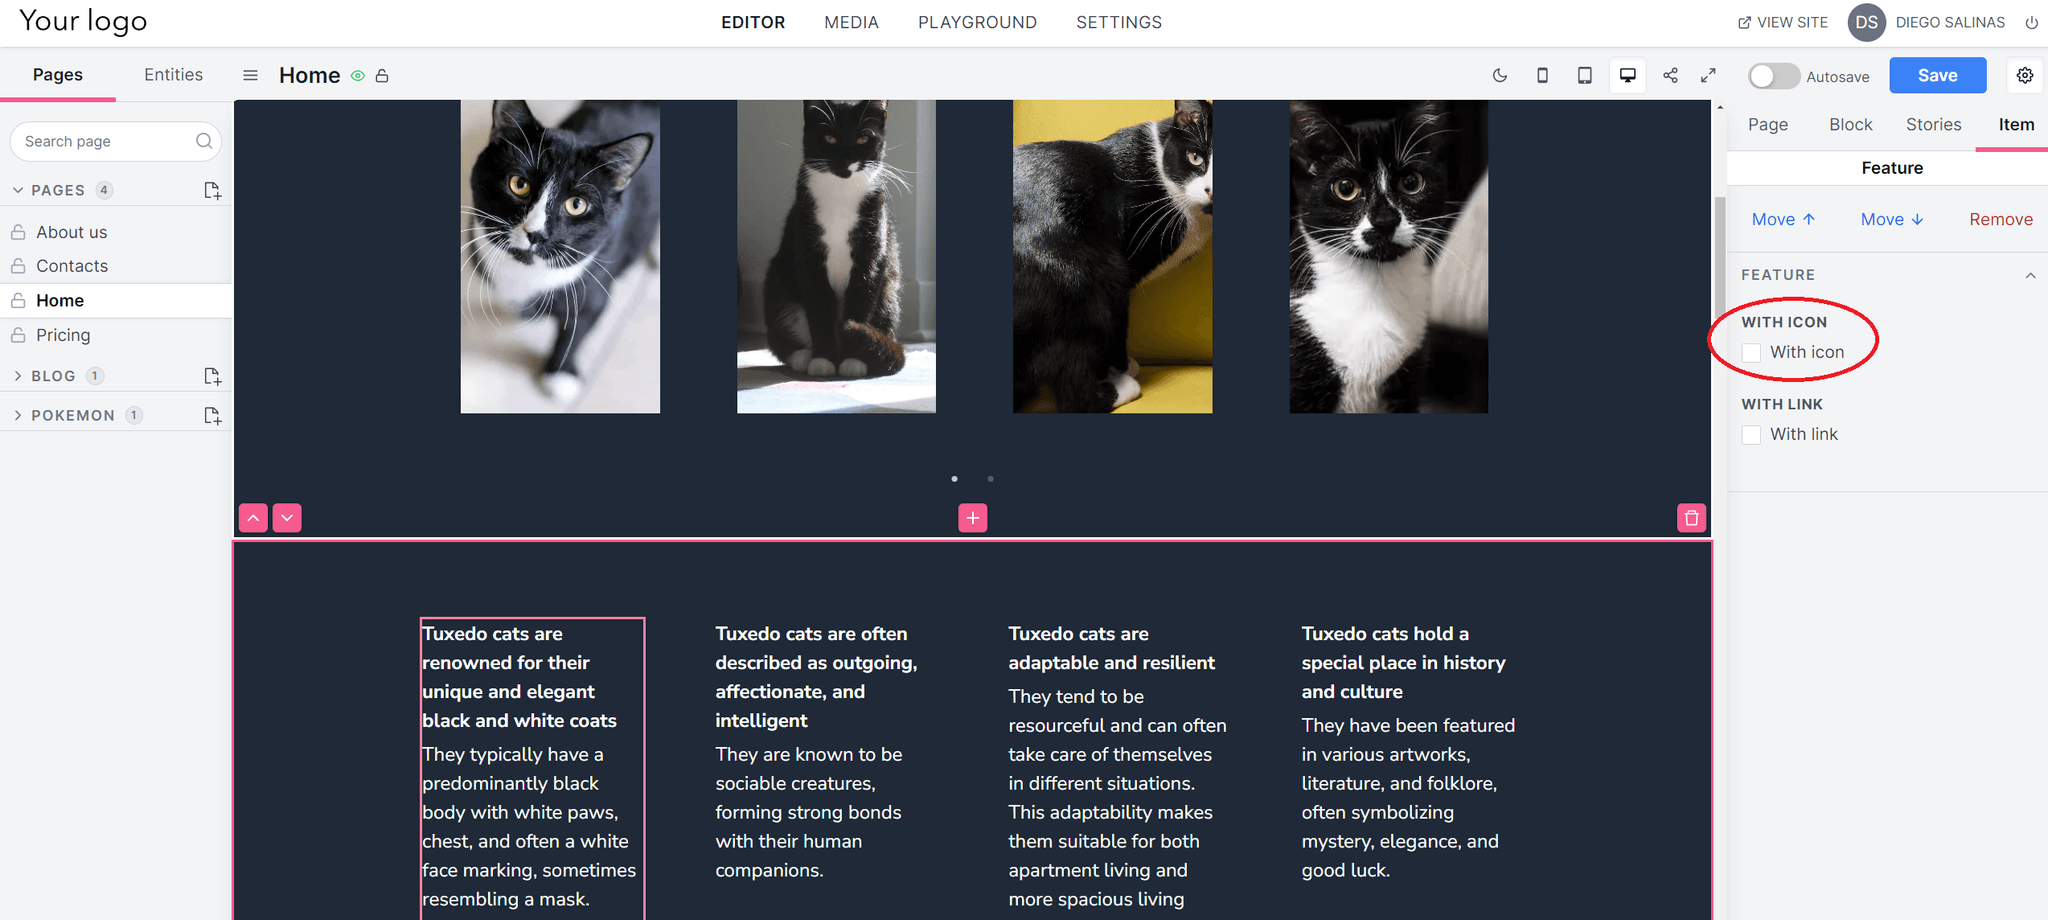
If you click on a Feature, you'll see that the "Item" tab appears in the sidebar to let you change the props for this item via sidebar controls.
Let’s remove the icons and add some copy to each feature block.
Reordering and deleting blocks
This is pretty simple. Just use the arrows on a selected block to move the block up or down and the trash bin button to delete a block.
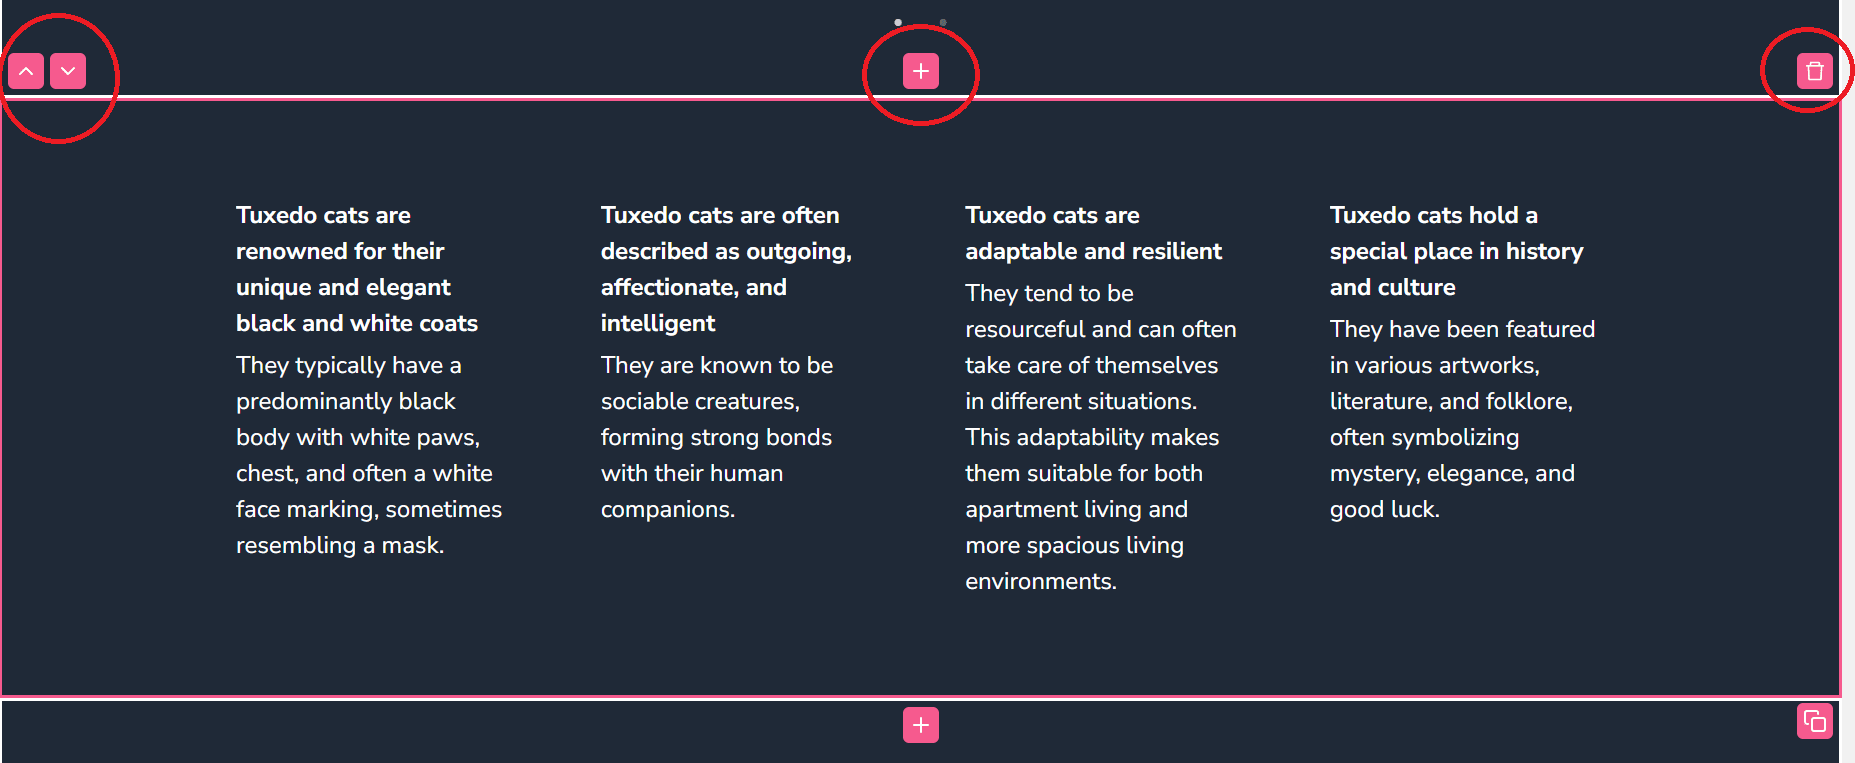
Since I won’t be using the rest of the blocks that come with the home page, I’ll delete them.
Saving page
To save, click on the Save button you see on the top right.
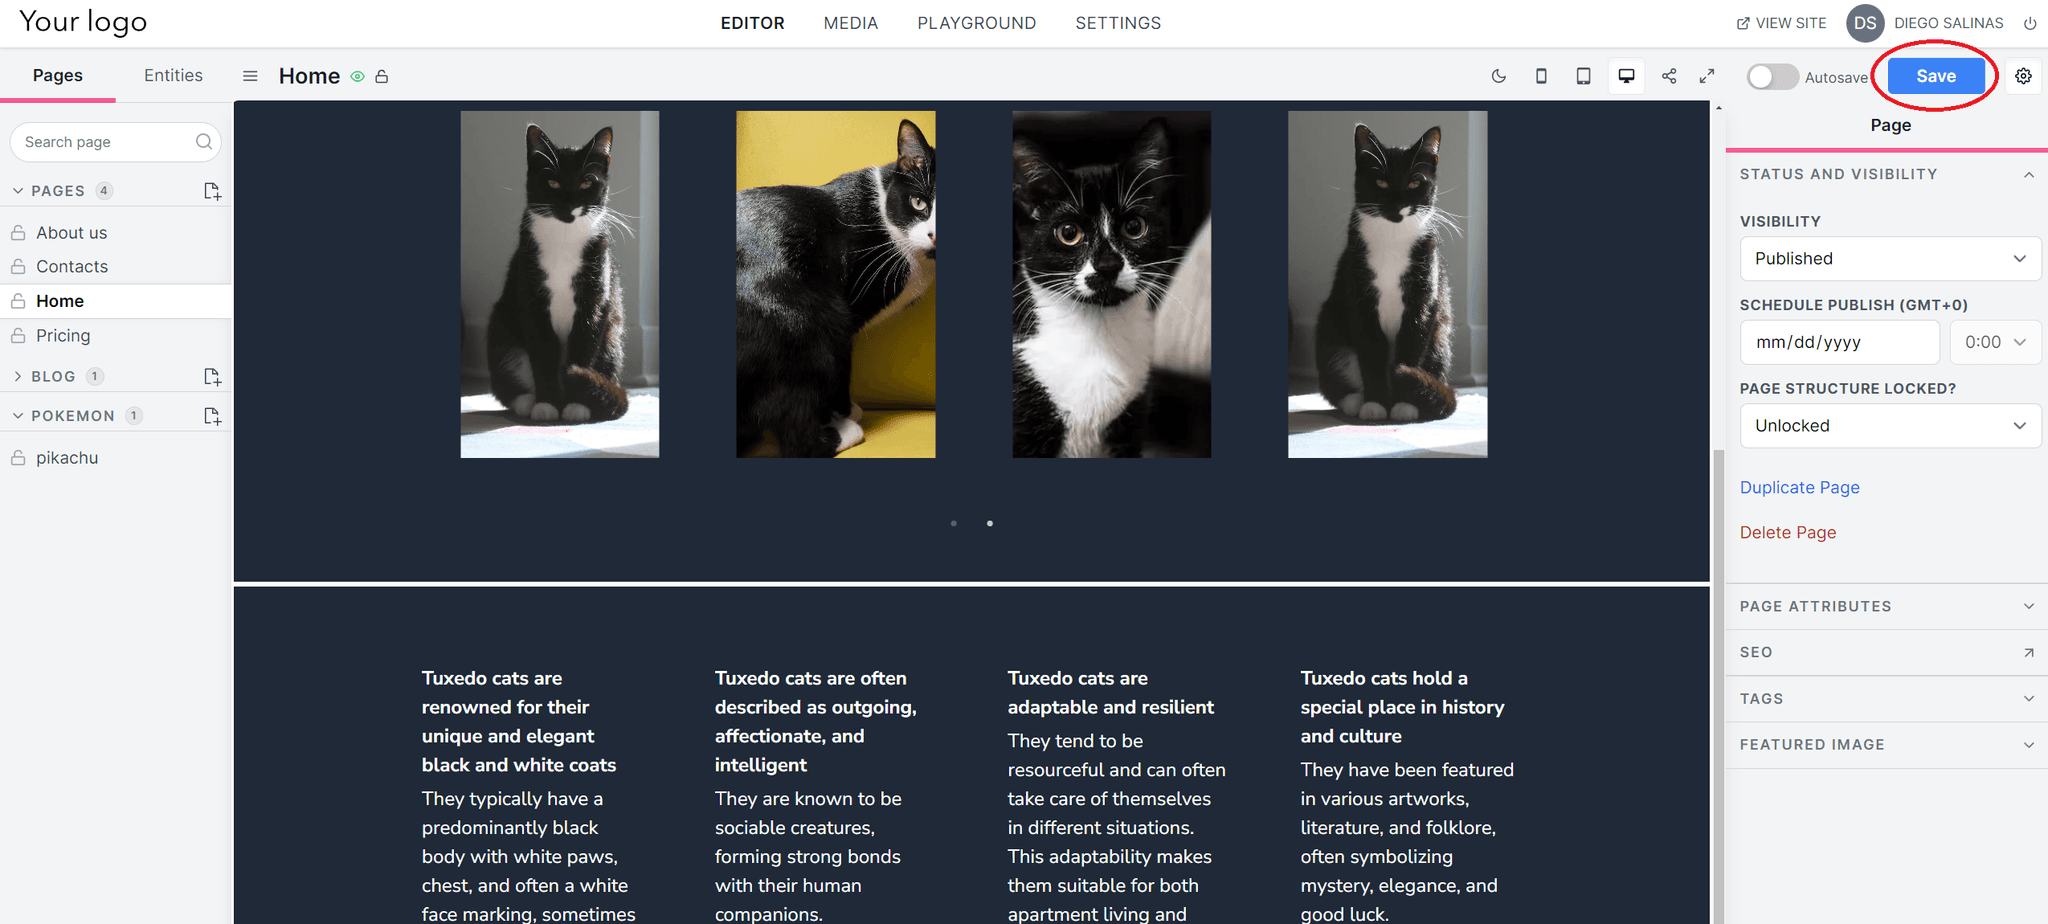
Congratulations! You just created your first page!
Editing and updating the blog
Now that we have a home page, let’s populate our blog. Our starter comes with a pre-written blog, but let’s create one from scratch using what we’ve learned so far.
To add a new blog, click on the “Add new blog” button and start adding blocks.
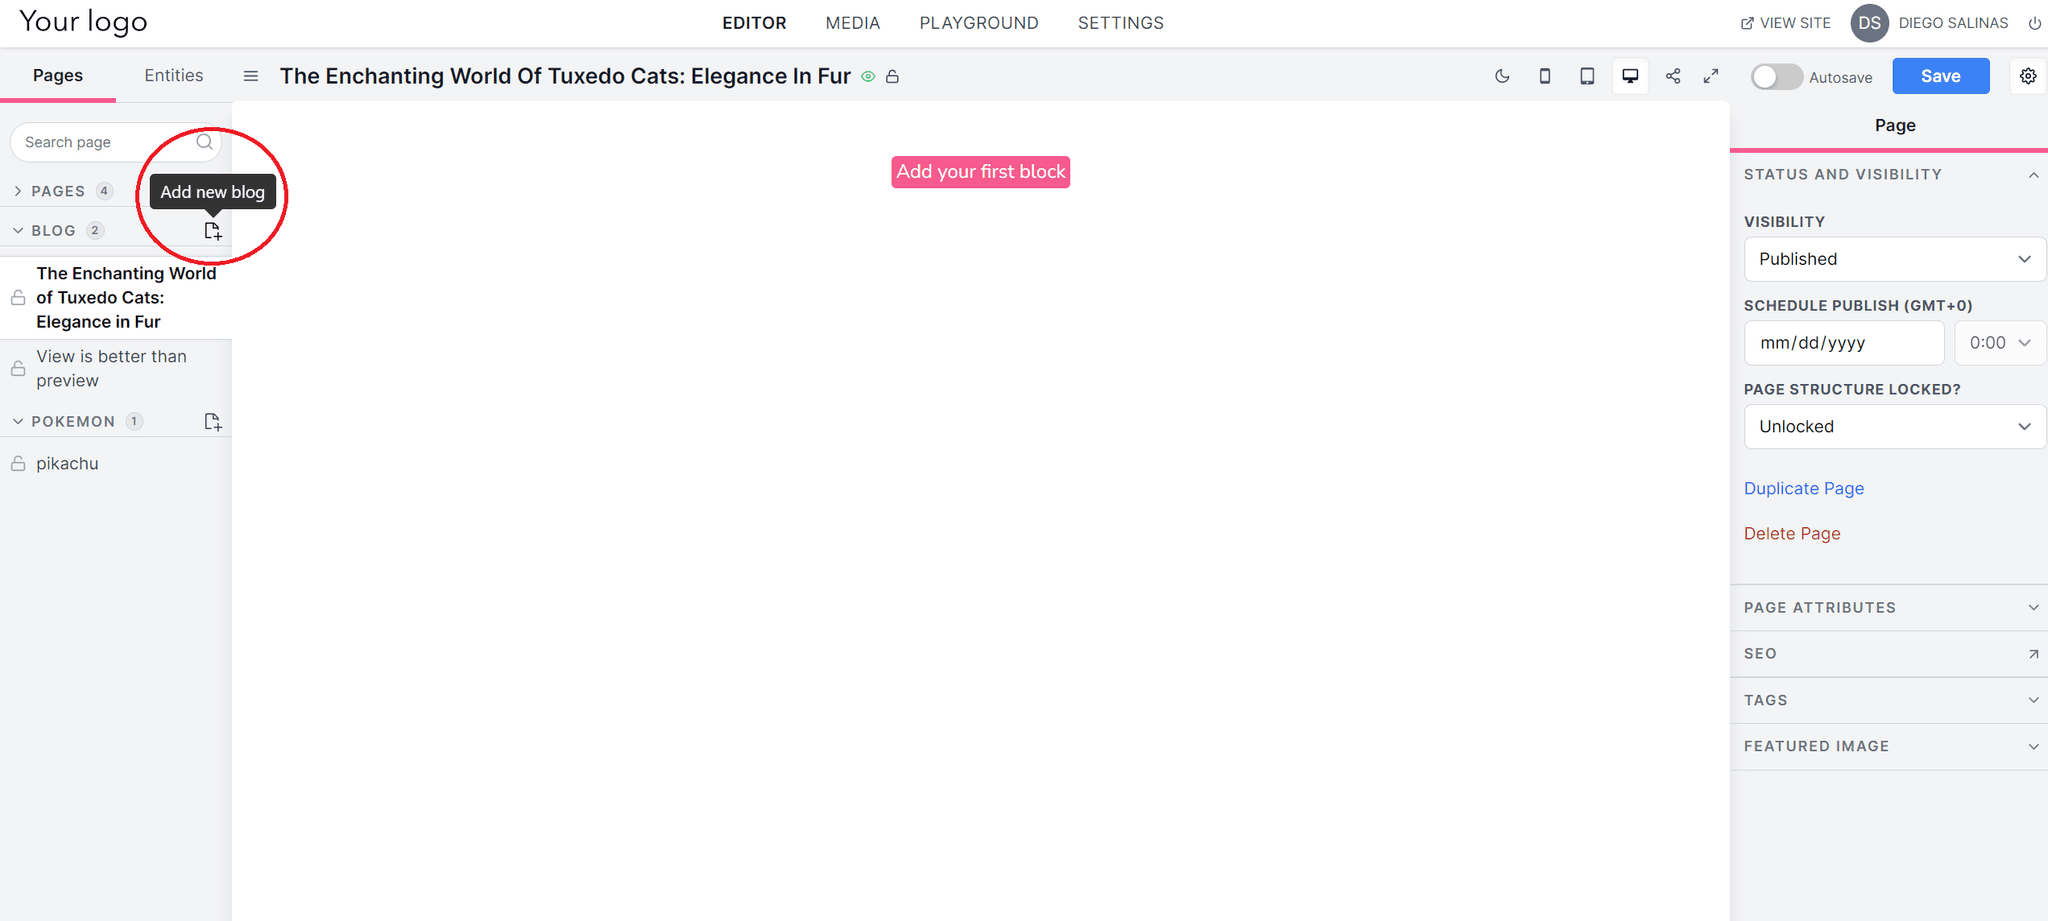
Now, let’s put our knowledge to the test!
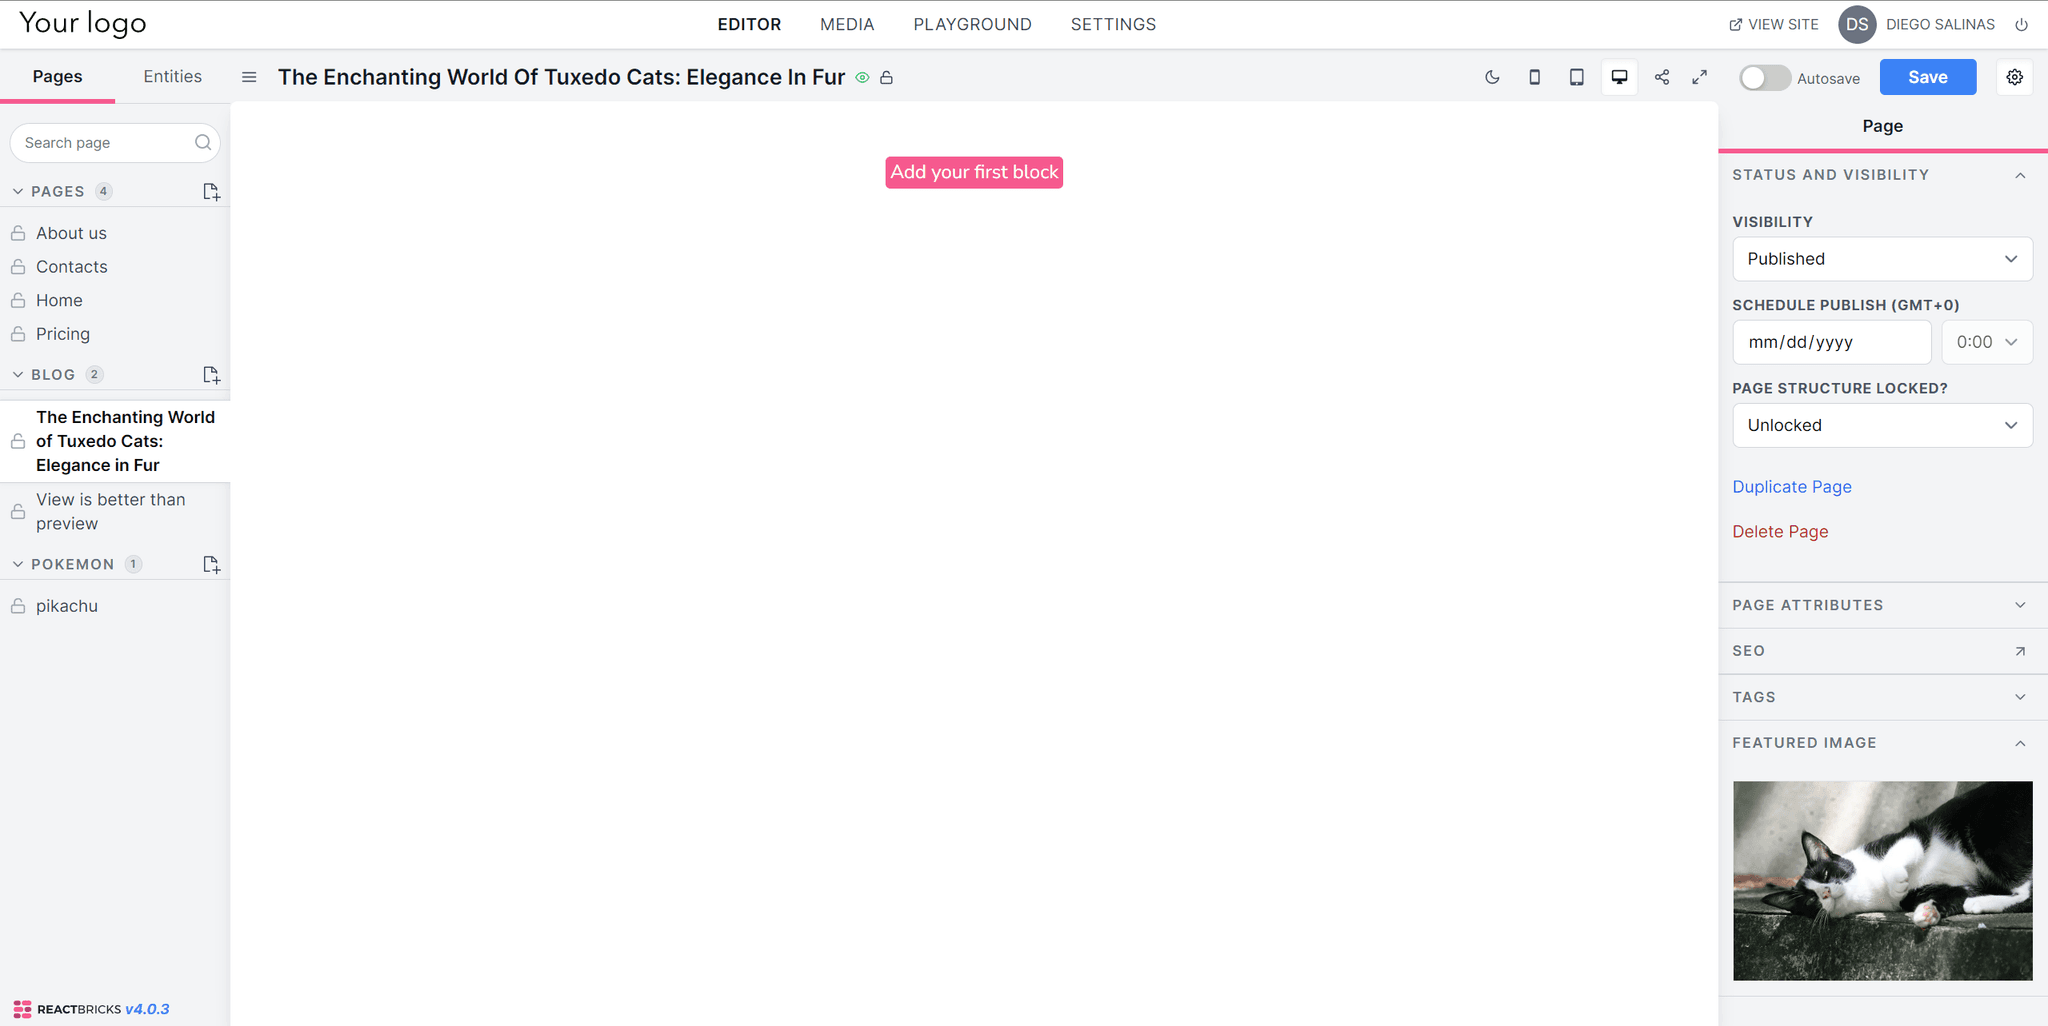
Adding a featured image
Let’s use Unsplash to select a featured image that will appear on the blog page
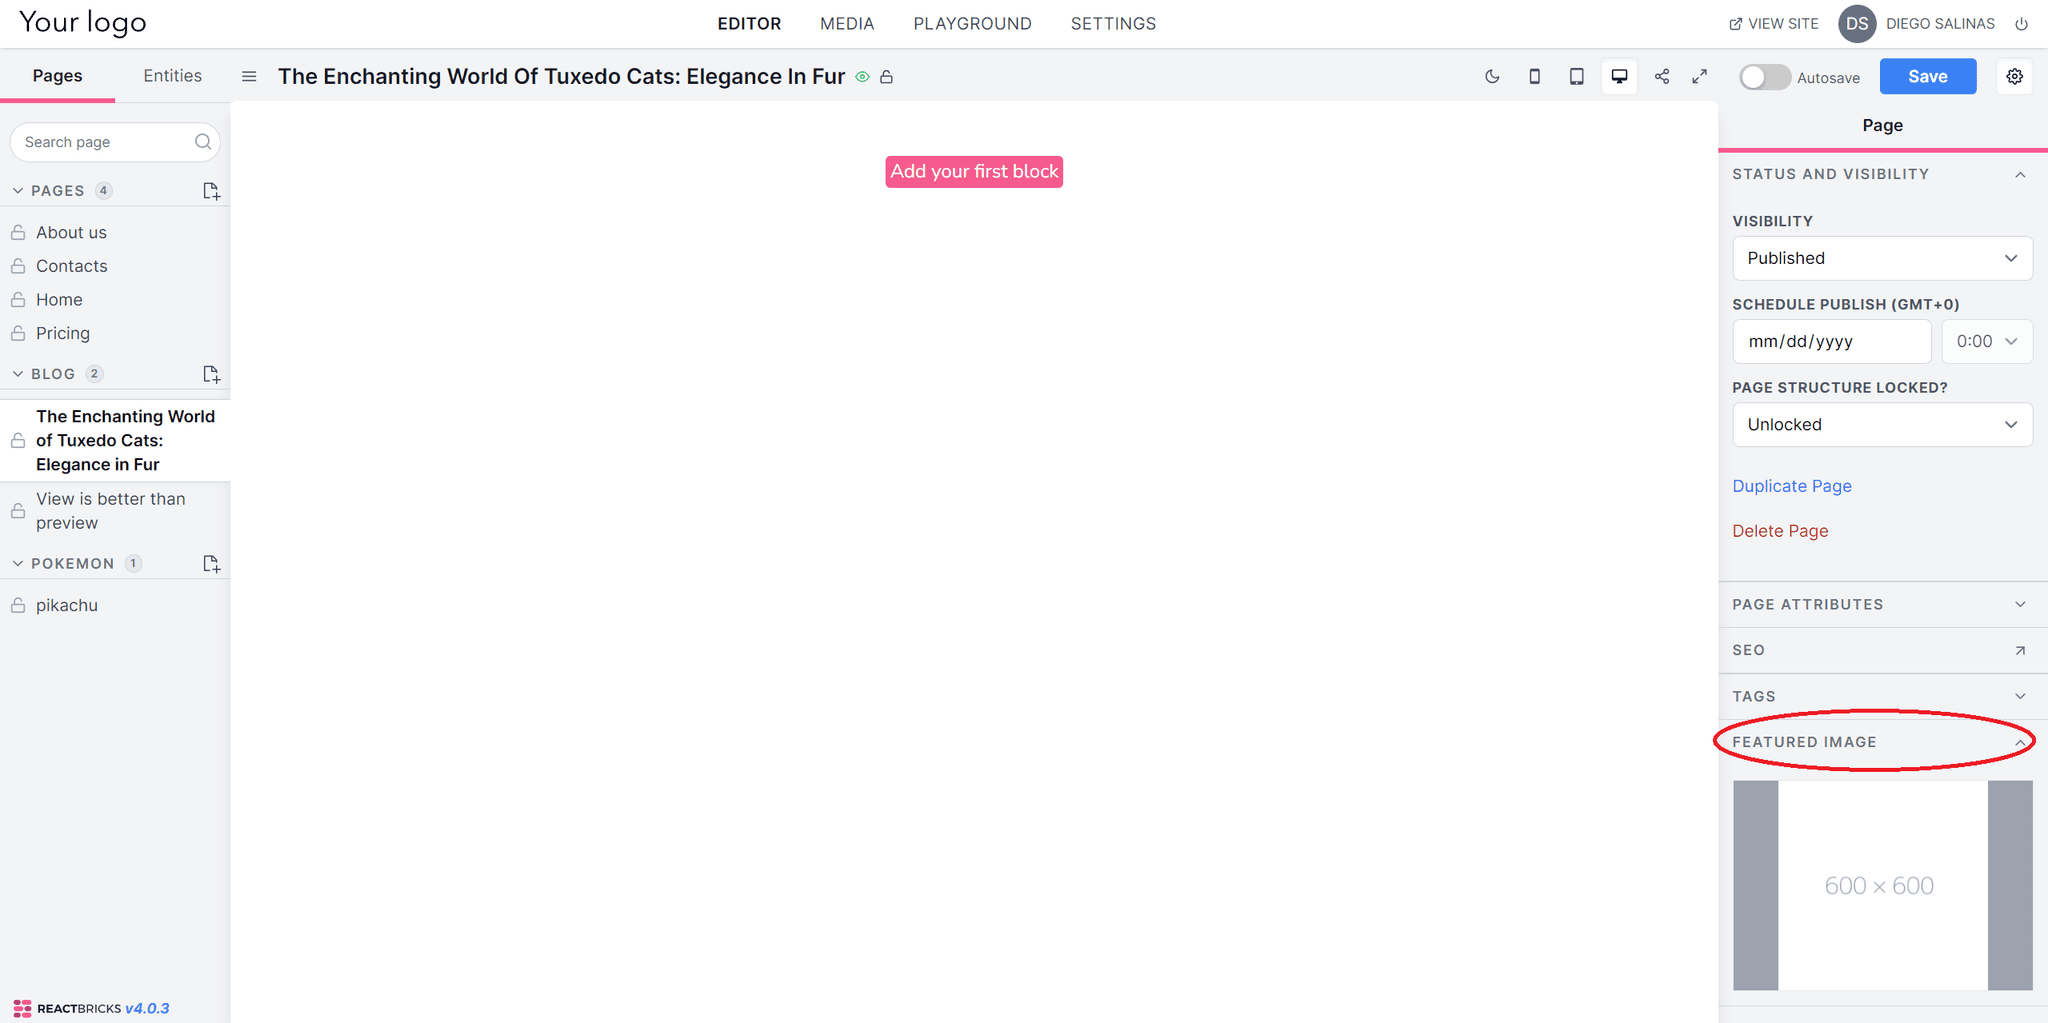
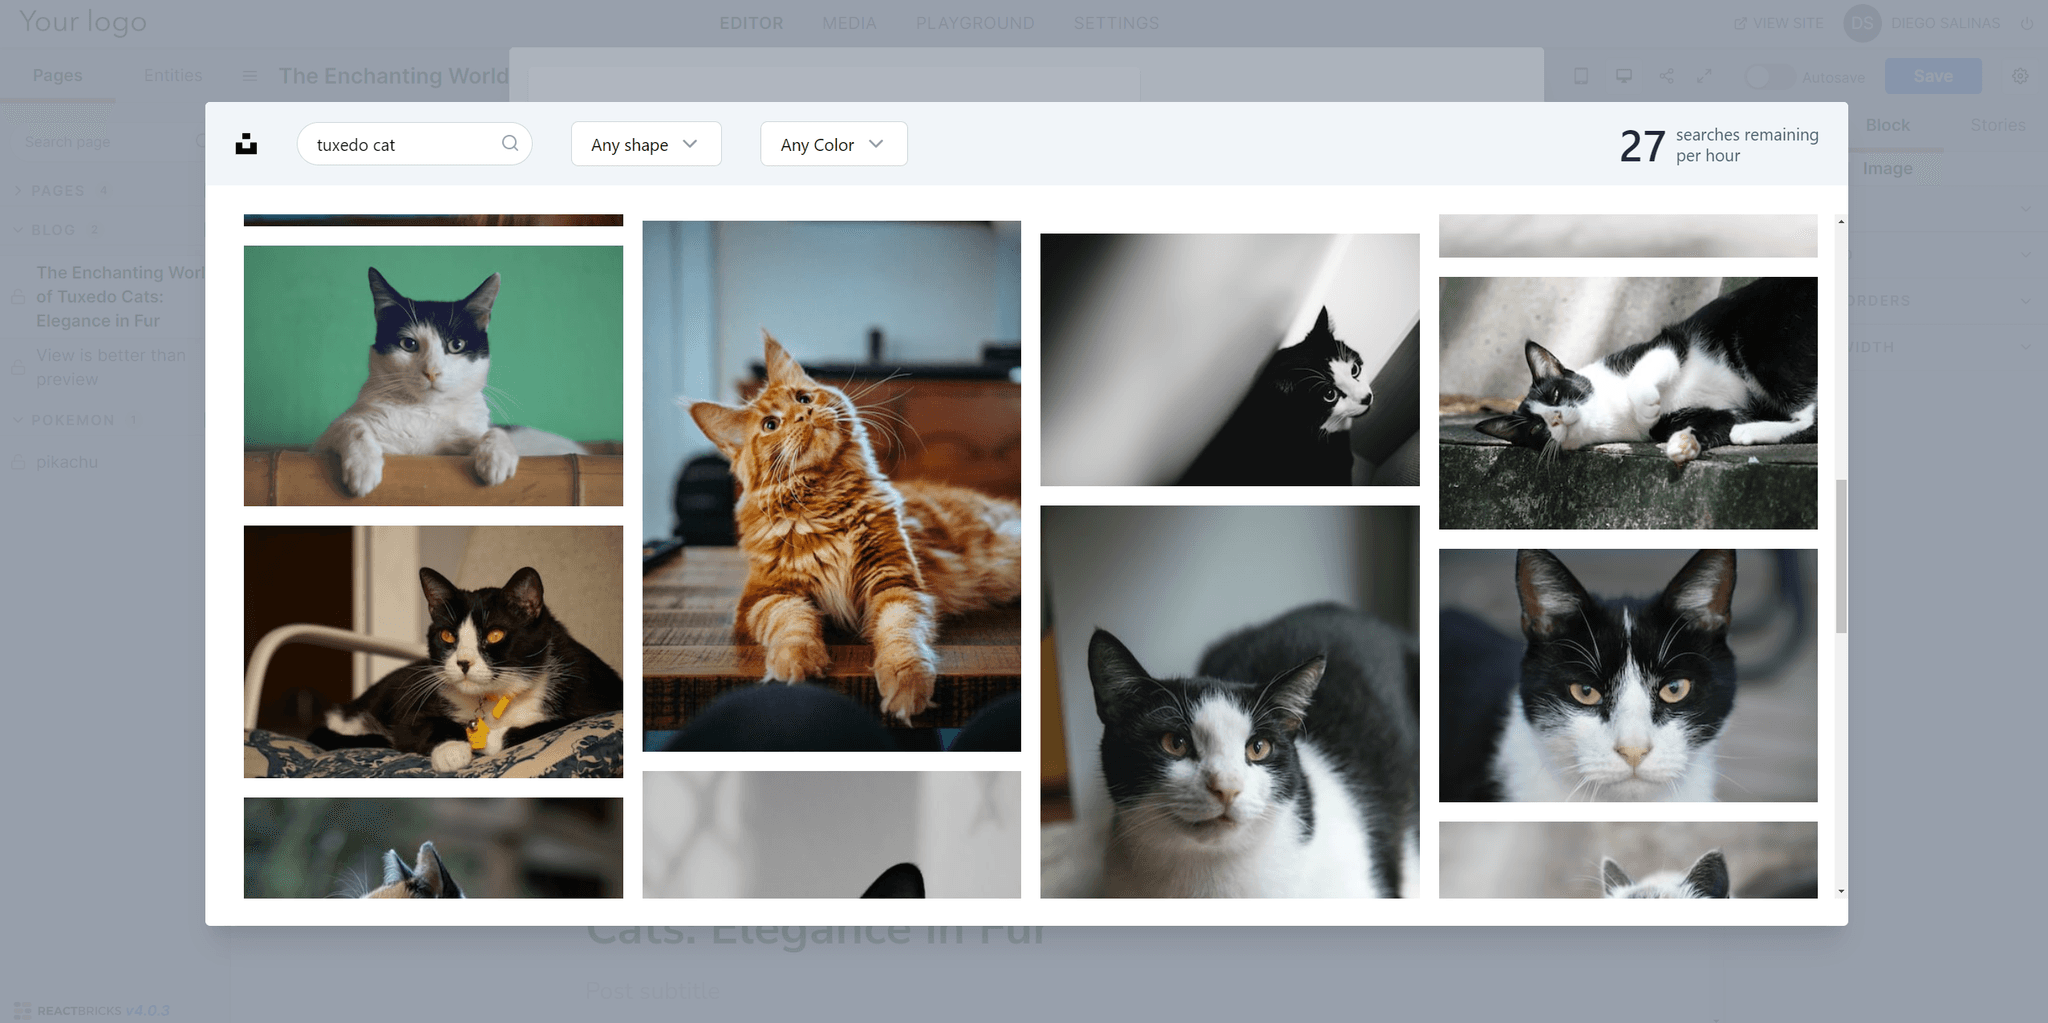
Voila!
Adding a header image
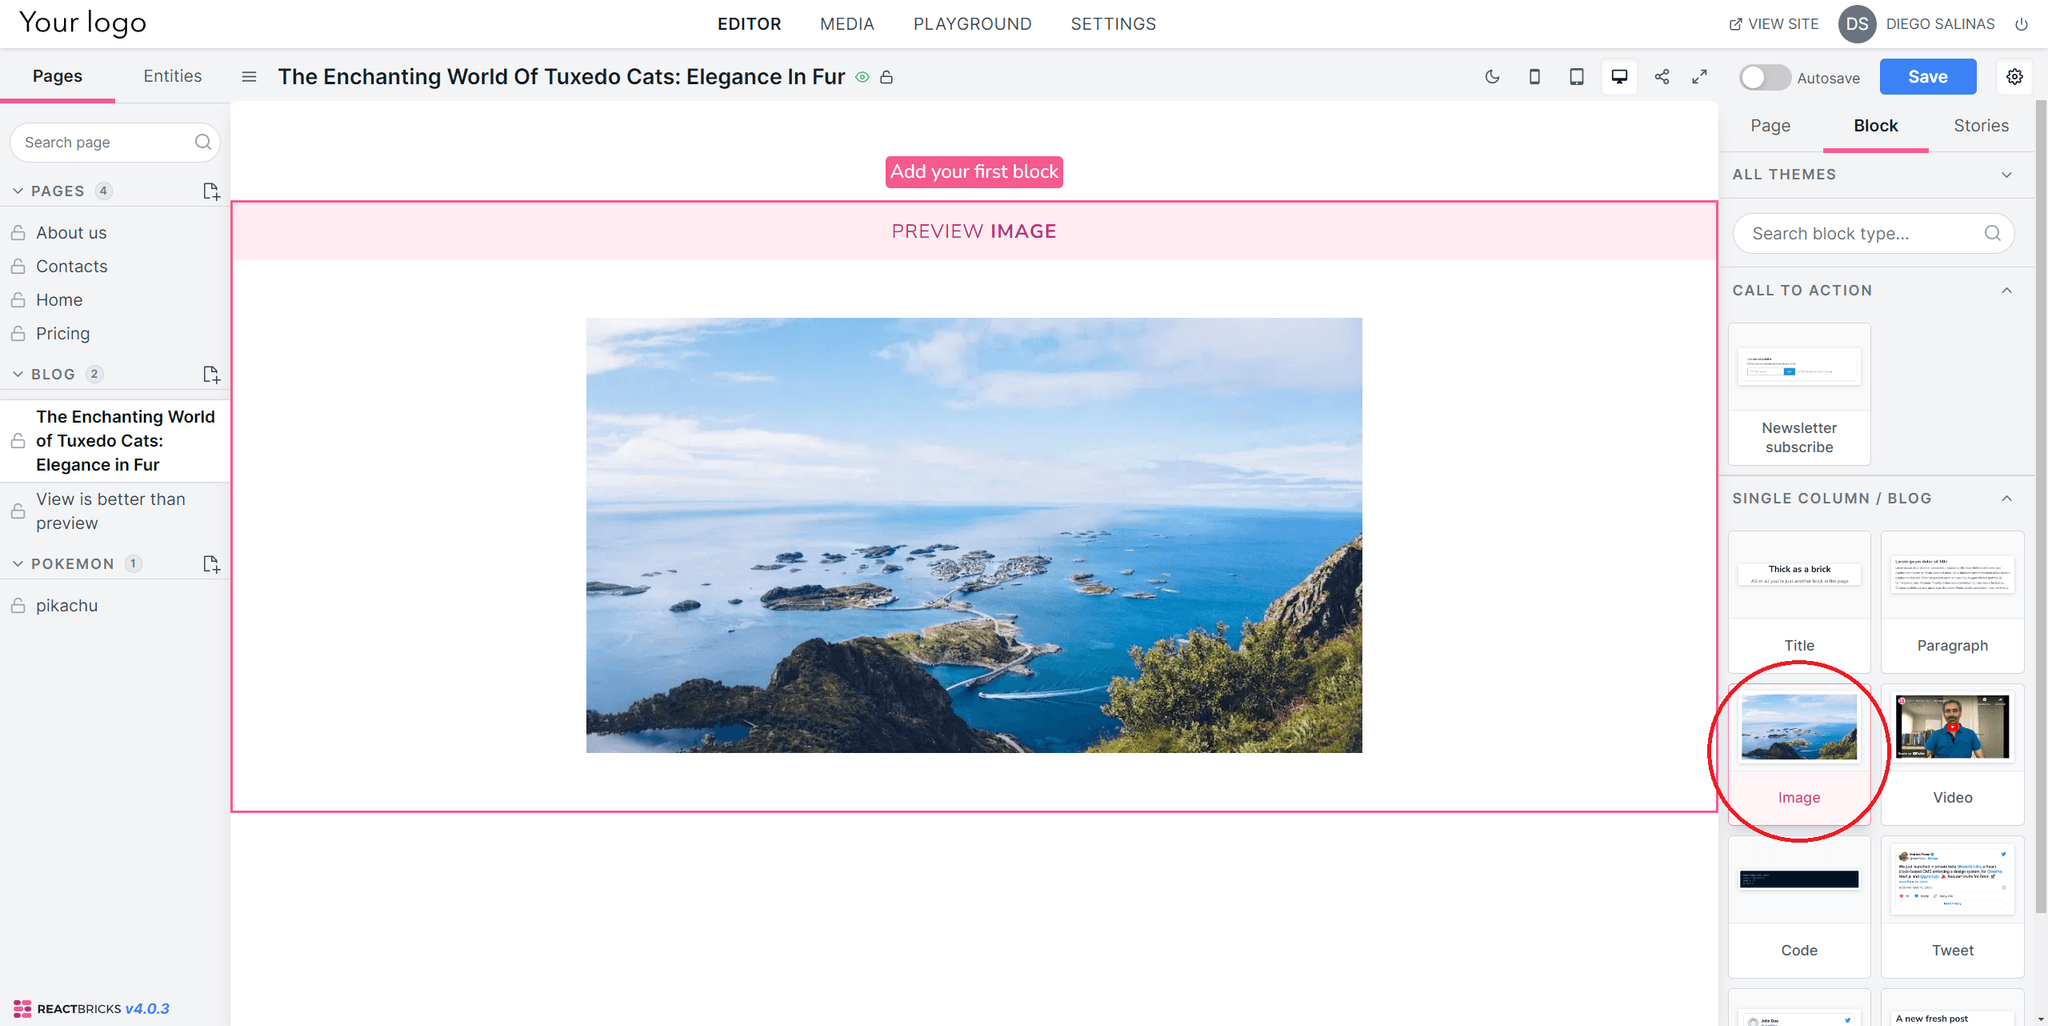
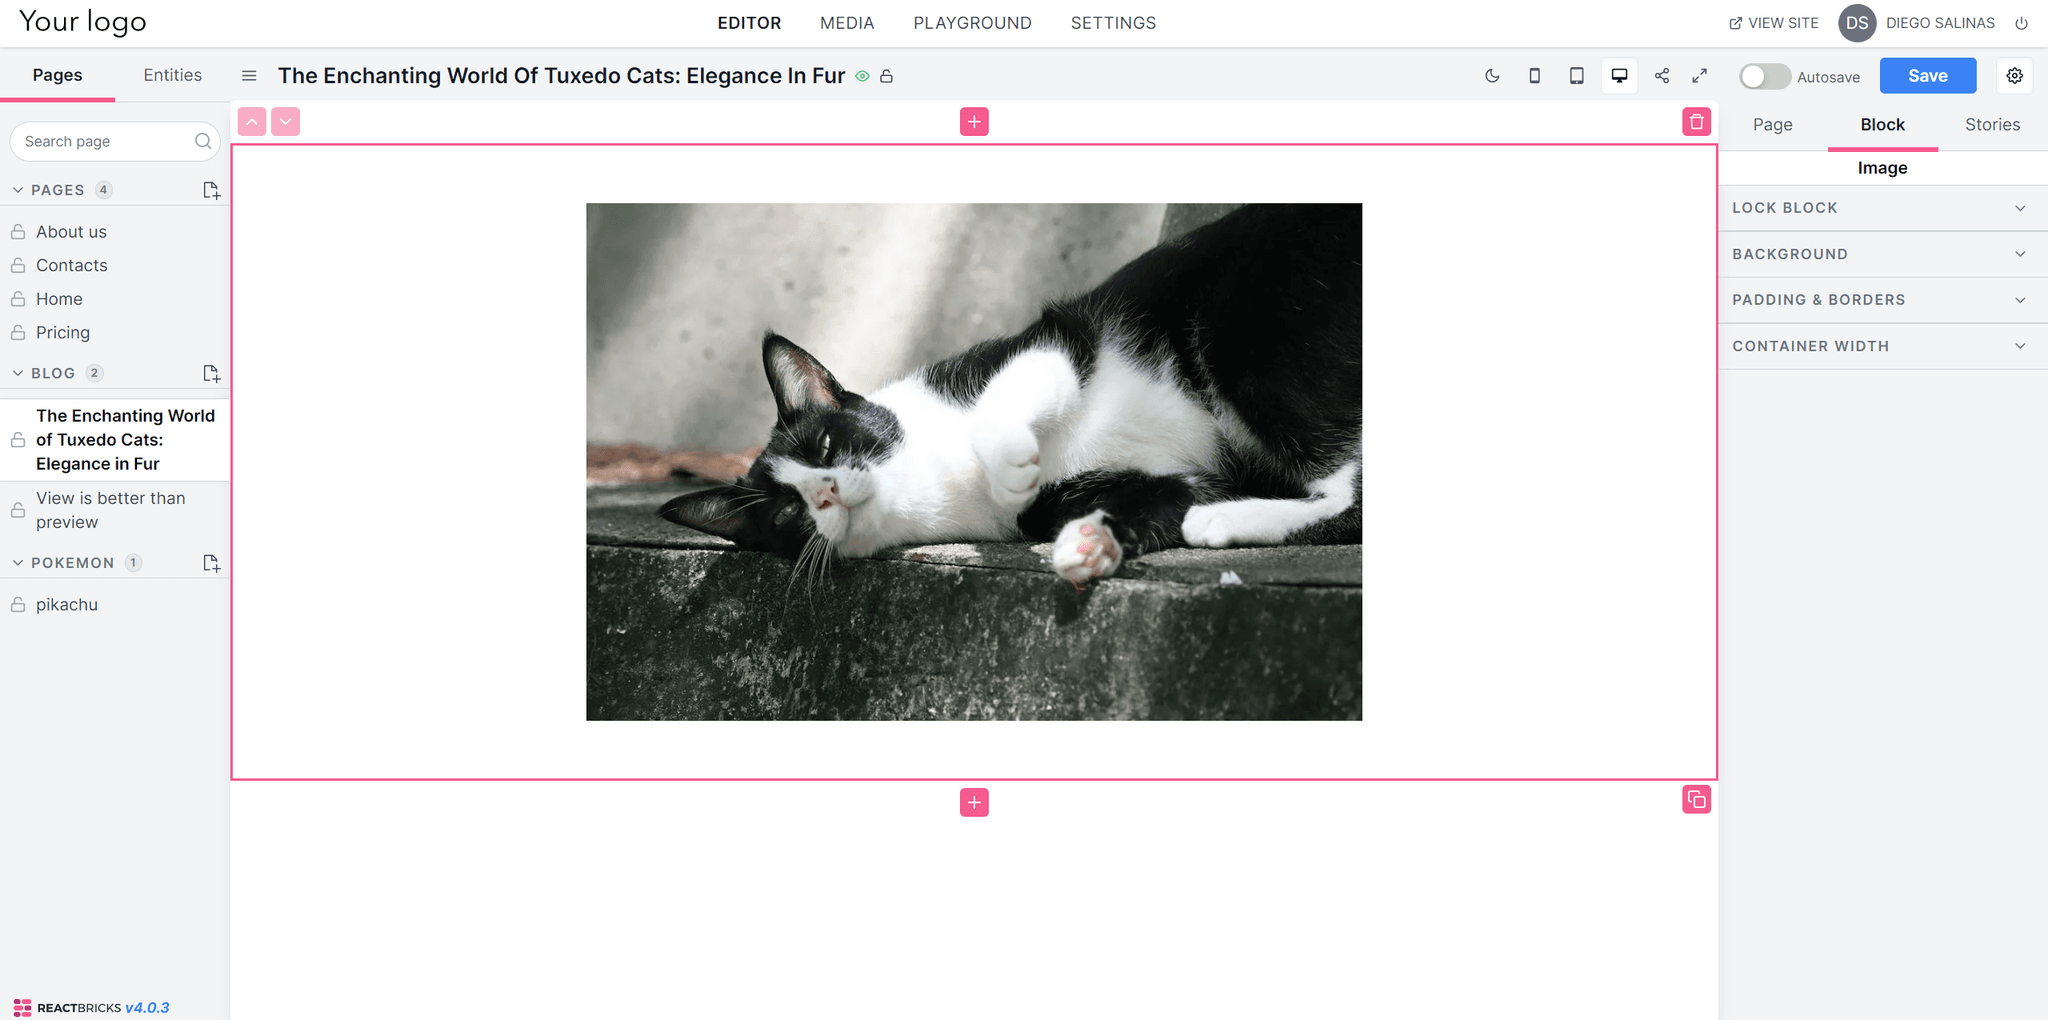
Now, let’s do the same procedure to add the same Cat picture as the article header image. Select an Image block and replace the image with the same cat image from Unsplash like I showed you.
Adding a title and a subtitle
It’s time to edit the title and text in the blog. Add a new brick and select Blog title.
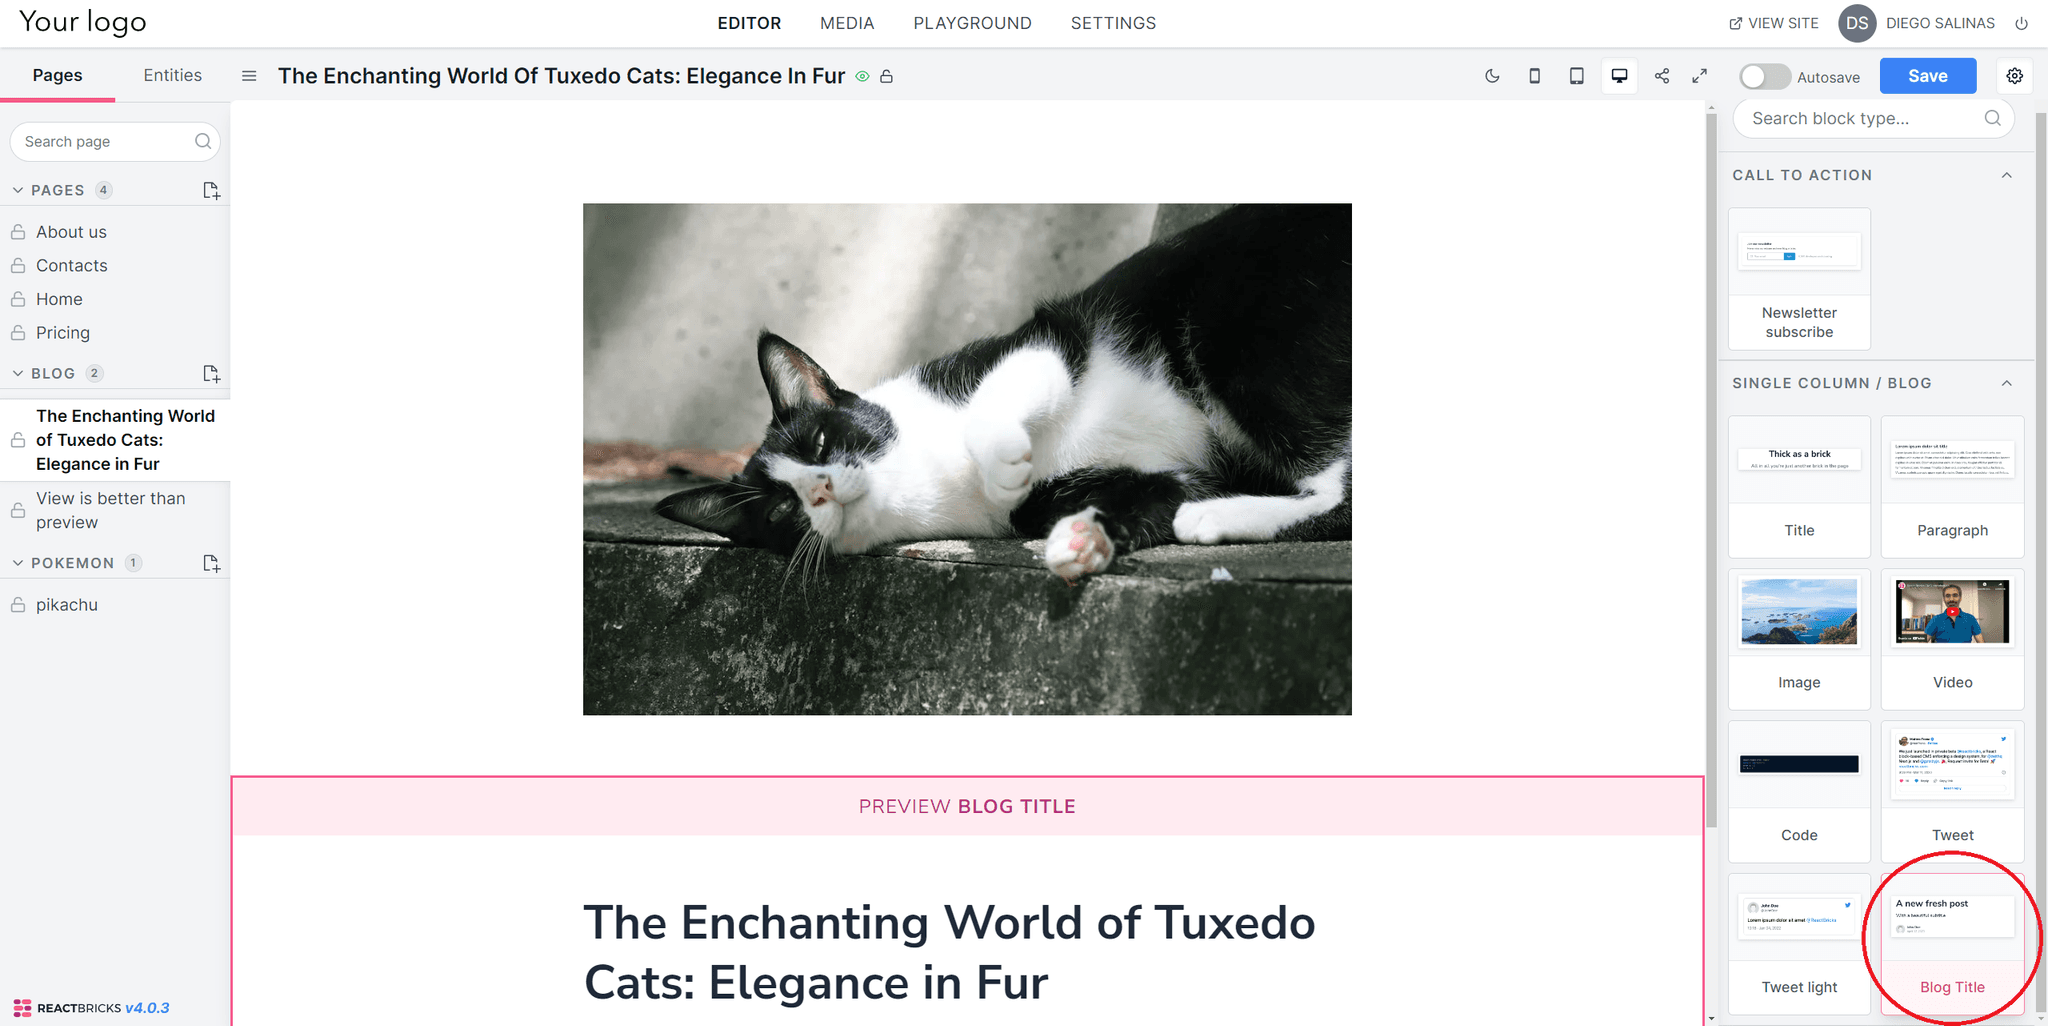
As you can see, the blog title gets created automatically based on what you chose as your title. Pretty handy, huh?
Write a subtitle and your title is ready. You can choose not to add a subtitle, but I think it looks cooler with a subtitle.
Populating your blog with content
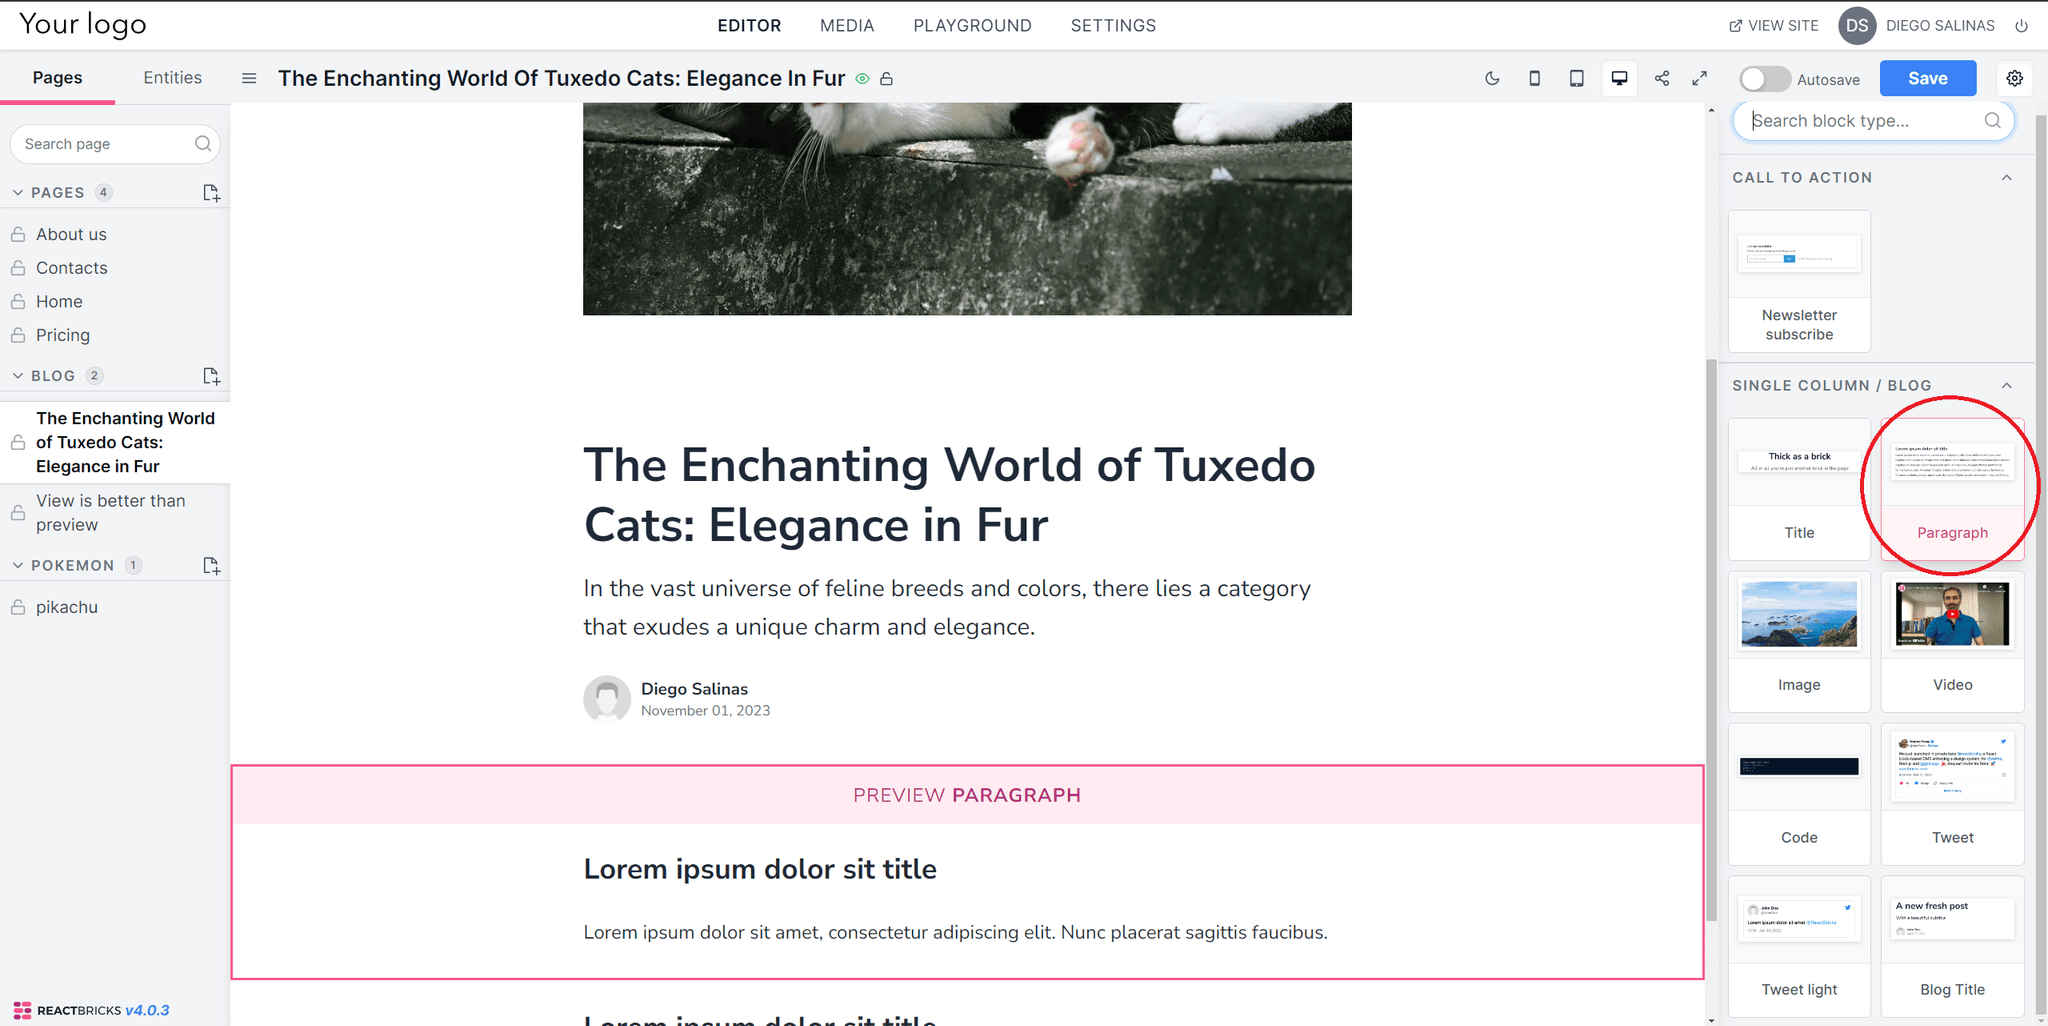
Add a Paragraph block to your blog post and you’ll see it comes with some placeholder text. Erase it and paste your content.
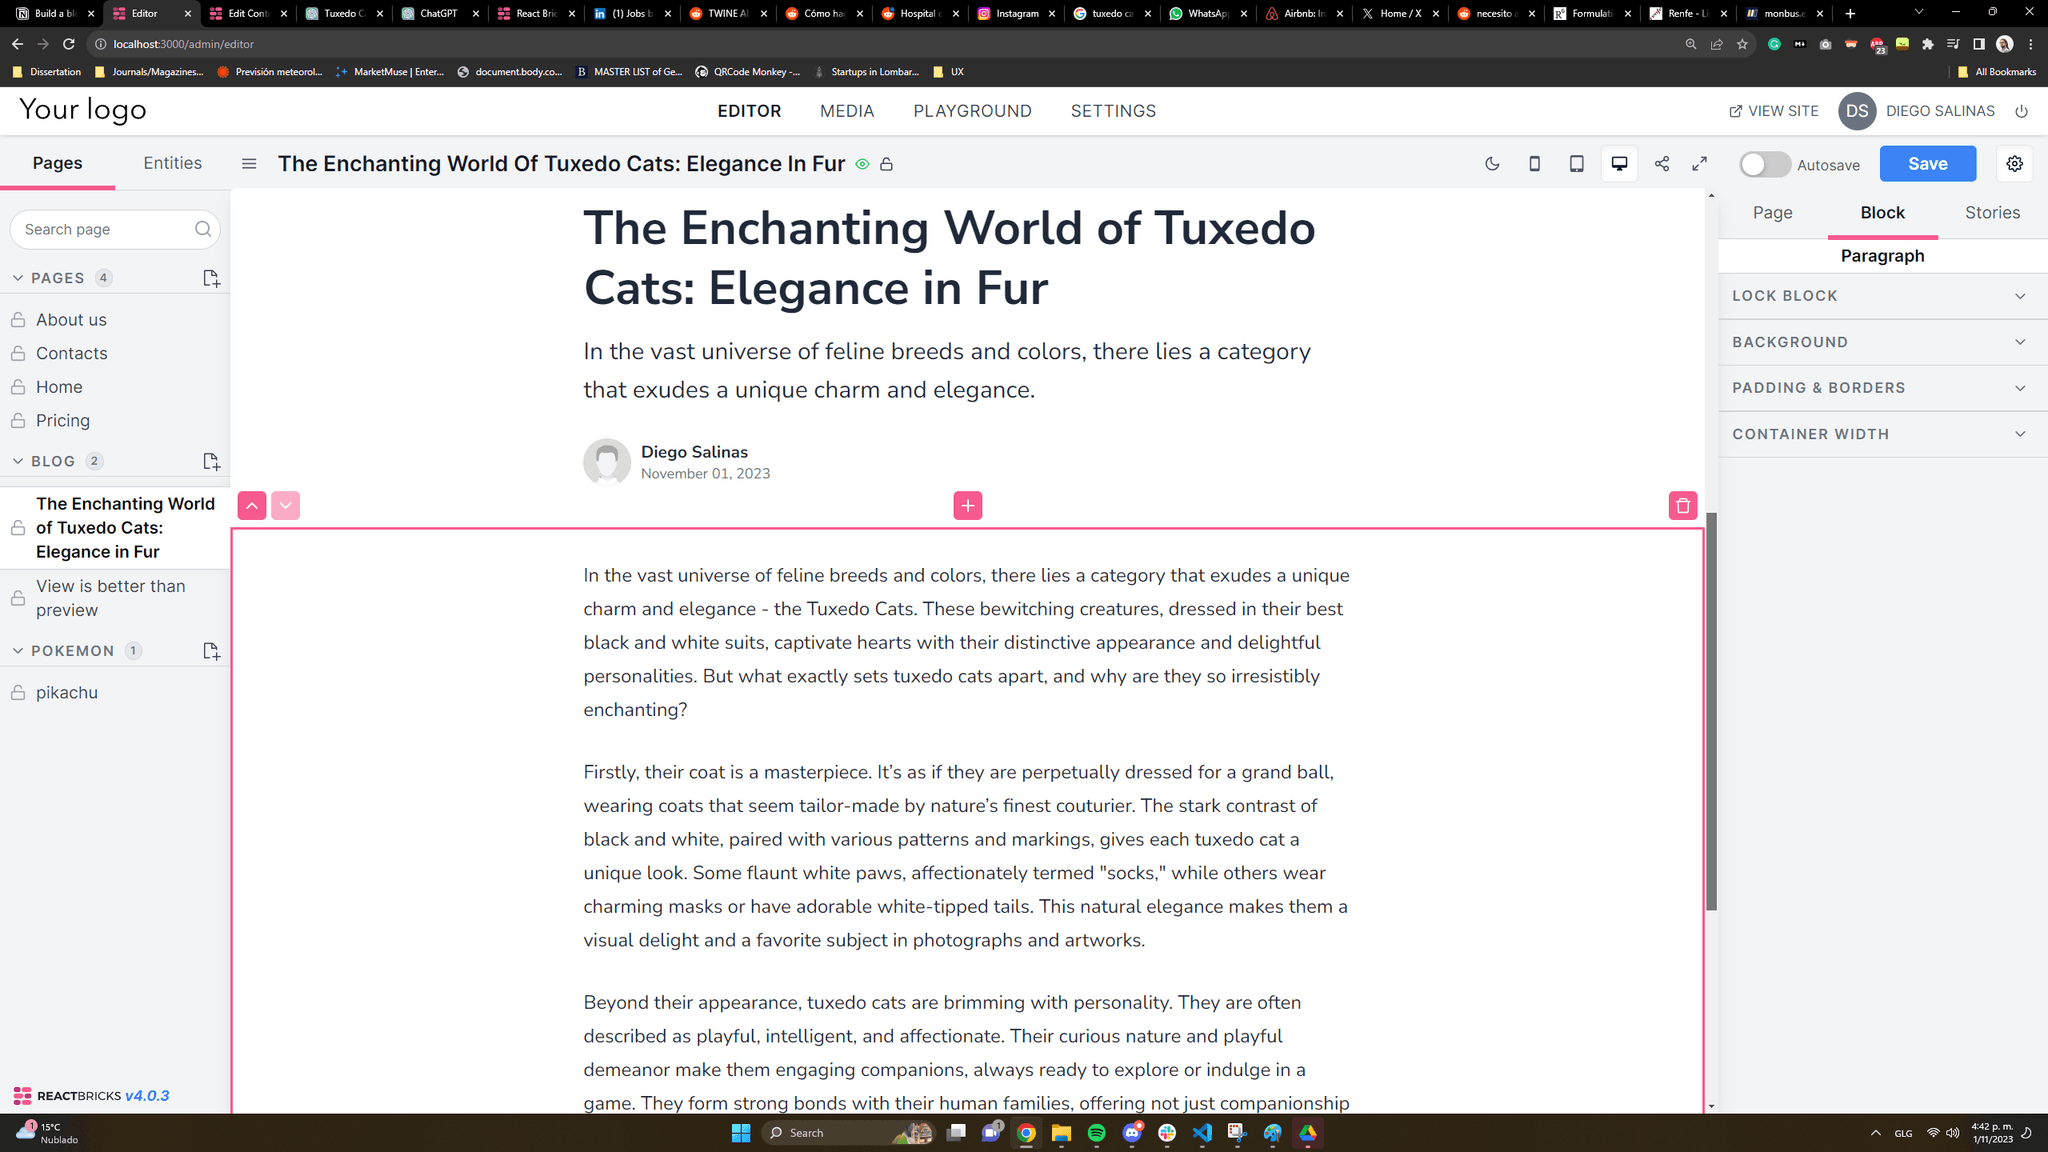
Creating a call to action
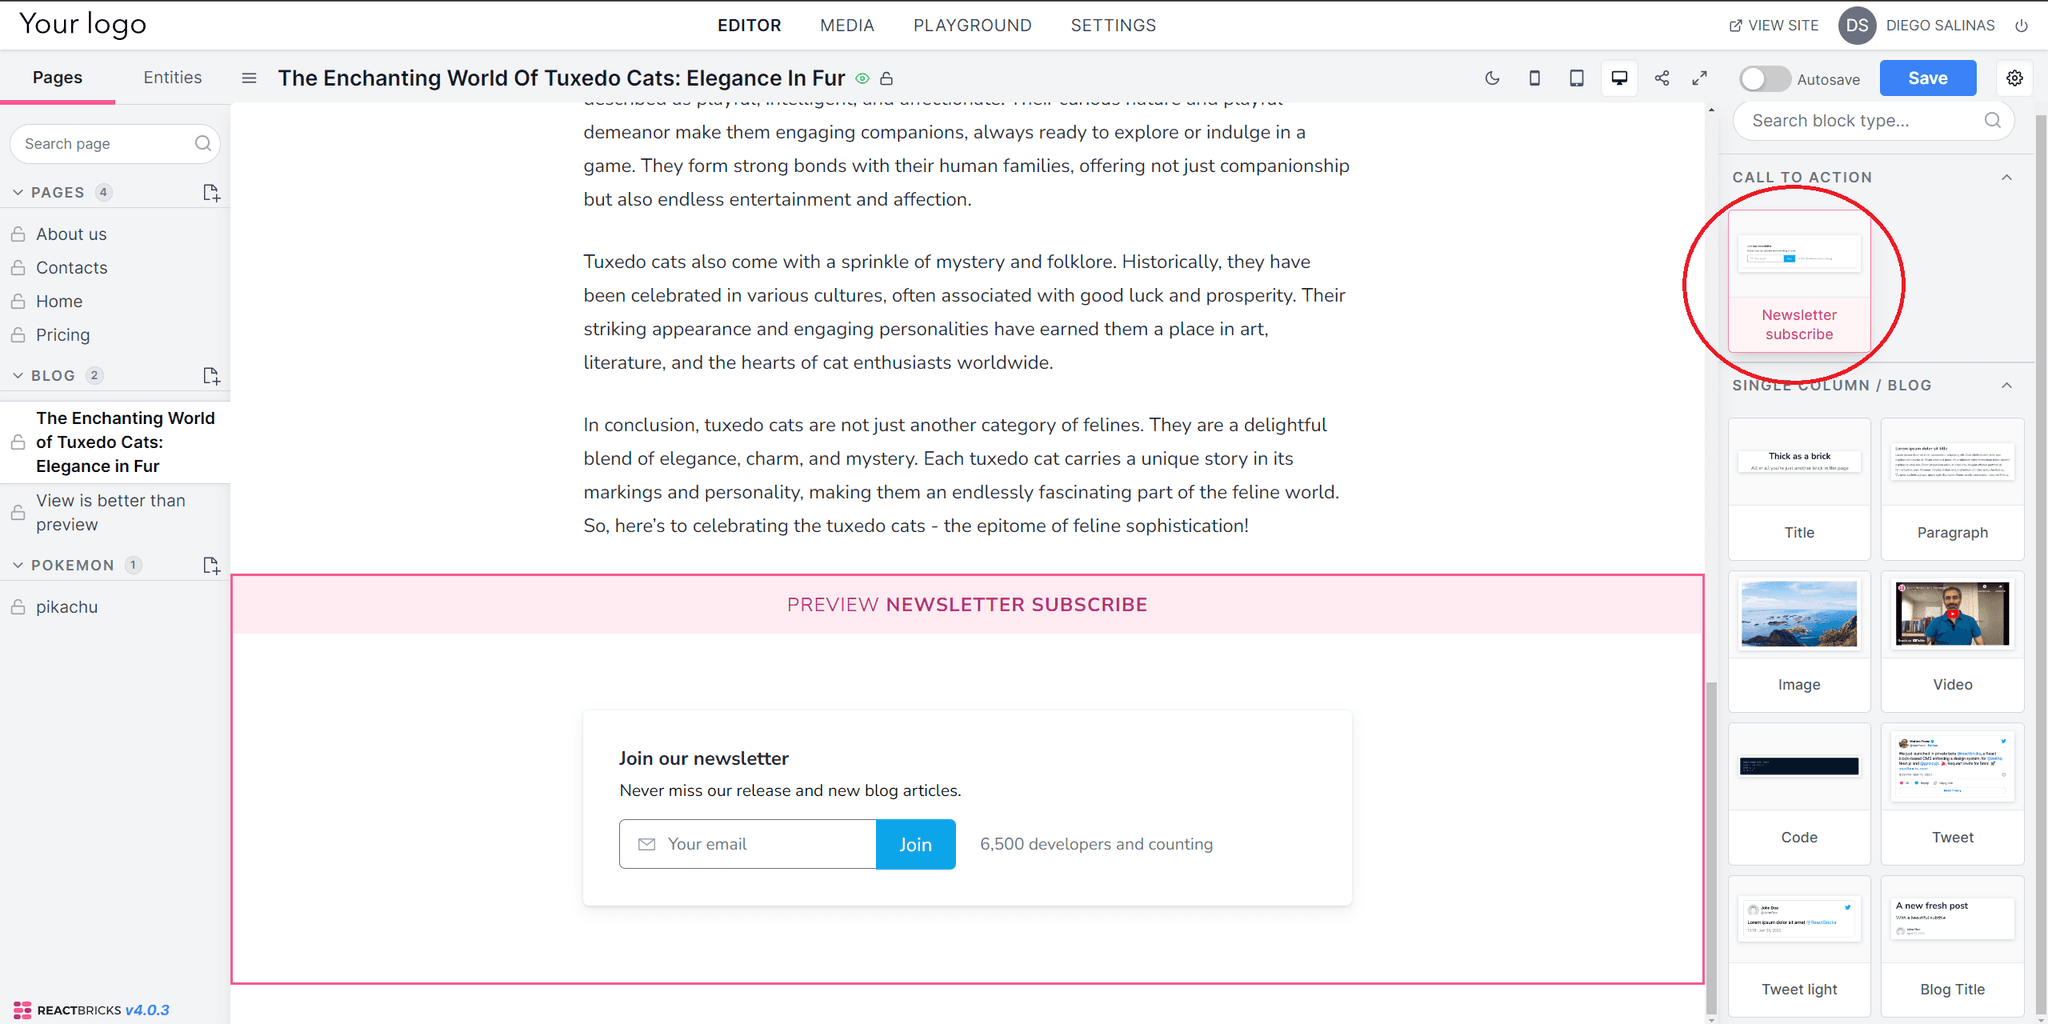
No blog post is complete without a solid call to action, and React Bricks has got you covered with a Newsletter Subscribe button. Click on the + button and select the block
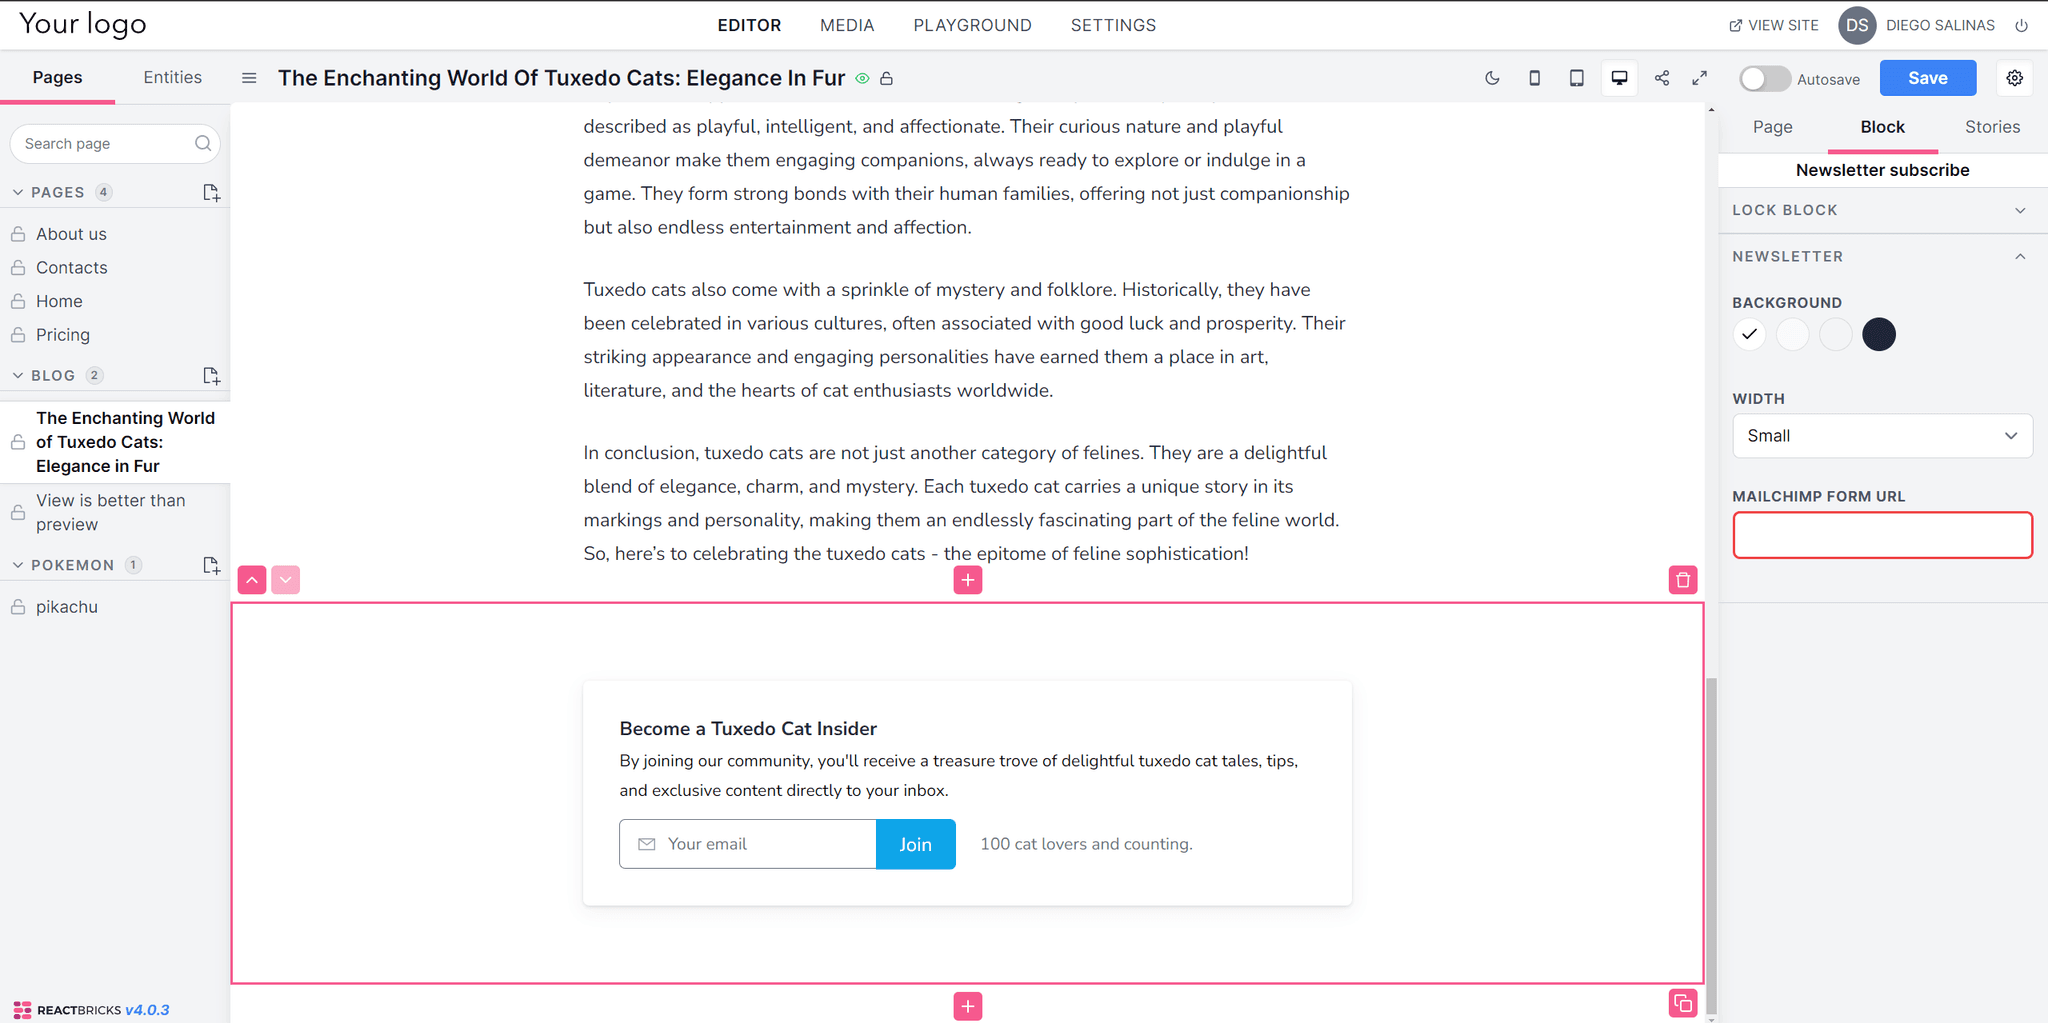
Edit your call to action and add a link to your Mailchimp form if you’re using it for email marketing.
And that’s it. Our blog is complete. Let’s preview it to see how it looks!
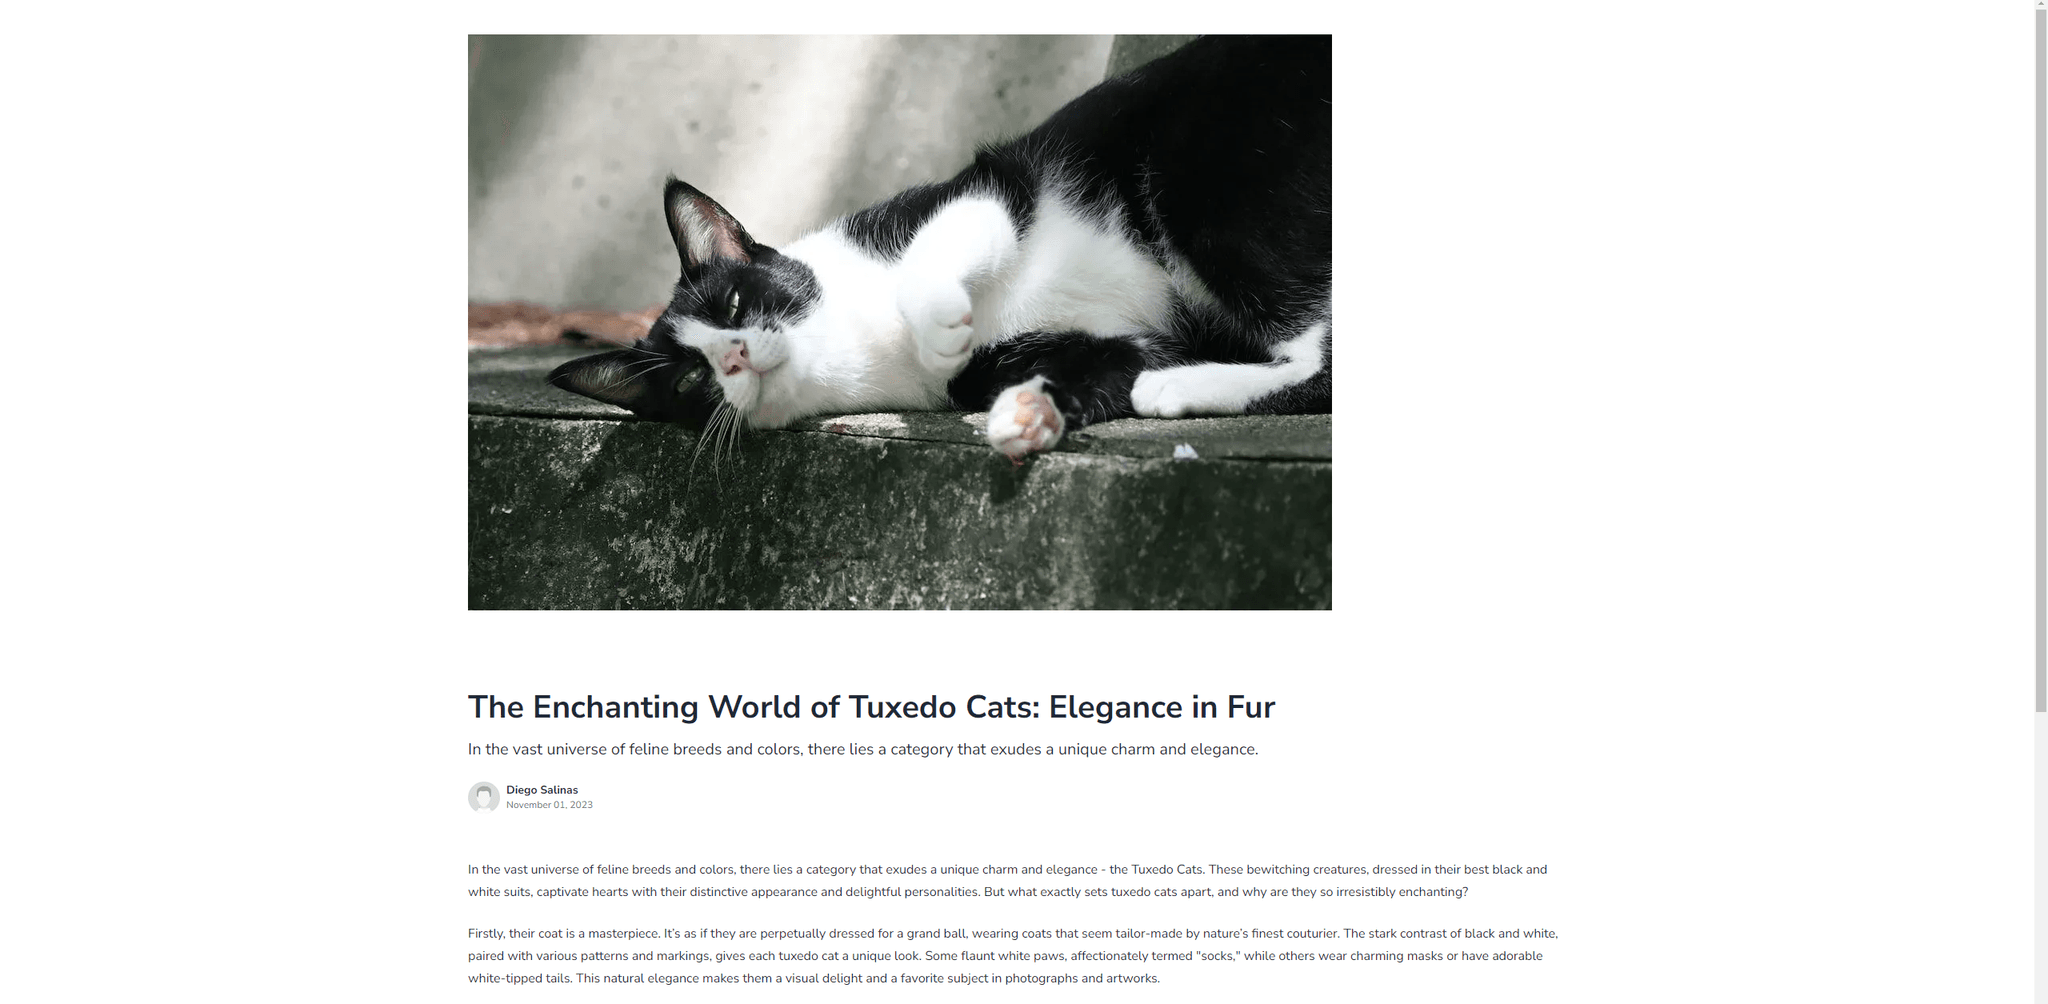
Looking good!
Optimizing our website for search engines
Now comes SEO, one of the most important parts of creating a website. React Bricks allows for granular optimization for your websites. Let’s take a look.
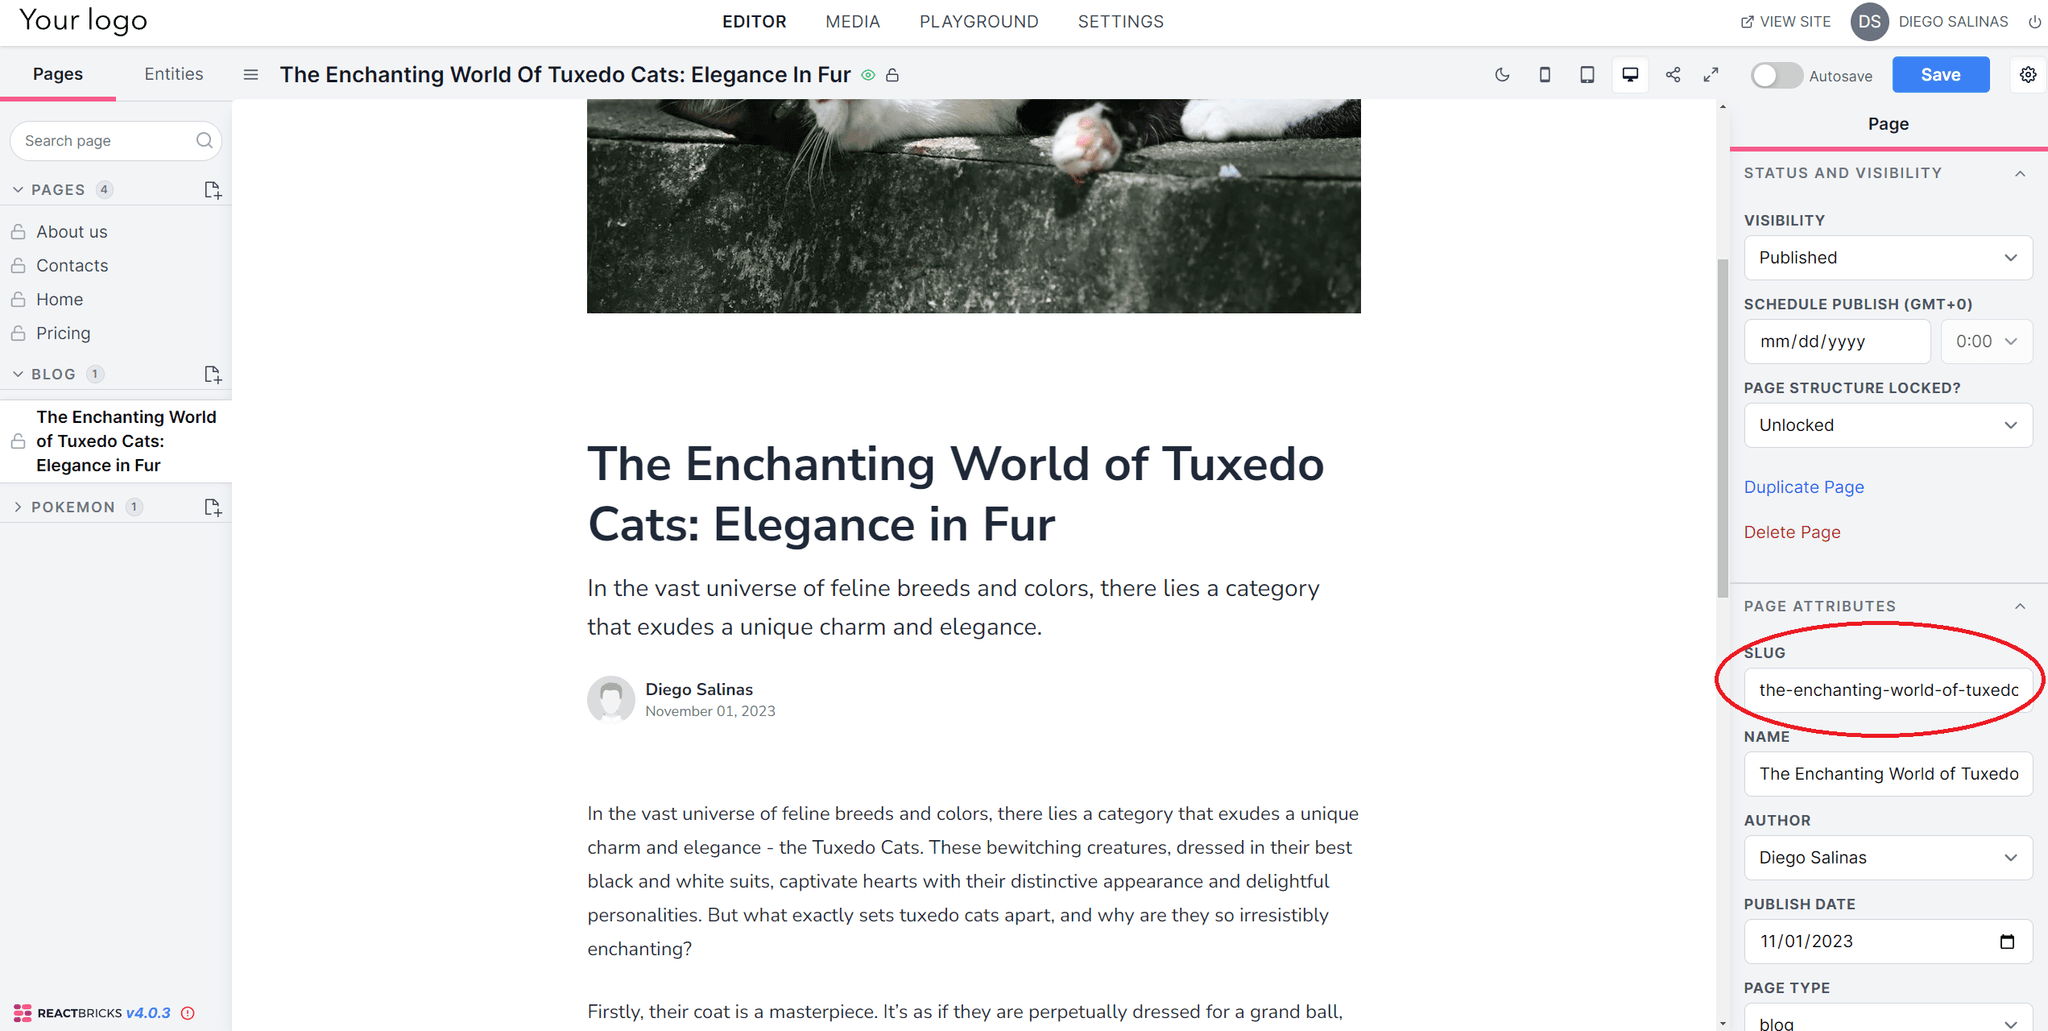
Changing the URL slug
One of the main things to do with your page, SEO-wise, is to change the slug. A URL slug is the end part of a URL after the backslash (“/”) that identifies the specific page or post.
Each slug on your web pages must be unique, as it provides readers and search engines with information about the web page or post.
In React Bricks, the default slug of your posts is the name of the article. While this may work sometimes, you can change it for something more specific to your focus keywords.
Changing the title and meta description
A meta description for SEO is an HTML attribute that provides a brief and concise summary of the content of a web page. It’s used on search engine result pages (SERPs) to display preview snippets for a page.
While the meta description does not directly influence page rankings, it is crucial for providing a compelling reason for users to click on your link rather than another.
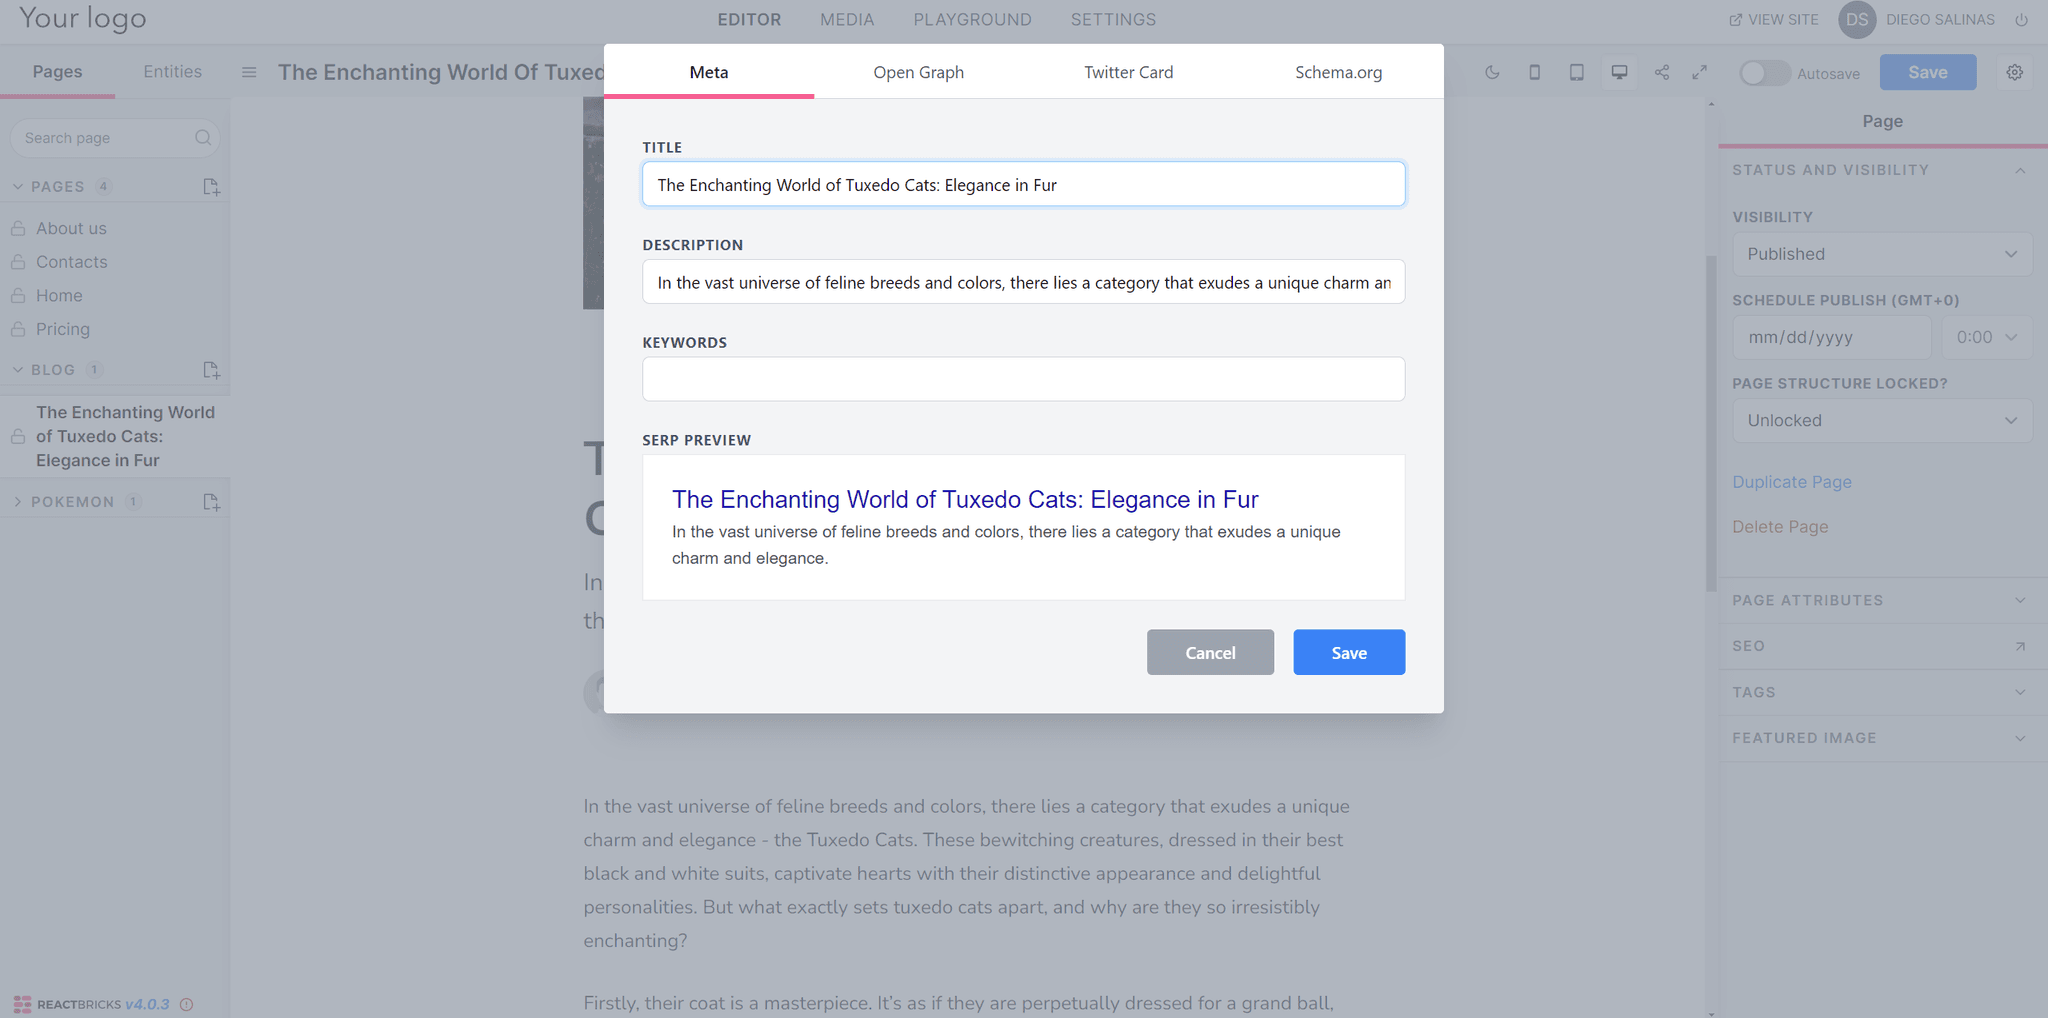
React Bricks uses your subtitle automatically as your meta description. You can change it for something more relevant. The same with your title.
Editing open graph tags
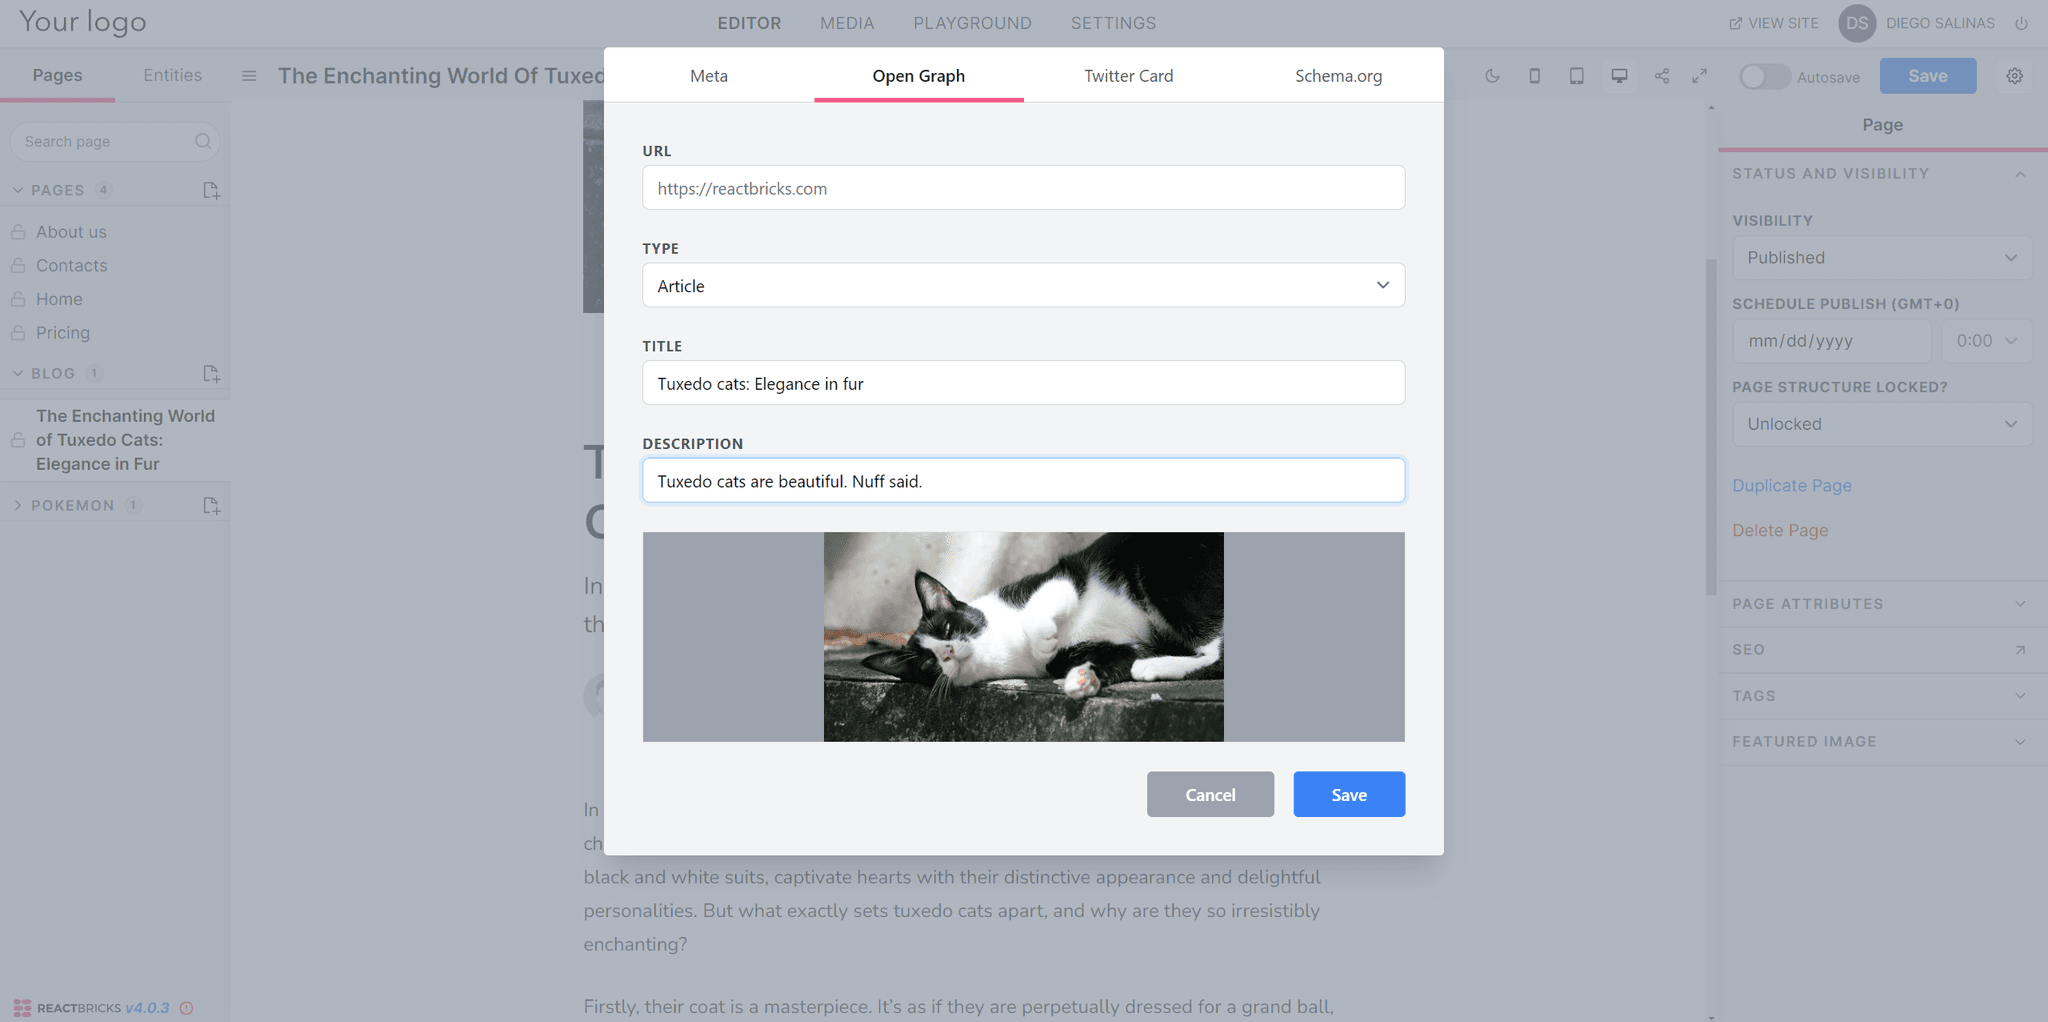
Open Graph tags are snippets of code that control how URLs are displayed when shared on social media.
They are part of the Open Graph protocol initially developed by Facebook. They are now widely used by other social platforms such as Twitter (via Twitter Cards), LinkedIn, and Pinterest to enhance the visual appeal and contextual relevance of shared content.
You can choose among different tags and add a picture to display on your socials. I chose the same picture as the featured image and changed the title and description a bit to spice things up.
Editing Twitter card
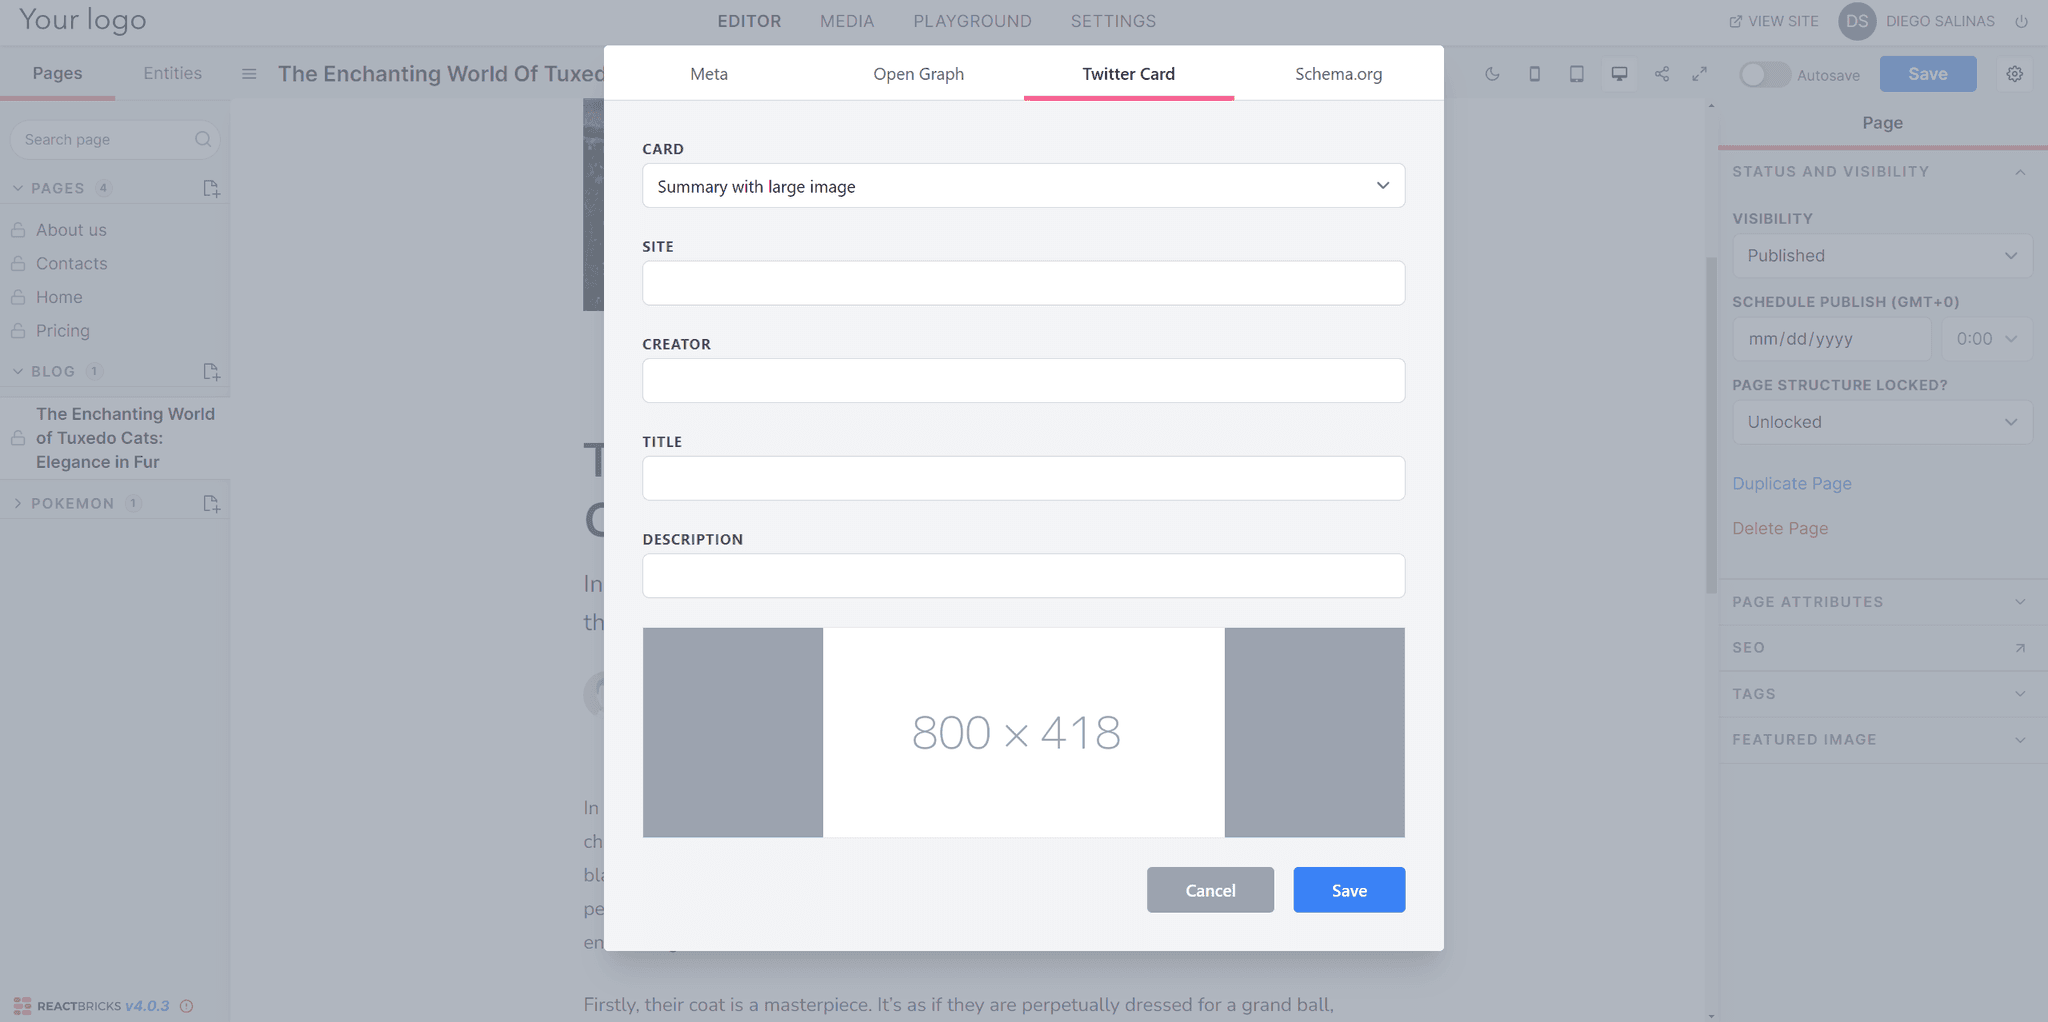
A Twitter Card is a type of markup used by Twitter to allow for the attachment of rich photos, videos, and media experiences to Tweets that link to your content. It's similar to Open Graph tags but specifically tailored for Twitter's platform.
You can choose between different cards depending on the type of content on the page, add a creator, the title, add a description, and a specific URL to the site.
Fine-tuning your schema
Schema.org provides a shared vocabulary that webmasters can use to mark up their pages in ways that can be understood by major search engines, including Google, Bing, Yahoo!, and Yandex.
This shared markup vocabulary makes it easier for search engines to parse and interpret the information on web pages, which can then be used to improve search result listings and make them more informative (via rich snippets, for example).
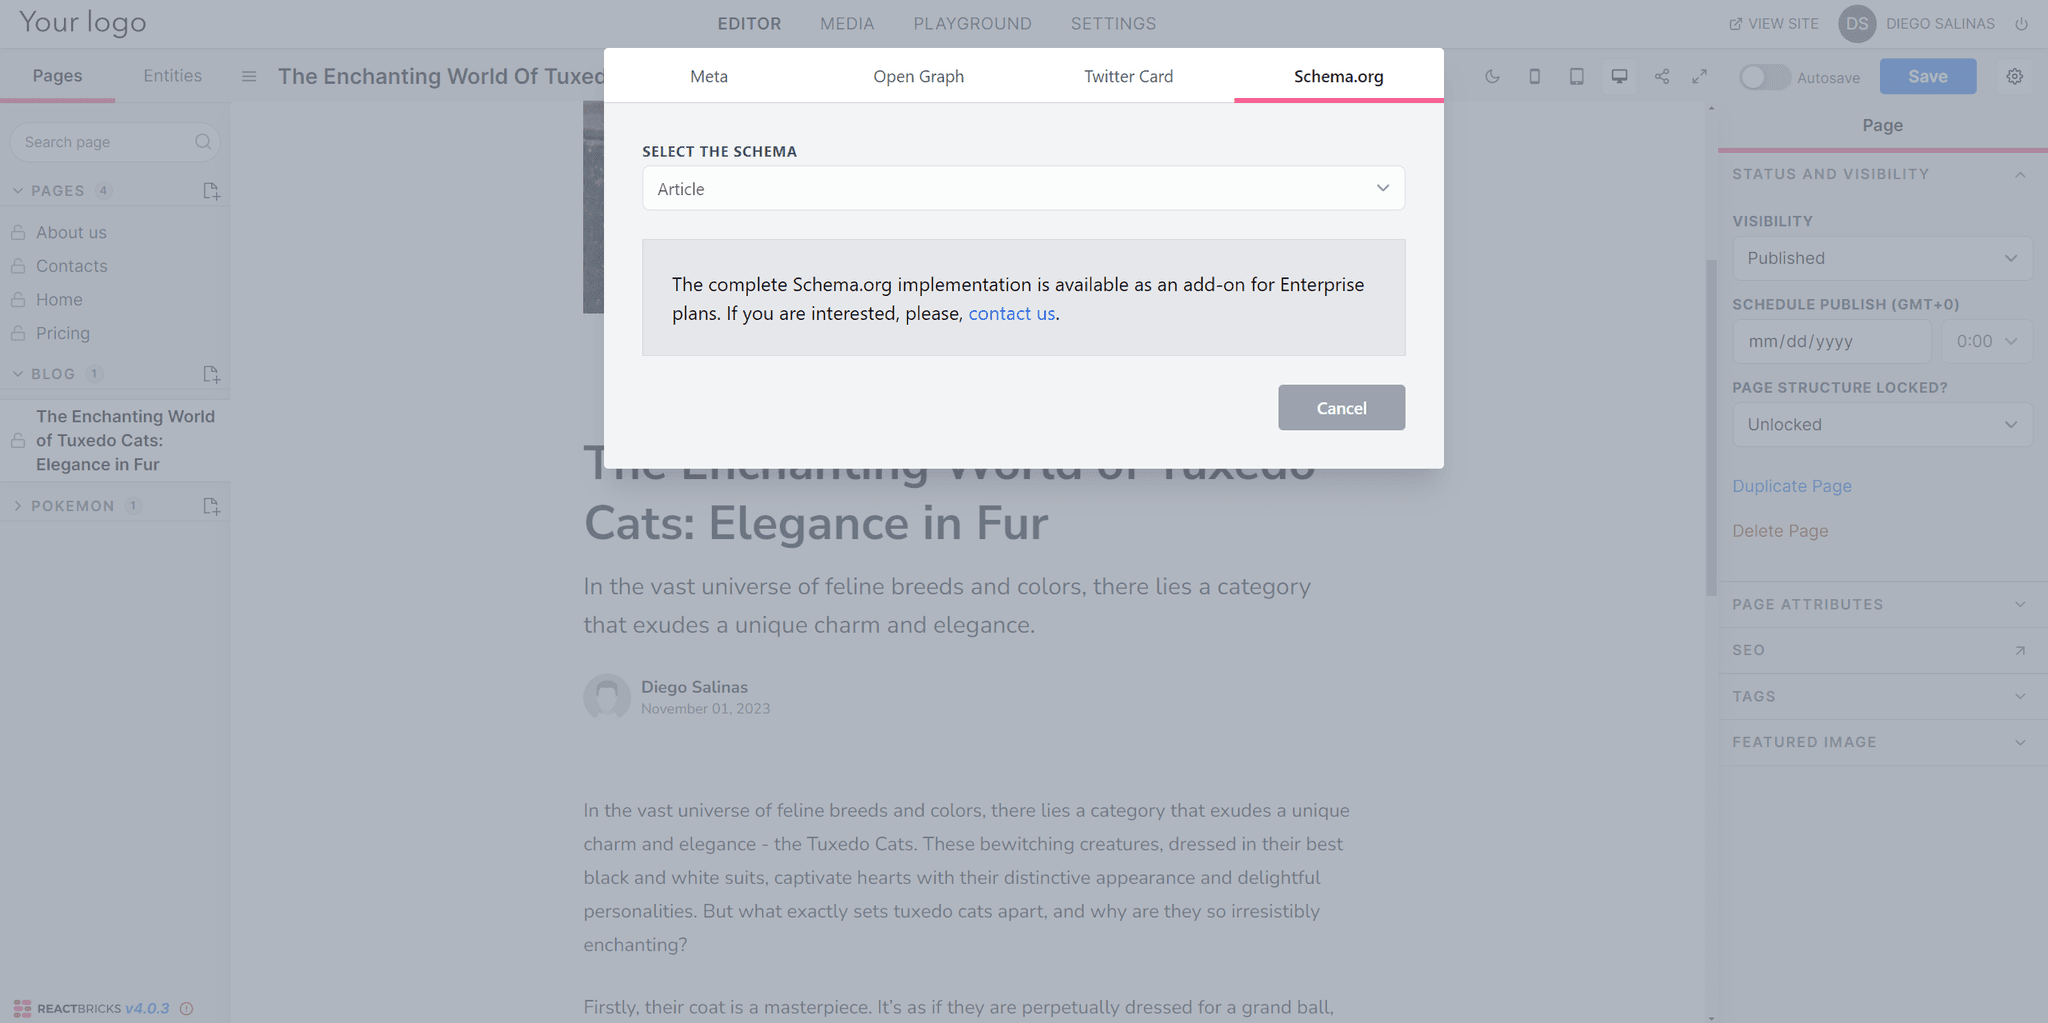
If you want to be able to fine-tune your Schema, you need an enterprise plan.
Now we’re ready to deploy our site!
Deploy the website
Create a Git repo
The fastest way to host your website on Vercel or Netlify is to connect their service to your git repository on GitHub (or BitBucket or GitLab).
First of all, let's create our local Git repo, if we didn’t create it before:
git init
Now, if you are using Visual Studio Code, you'll see that you have all the files to commit. We can create a first commit using the VSCode interface, or using the following shell commands.
First of all we need to add all the files:
git add -AAnd then create the first commit:
git commit -m "First commit"Now, let’s create a GitHub repository and add it as “remote”, so that our project will be synced with the GitHub cloud service. We can create the repo from the GitHub website or, if we installed the GitHub CLI, running the following CLI command:
gh repo createChoose Push an existing local repository to GitHub and choose the repository name so it matches the name of your project:

If you created the repository from the GitHub website, you’ll need to add the remote using the command suggested by GitHub after the creation.
It’s time to push your code to GitHub. You can either click the cloud icon on VSCode or use the git command:
git push -u origin masterGreat, now our code is on the cloud, ready to be read by Vercel or Netlify.
Create the project
In this tutorial, we will deploy to Vercel. So, access your Vercel account at Vercel.com
Click on the "Start Deploying" button, then use "Import Git Repository" section to authenticate to your Git provider. (I used GitHub for this tutorial). Select the repository you created for this tutorial and click the "Import" button.
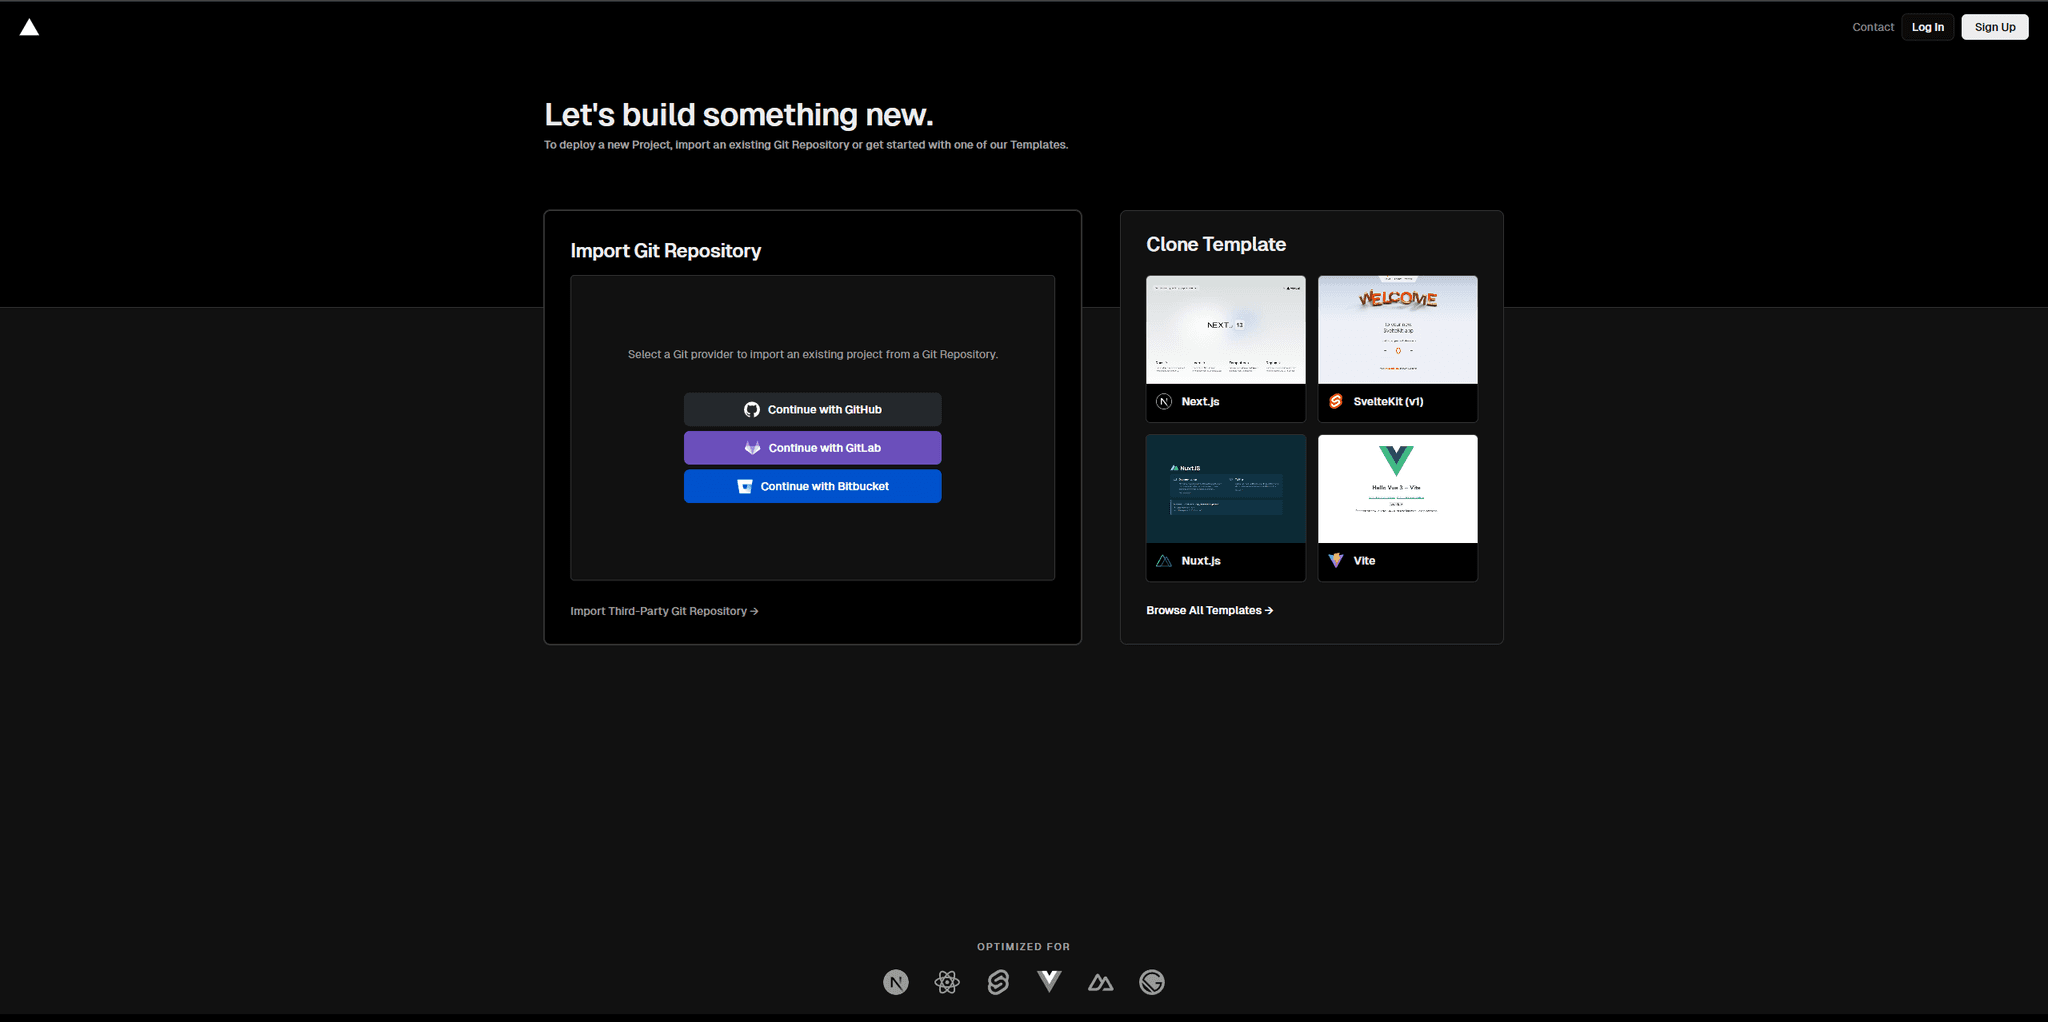
On the "Import project" page, leave all the default options for a Next.js project, but expand the "Environment Variables" section. Add the two variables that you can find in your project .env file:
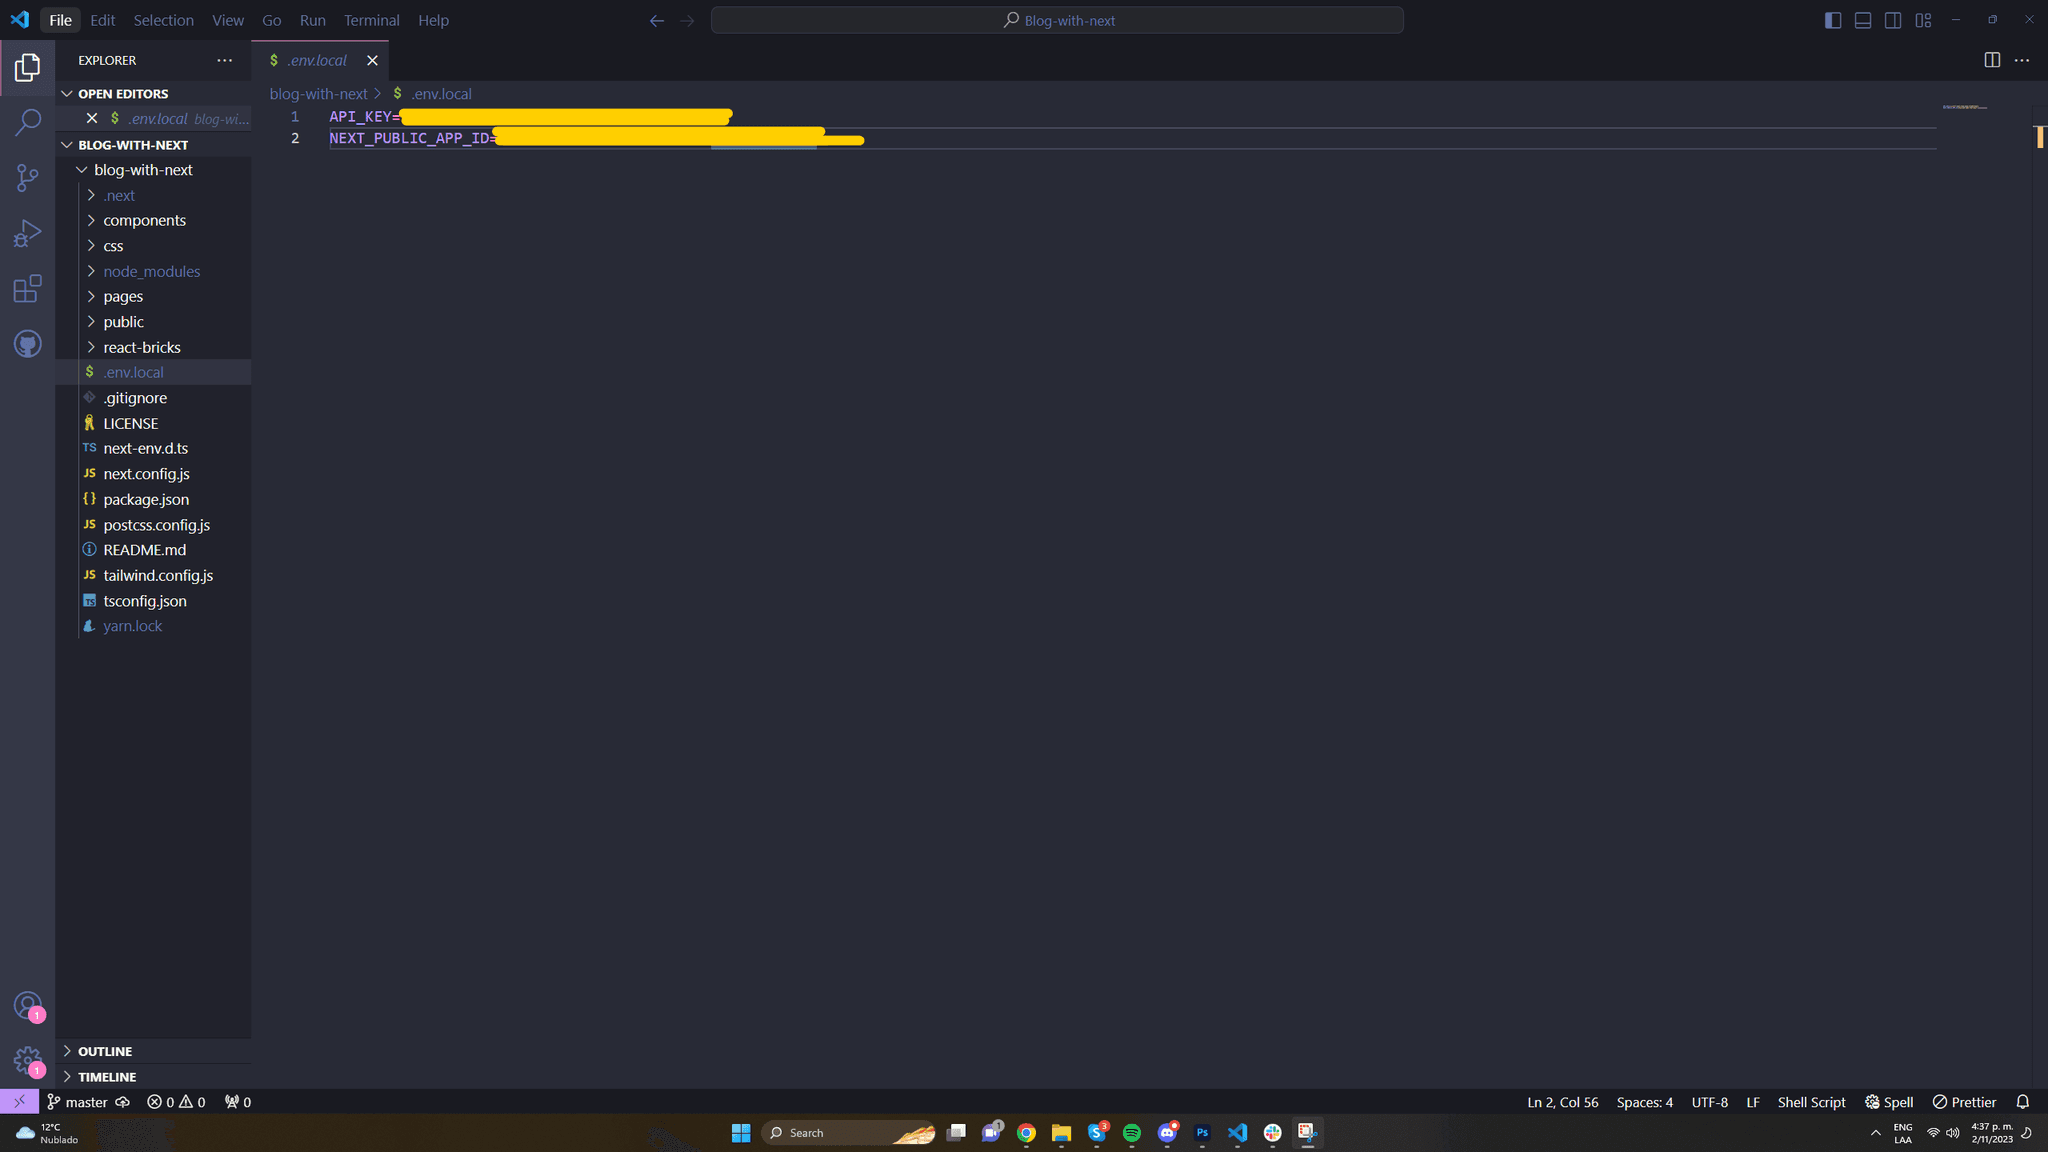
API_KEY, the secret key to access your APIs.NEXT_PUBLIC_APP_ID, a string identifying your app. It is prefixed by "NEXT_PUBLIC" so that it will be accessible by the client (browser) app.
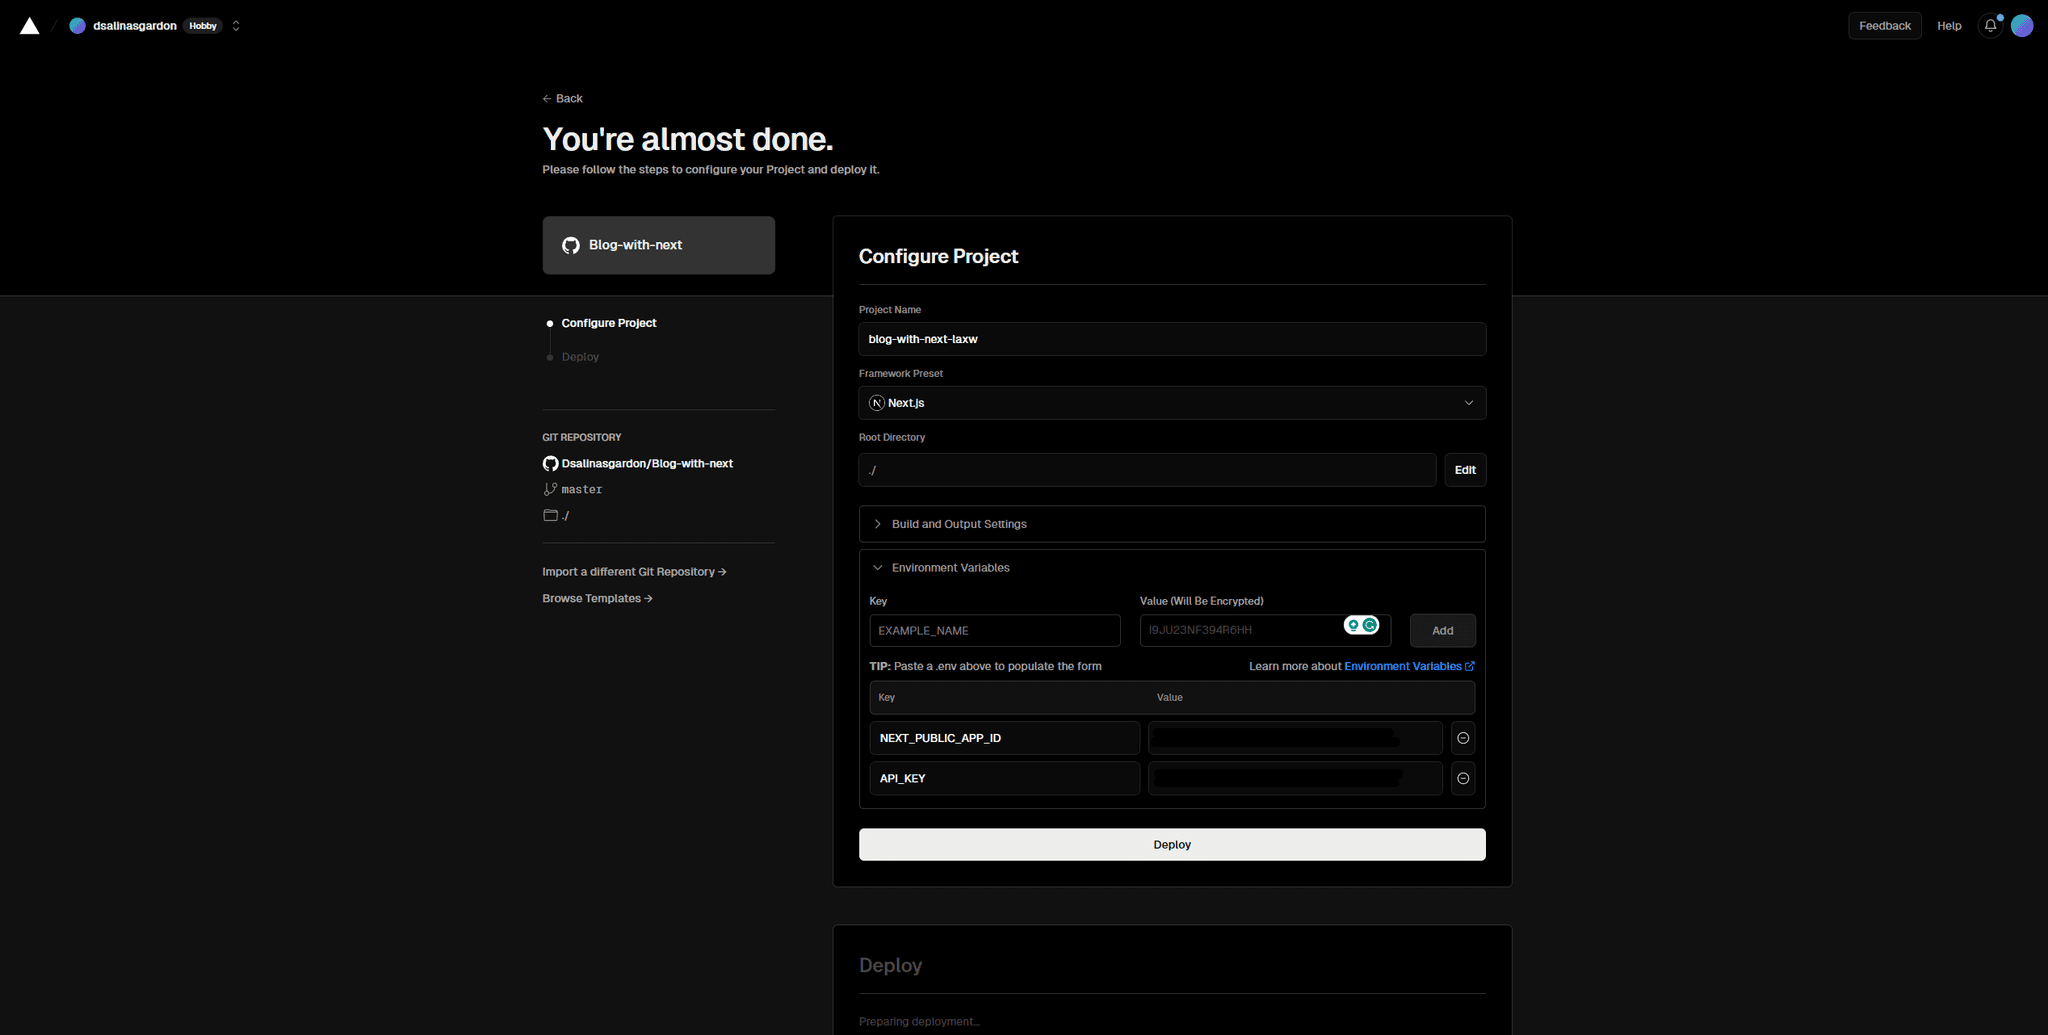
Now click Deploy.
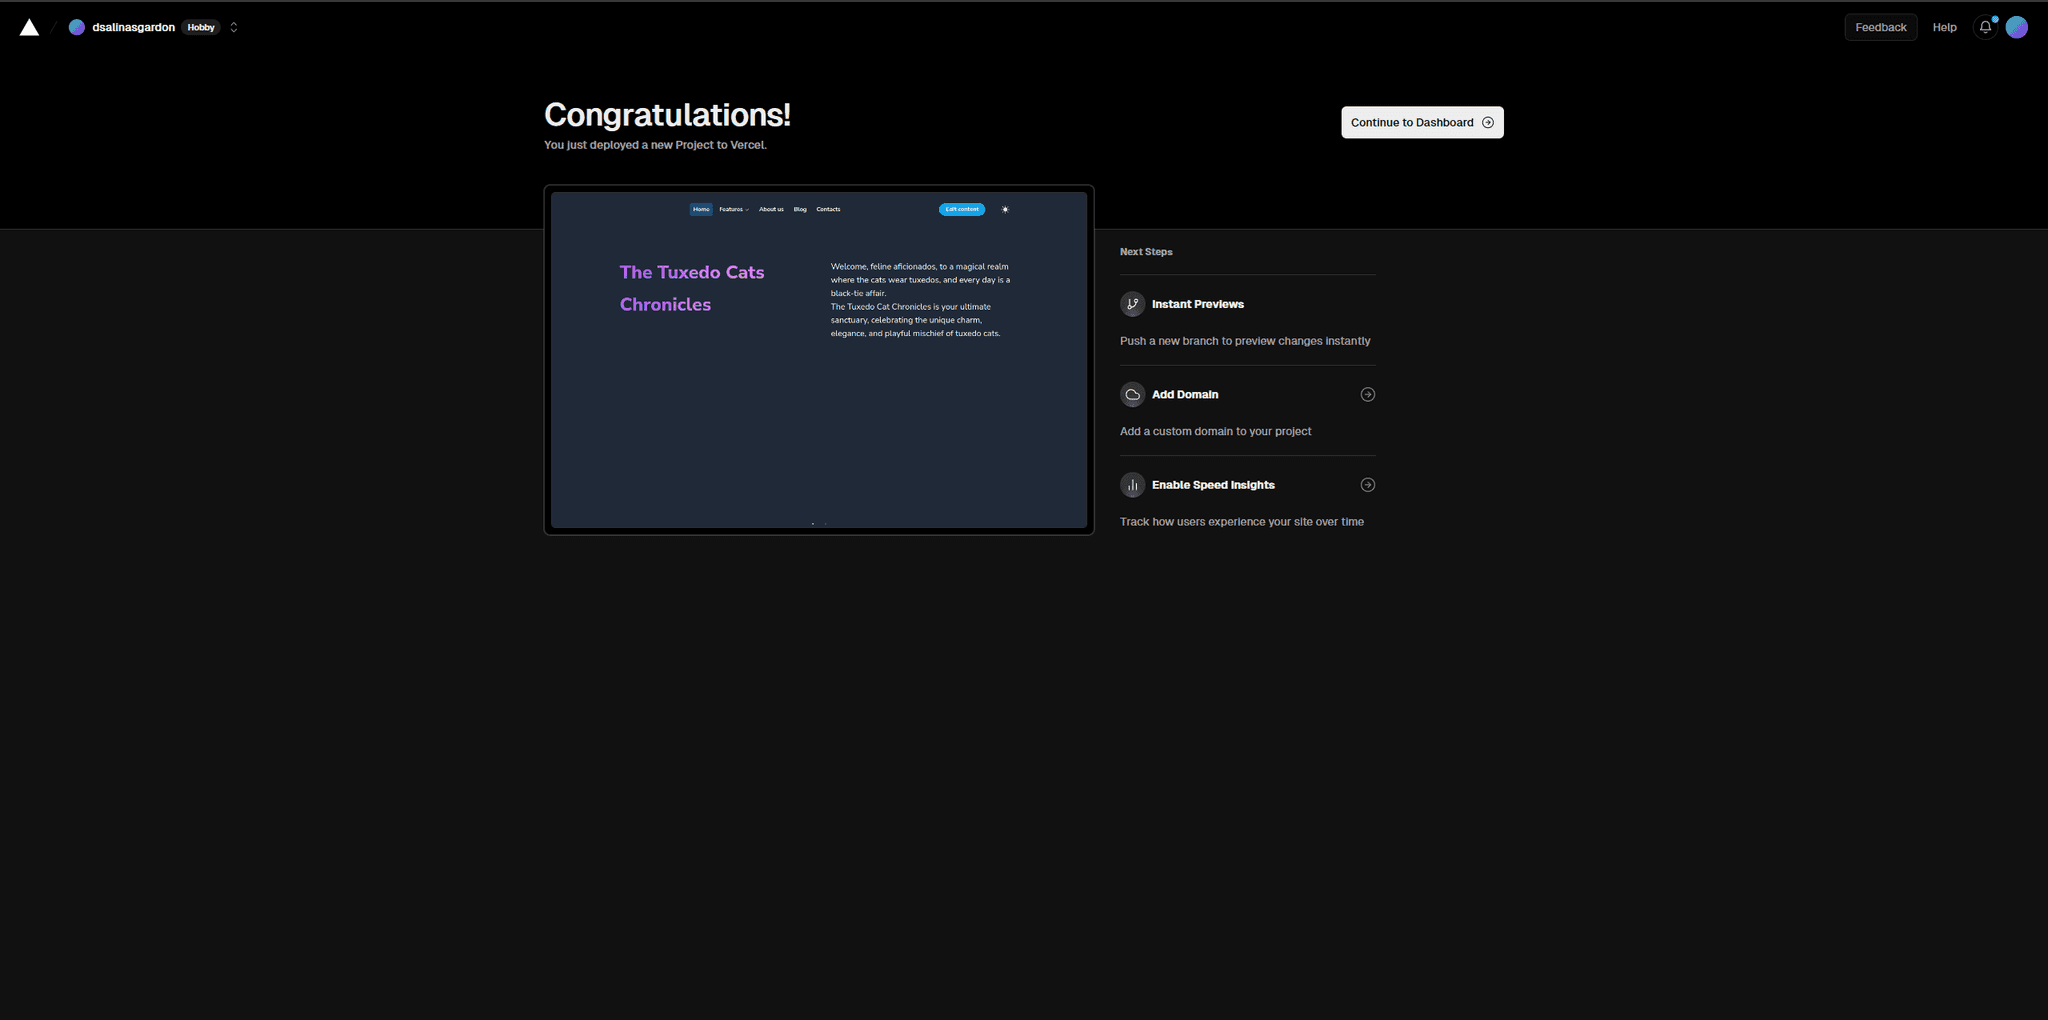
Vercel will fetch the code from the Git repository and will start the build process. As soon as it finishes, you should see something like this:
Setting up a deploy hook
The website will be rebuilt automatically by Vercel each time we push new commits from the git repository, but we want the website to be rebuilt also when you update the content.
To do this, we must create a build hook on Vercel and put it into the React Bricks app settings. In this way, your editors will see a "Deploy now" button in React Bricks to rebuild the website when they update the content.
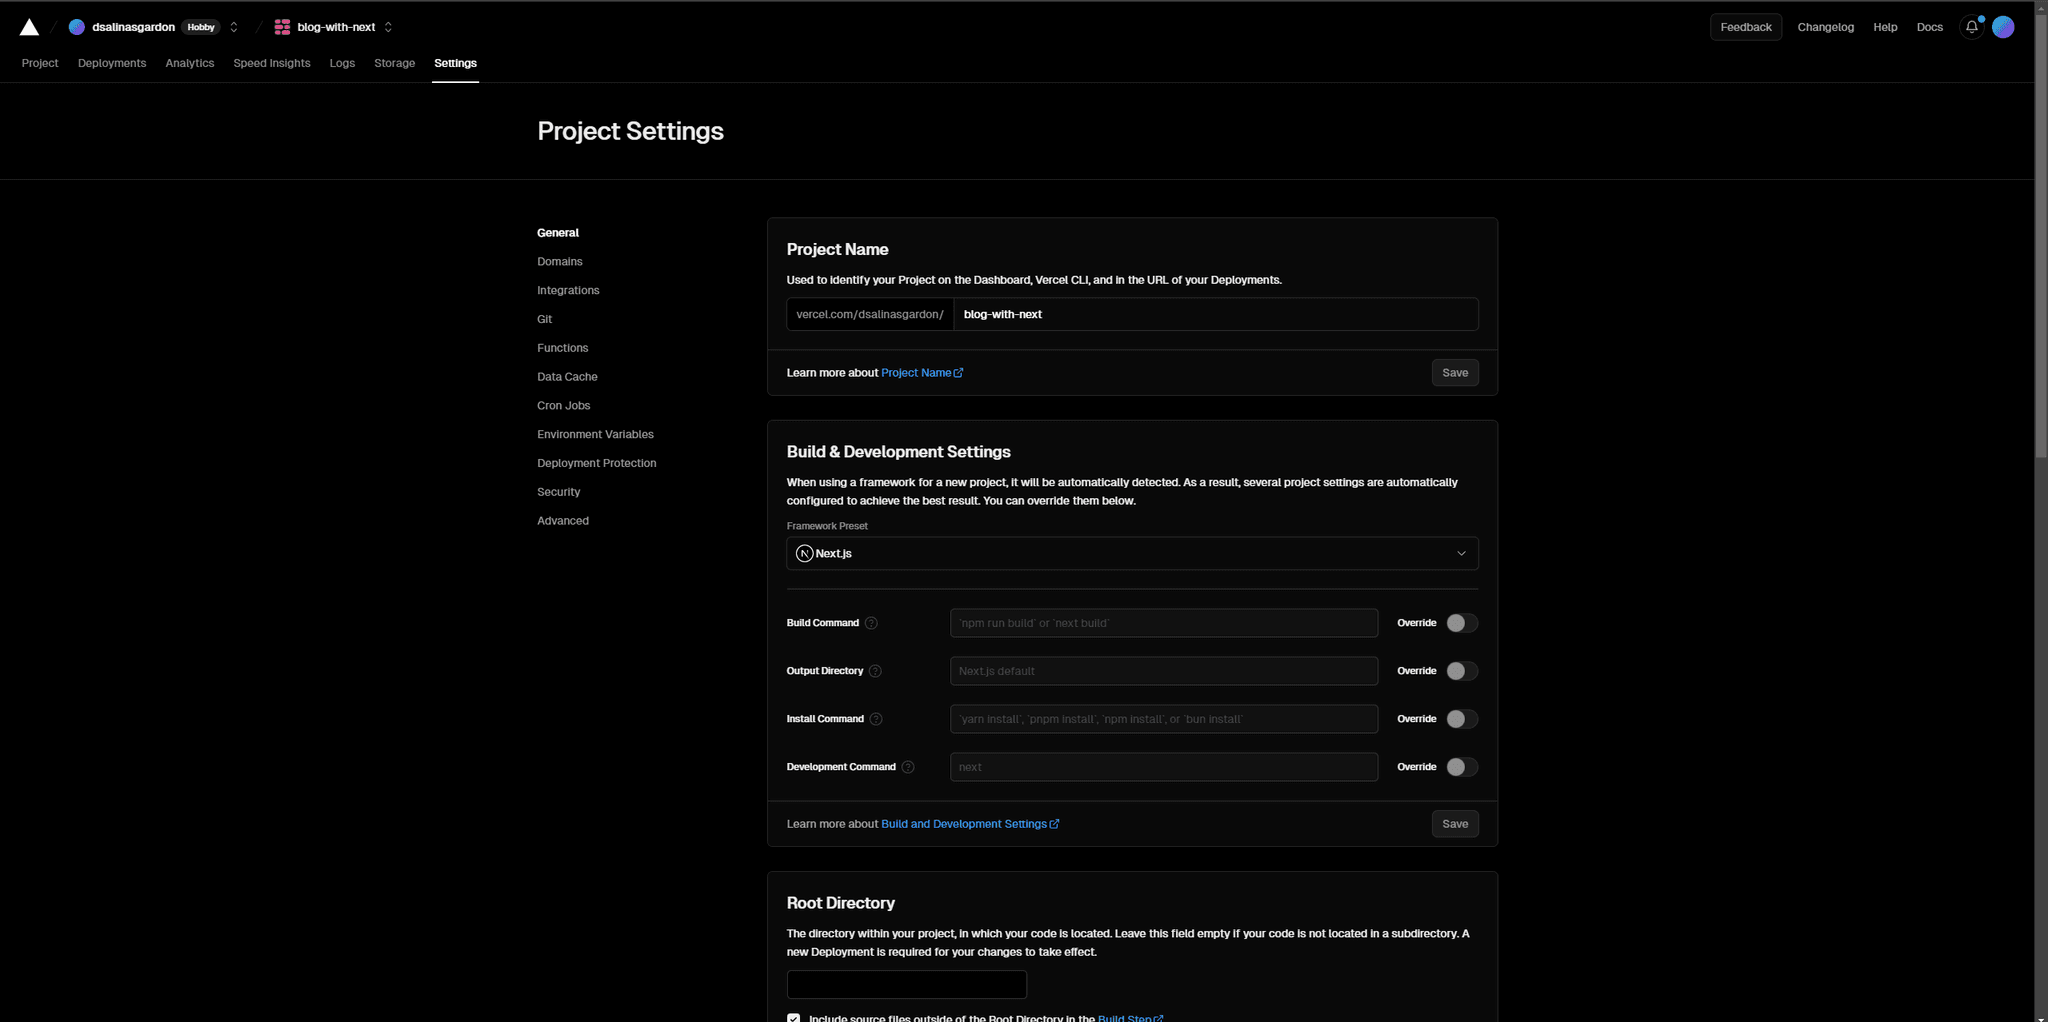
Click the "Continue to dashboard" button to enter the Vercel App dashboard. Click on "Settings" in the upper menu and then on "Git" on the left menu. Scroll down to "Deploy Hooks".
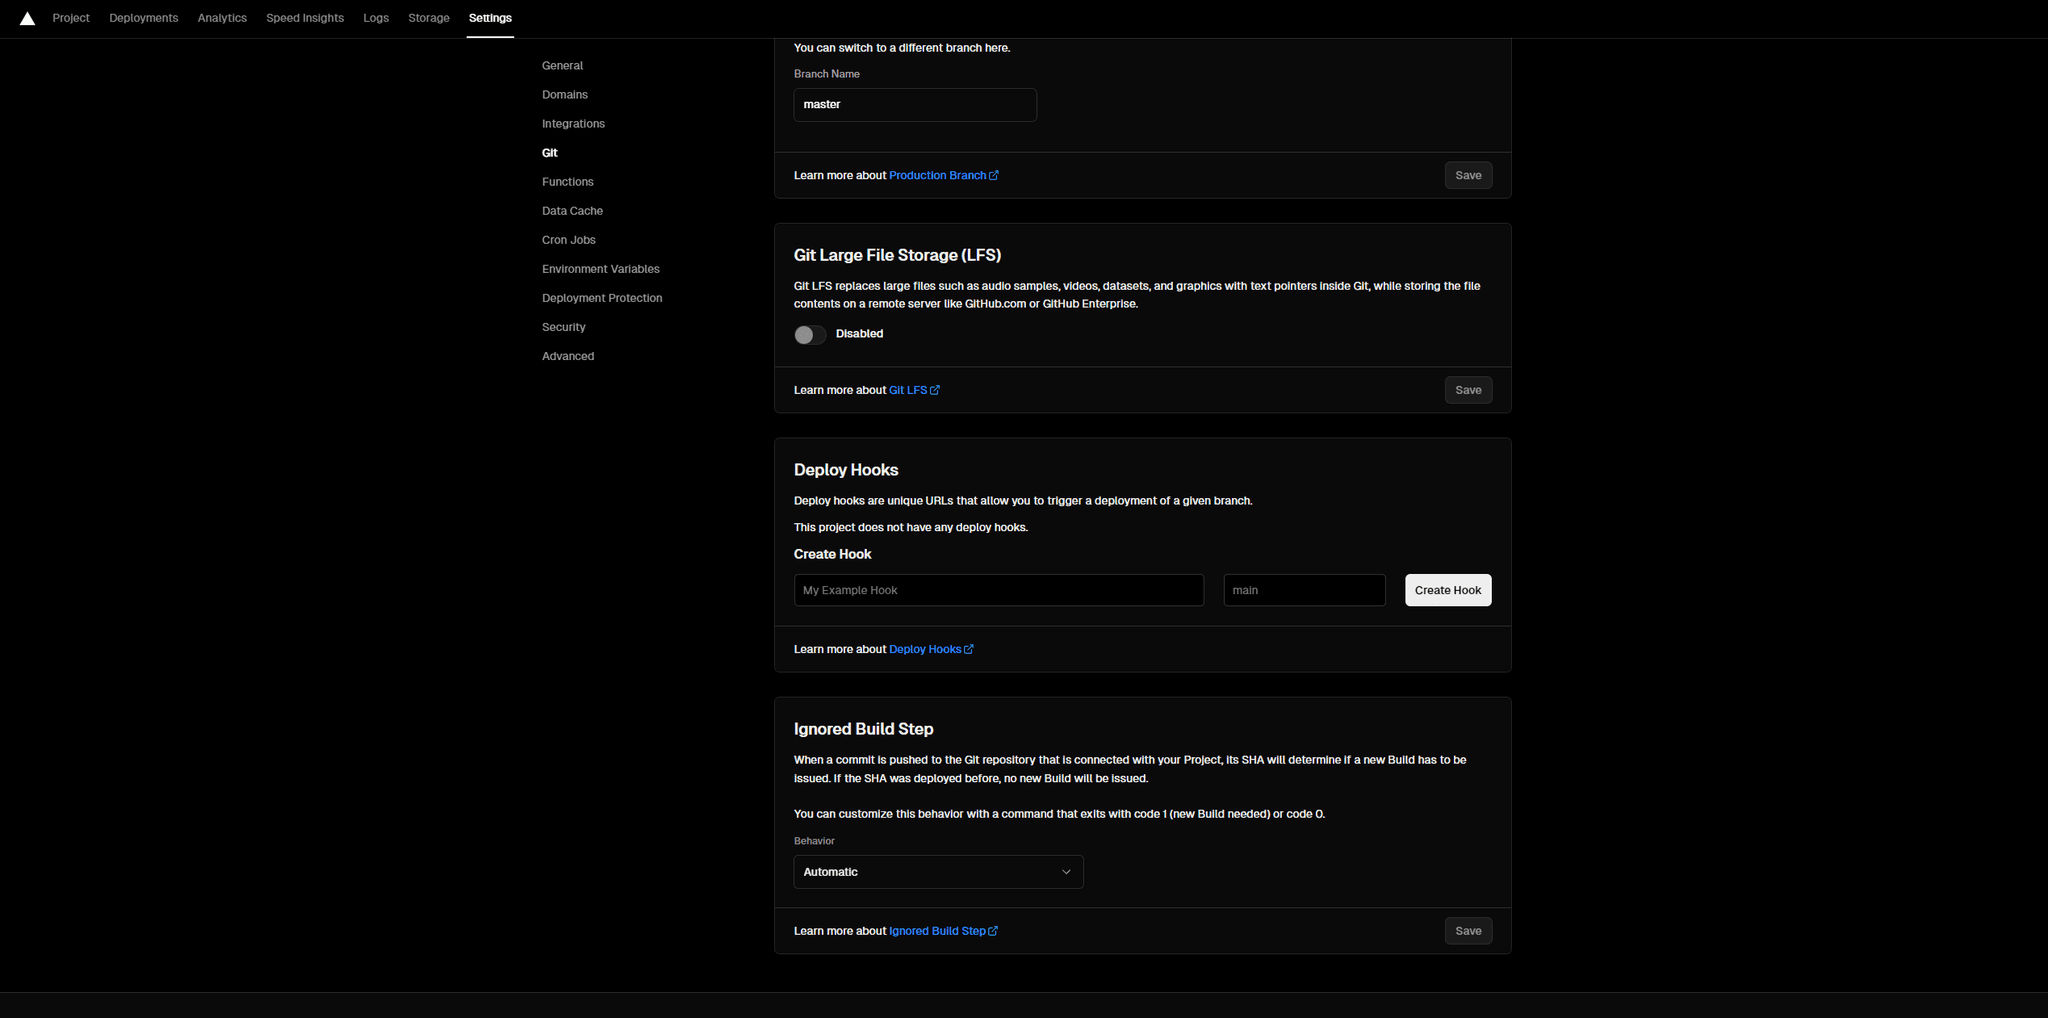
Give a name to your hook. I used react-bricks. Set the branch name to “master” or “main” (based on the name of your branch) and click on "Create hook.” Then, copy the hook URL.
Go to your React Bricks website (either local or the newly published one on Vercel) and click on the "App Settings" tab then on the "Deploy Hooks" button.
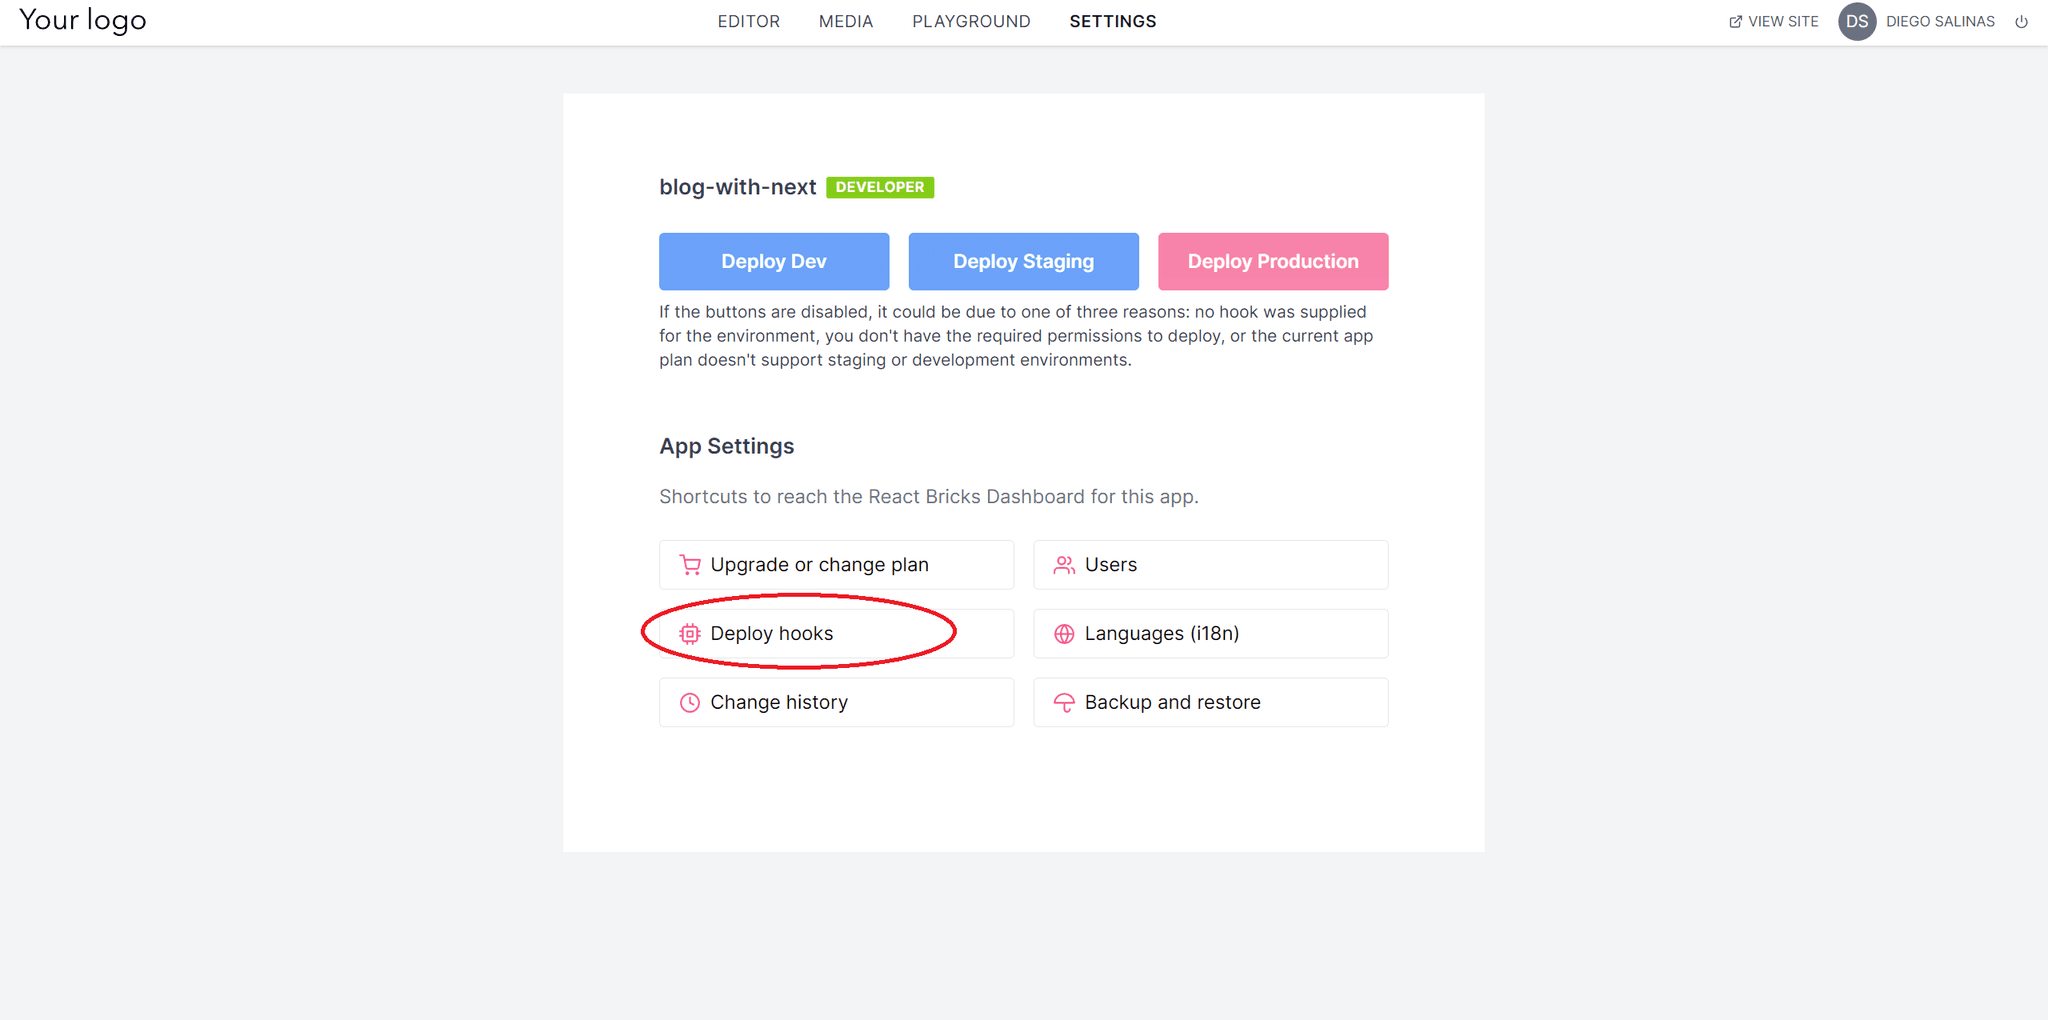
Now paste the hook URL you got from Vercel and select GET on the “Method” section
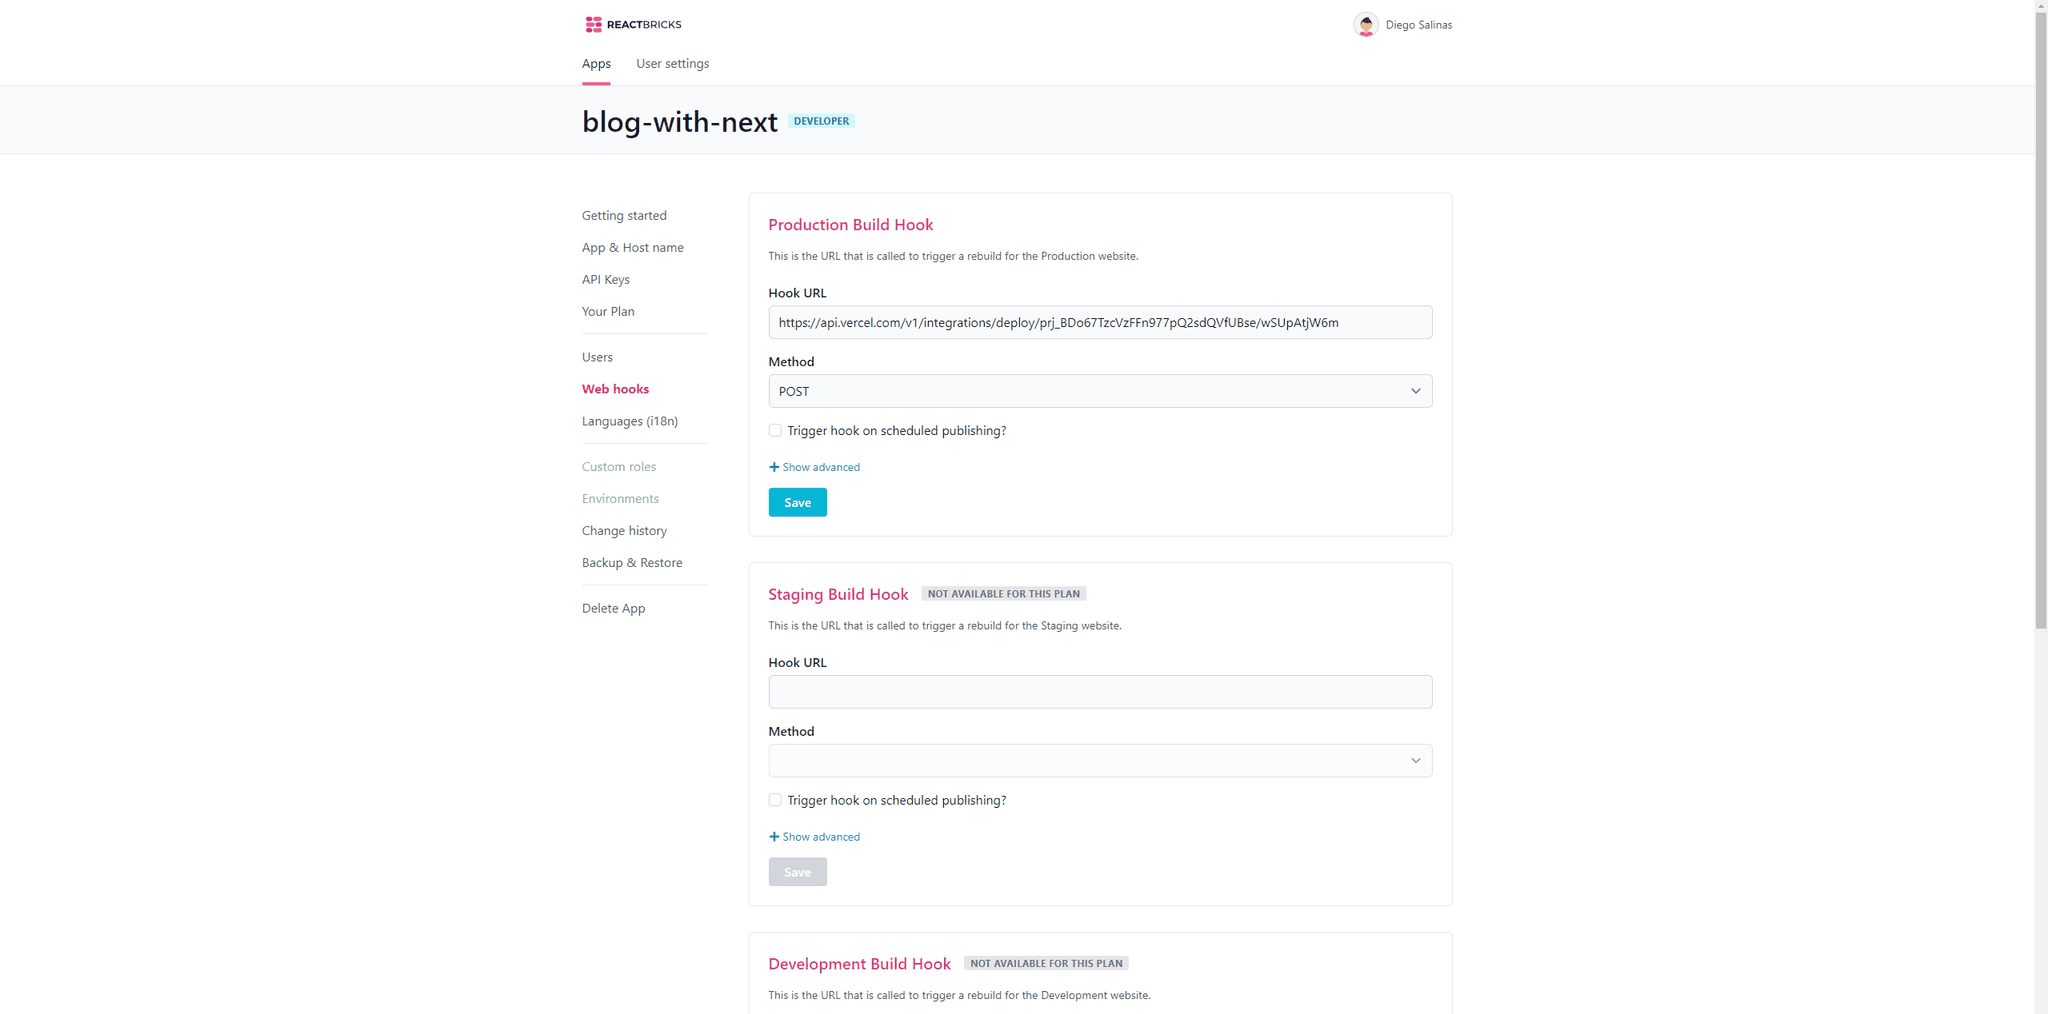
Now you see that the "Deploy to Production" button on the App Settings tab of React Bricks is active. Click it and verify that it triggers a rebuild process on Vercel.
That’s it! You built a website with a blog using React Bricks, Next.js, and Vercel. And all of that with almost no code.
Check the fully functioning website here: https://blog-with-next-two.vercel.app/
If you want to learn how to create your own content blocks, we’ll soon create a Part 2 to do just that. Meanwhile, you can follow our Step-by-step tutorial with Gamification and see our comprehensive Documentation about it.